
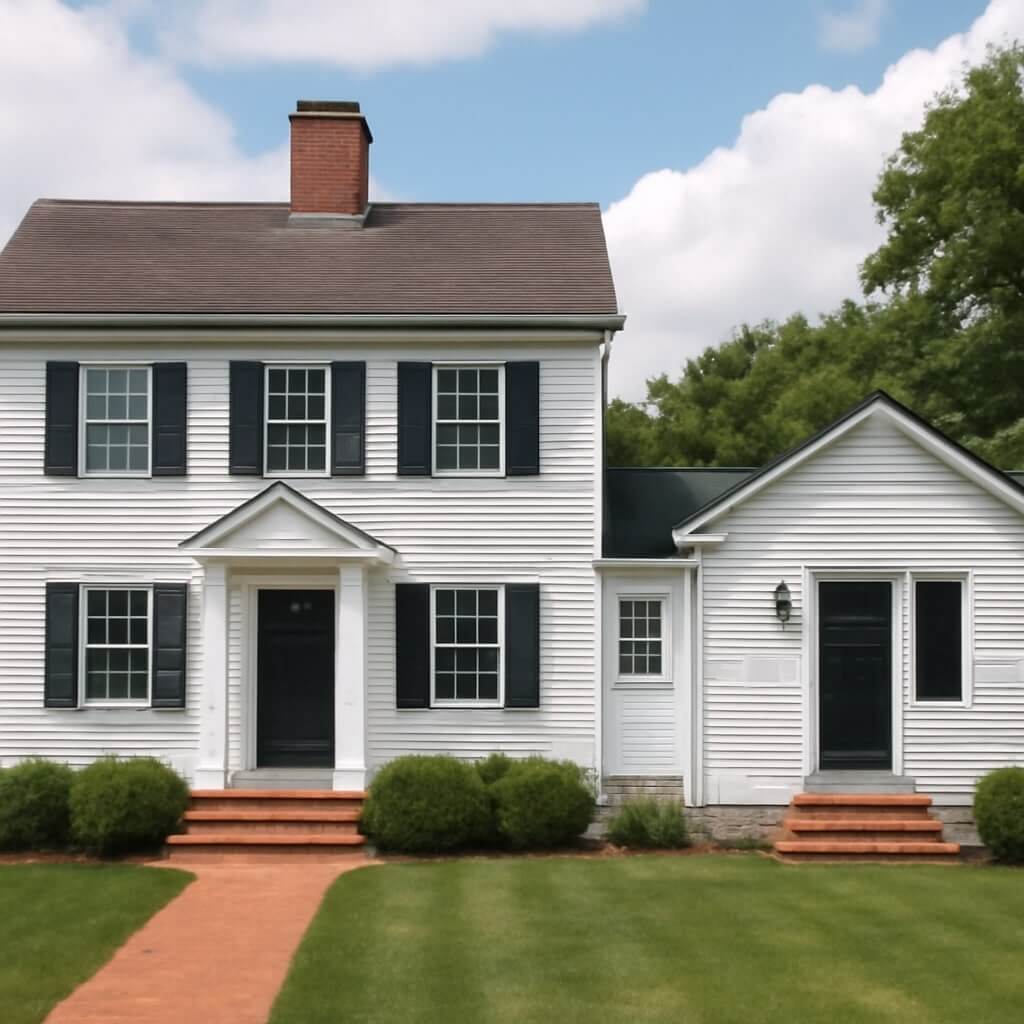
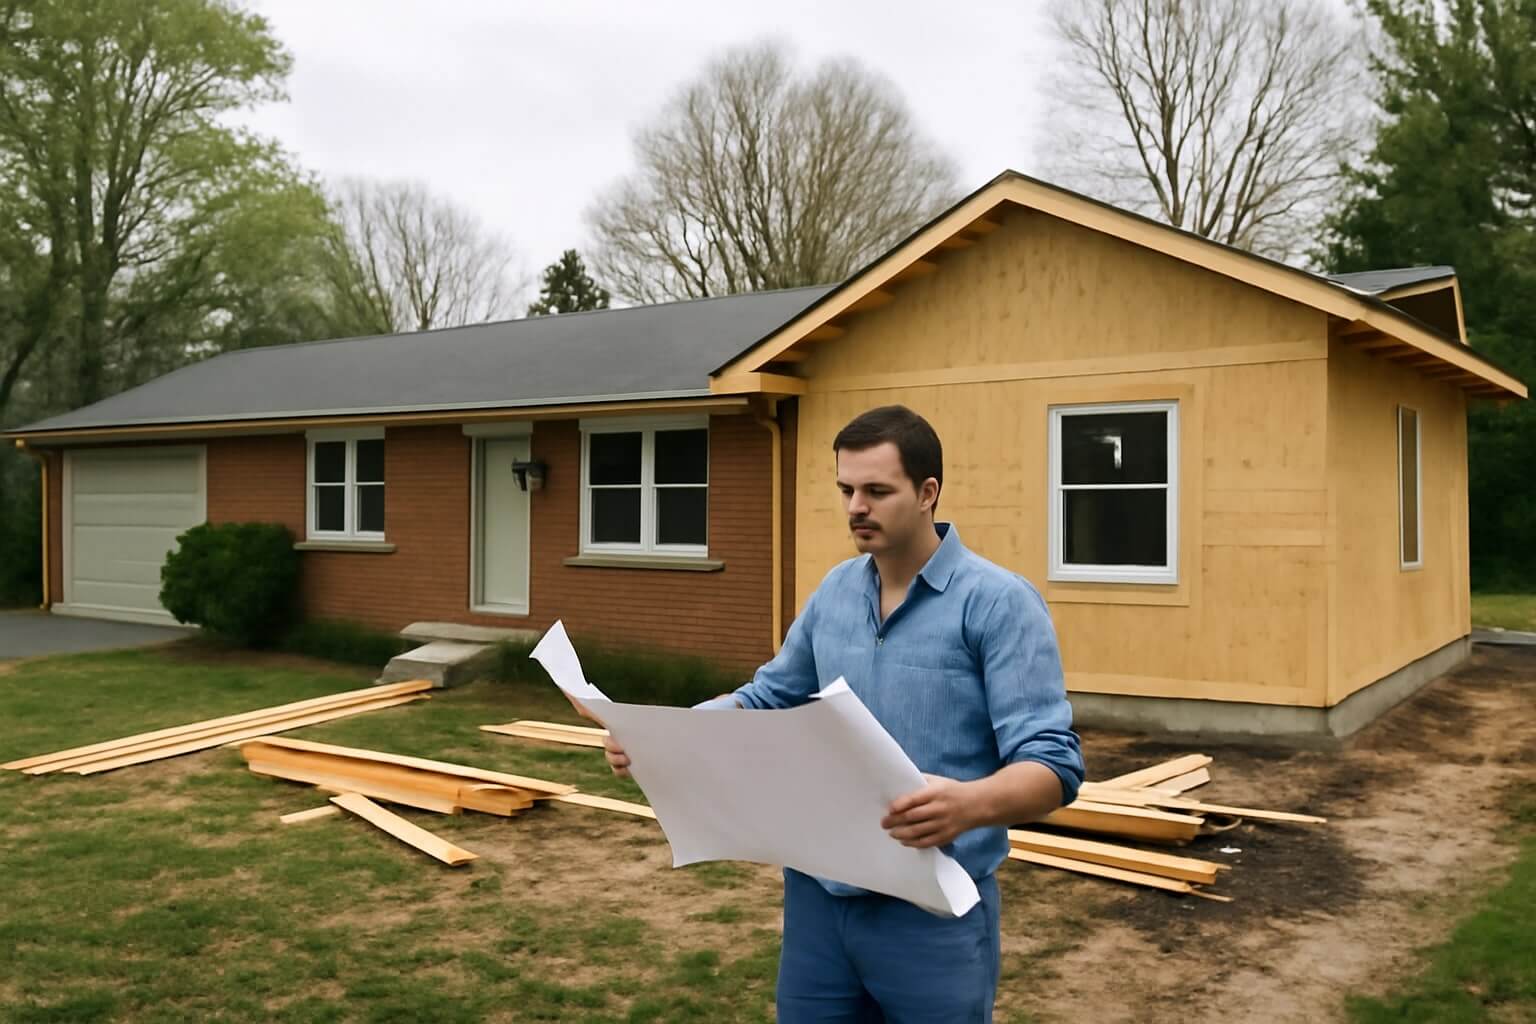
3 Essential Tips for Planning Colonial Home Additions
When planning a Colonial home addition, you’ll want to make certain that the new space complements the existing structure without compromising its character. It’s vital to honor the architectural style, consider scale and proportions, and focus on materials and finishes. Each decision impacts the overall aesthetic and functionality. As you move forward, think about how these elements can enhance your home’s charm while creating inviting spaces. Let’s explore these essential tips further.
Key Takeaways
- Prioritize historical accuracy by using materials and colors that align with the original Colonial architecture.
- Ensure new elements blend seamlessly with existing structures, mirroring details like moldings and rooflines.
- Maintain scale and proportion consistency to create a visually appealing silhouette that complements the main house.
- Use timeless materials and muted color palettes to reinforce the home’s charm while preserving its historical integrity.
- Focus on design continuity by reflecting existing architectural features in the addition for a cohesive aesthetic.
Honor the Architectural Style
When you’re planning an addition to a Colonial home, it’s essential to honor its architectural style, as doing so not only preserves the integrity of the original structure but also enhances its overall charm.
Focus on historical accuracy by choosing materials and colors that reflect the period, ensuring your new elements blend seamlessly.
Maintain design continuity by mirroring existing details like moldings, windows, and rooflines. Incorporate traditional features such as gables, dormers, or symmetrical layouts to reinforce the Colonial aesthetic.
Consider Scale and Proportions
To guarantee your Colonial home addition feels cohesive, it’s essential to take into account scale and proportions carefully. Aim for scale harmony between your existing structure and the new addition; this guarantees that the overall silhouette remains visually appealing.
Pay attention to proportion balance as well; windows, doors, and rooflines should align seamlessly with your home’s original design. Consider the height and width of your addition in relation to the main house, avoiding overly large or small elements that disrupt the flow.
Thoughtful planning in these areas will create a balanced aesthetic, enhancing your home’s charm and integrity.
Focus on Materials and Finishes
Maintaining harmony in scale and proportion sets a solid foundation, but the choice of materials and finishes truly elevates your Colonial home addition.
Opt for timeless materials like brick, wood, and stone that resonate with traditional aesthetics. Pair these with complementary finishes, such as classic shutters and period-appropriate hardware, to enhance authenticity.
Don’t overlook color palettes; muted tones often work best to maintain that historical feel. Pay attention to details like trim work and molding, which can further enrich your design.
Ultimately, the right combination of materials and finishes will guarantee your addition feels both cohesive and inviting.
Conclusion
By honoring the architectural style, considering scale and proportions, and focusing on materials and finishes, you can guarantee your Colonial home addition enhances its charm while preserving its character. Aim for design continuity that reflects the original features, creating a seamless shift between old and new. With these essential tips, you’ll not only maintain the integrity of your home’s aesthetic but also create inviting, functional spaces that your family will cherish for years to come.
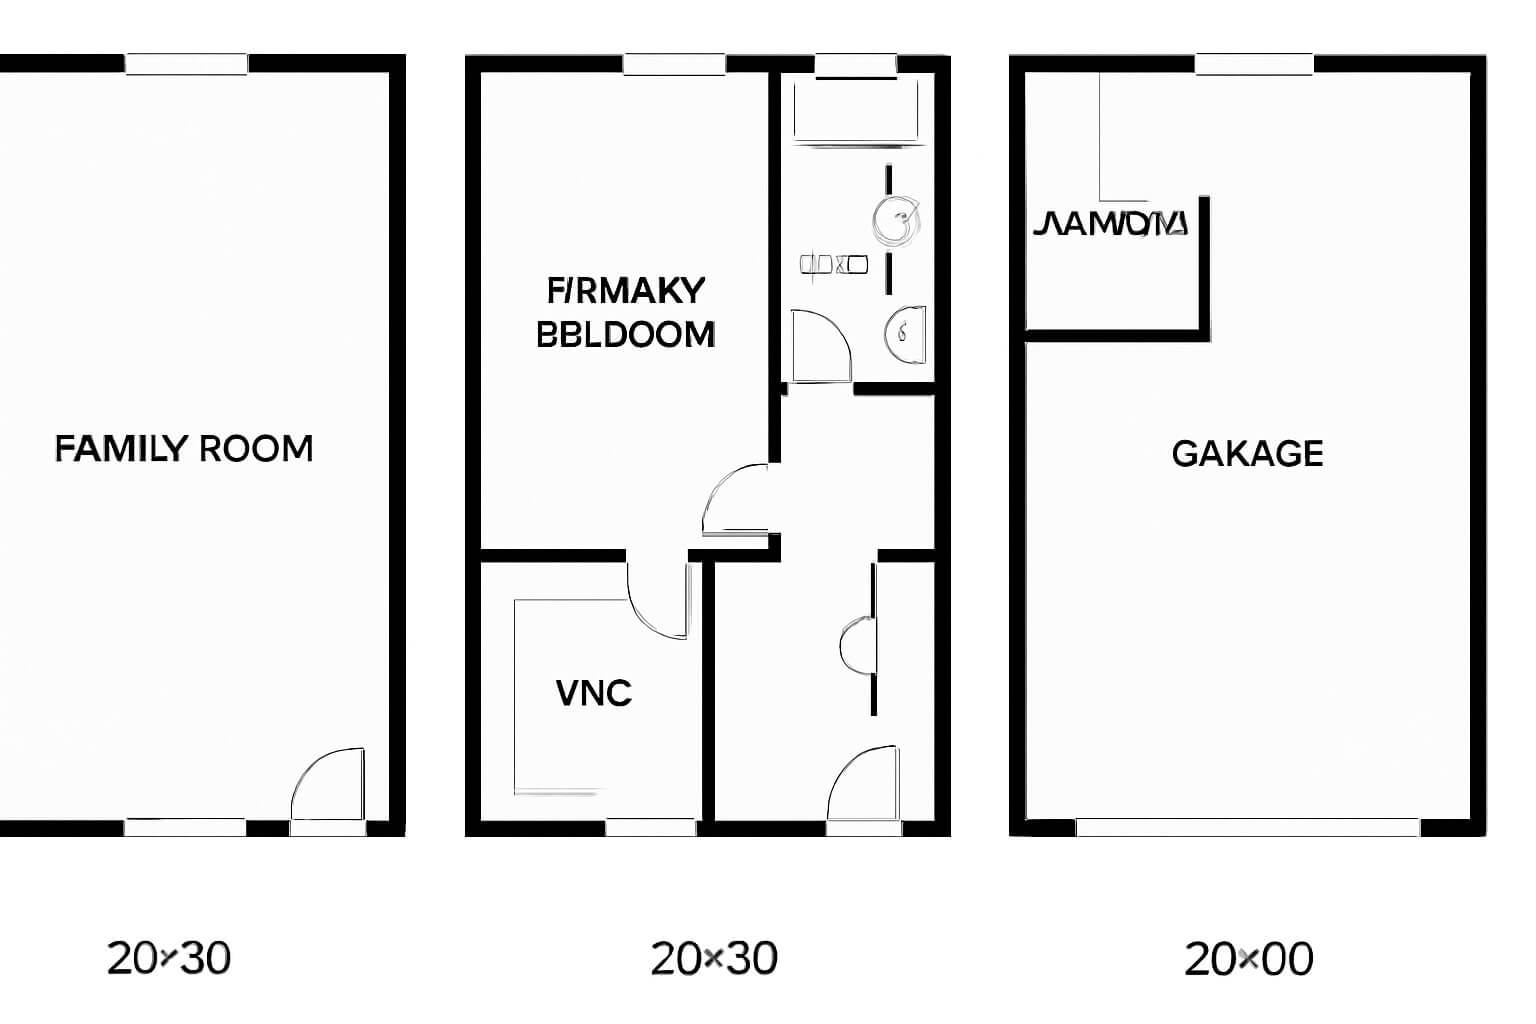
3 Essential 20×30 Home Addition Plans to Consider
When considering a 20×30 home addition, it’s essential to evaluate how each space can enhance your lifestyle. A cozy family room, a functional home office, or a versatile extra bedroom might be just what you need to optimize your home. Each option serves a distinct purpose while ensuring comfort and practicality. Let’s explore these designs further, uncovering how they can seamlessly integrate into your existing layout and elevate your daily experience.
Key Takeaways
- Consider a cozy family room addition to enhance comfort and encourage social interactions with plush seating and warm lighting.
- A functional home office design can boost productivity, featuring an ergonomic workspace and natural lighting from window placement.
- Create a versatile extra bedroom that accommodates guests and serves multiple purposes with modular furniture and efficient storage solutions.
- Focus on maximizing utility in each space while ensuring they remain adaptable for future lifestyle changes and personal preferences.
- Personalize each addition with decor that reflects your style, fostering a sense of belonging and enhancing the overall home experience.
Cozy Family Room Addition
When you envision a cozy family room addition, imagine a space that effortlessly blends comfort with functionality.
You’ll want to choose cozy furniture, like plush sofas and soft armchairs, perfectly arranged to encourage conversation. Incorporate warm lighting through sconces and floor lamps, casting a gentle glow that invites relaxation.
Consider large windows to maximize natural light, enhancing the room’s warmth and openness. Add personal touches, like family photos or a stylish rug, to create a sense of belonging.
With thoughtful design, your family room will become a cherished retreat, ideal for gatherings, movie nights, or quiet evenings spent with loved ones.
Functional Home Office Design
As cozy family rooms create inviting spaces for relaxation, a functional home office design transforms your work environment into a productive haven.
Start by prioritizing an ergonomic workspace, ensuring your desk and chair promote comfort and proper posture.
Position your desk near windows to maximize natural lighting, reducing eye strain and enhancing focus.
Use sound-absorbing materials to minimize distractions and improve acoustics.
Incorporate storage solutions to keep your space organized, allowing you to maintain a clutter-free environment.
Personalize the decor with inspiring art or plants, fostering creativity while you work.
This thoughtful design will empower you to achieve your professional goals efficiently.
Versatile Extra Bedroom Space
Creating a versatile extra bedroom space not only enhances your home’s functionality but also adapts to your changing needs over time.
By designing a room that can serve as a guest bedroom or a multi-purpose space, you maximize utility without sacrificing comfort. Consider incorporating a fold-out sofa bed or modular furniture that allows for easy reconfiguration.
Use storage solutions to keep the area tidy, ensuring you can quickly shift from a cozy retreat for visitors to a functional workspace or play area.
With thoughtful planning, your extra bedroom can evolve with your lifestyle, providing endless possibilities.
Conclusion
Incorporating a cozy family room, a functional home office, or a versatile extra bedroom into your 20×30 home addition can truly transform your space. Each design emphasizes comfort and utility, ensuring your home evolves with your lifestyle. By prioritizing personal touches and thoughtful layouts, you’ll create an environment that not only meets your needs but also enhances daily living. Embrace these ideas to craft a harmonious flow that invites connection, productivity, and flexibility into your home.
3 Key Benefits to Add a Home Addition in Fort Worth
If you’re considering a home addition in Fort Worth, you’re onto something beneficial. Expanding your living space can greatly enhance comfort and functionality for your family. Plus, a well-planned addition can considerably increase your property’s value, making it more attractive to potential buyers. Let’s explore how customization can turn your house into a personalized haven that truly reflects your style and needs. The advantages may surprise you.
Key Takeaways
- Home additions significantly increase your property’s value and appeal to potential buyers in Fort Worth’s competitive market.
- They create tailored spaces that cater to your family’s unique needs and lifestyle preferences.
- Adding extra square footage enhances comfort, improves family dynamics, and fosters togetherness among household members.
- Customization options allow for design flexibility, ensuring your home reflects your personal style and preferences.
- Investing in a home addition offers a strategic advantage, providing a substantial return on investment for homeowners.
Increased Living Space and Comfort
When you decide to add on to your home, you’re not just gaining extra square footage; you’re enhancing your overall quality of life.
An addition can create a space tailored to your family’s needs, allowing for maximized functionality. Imagine a playroom for the kids, a home office, or a cozy reading nook.
These dedicated areas not only improve family dynamics, fostering connection and togetherness, but also provide everyone with personal space to thrive.
Embracing this new environment can lead to happier, more balanced lives, making your home a sanctuary that caters to both comfort and practicality.
Enhanced Property Value
Investing in a home addition not only enhances your living space but also greatly boosts your property’s value.
Enhancing your living space with a home addition significantly increases your property’s value.
When you decide to expand, you tap into the thriving property market and elevate your home’s investment potential.
Consider these benefits:
- Increased resale value: A well-planned addition can yield a significant return on investment.
- Attractiveness to buyers: More space appeals to a wider range of potential buyers, making your home more marketable.
- Competitive advantage: Stand out among similar properties in your neighborhood, enhancing your overall market position.
A home addition is a smart move for both comfort and value!
Customization to Fit Your Needs
Beyond boosting your property’s value, a home addition allows you to customize your space to perfectly fit your lifestyle and needs.
With design flexibility, you can create an area that reflects your personal preferences—be it a spacious kitchen, a serene home office, or a cozy family room.
You have the freedom to choose materials, layouts, and finishes that resonate with your style, ensuring your home truly feels like yours.
This tailored approach not only enhances your comfort but also elevates your daily living experience.
Conclusion
Incorporating a home addition in Fort Worth is more than just a renovation; it’s an investment in your family’s comfort and future. You’ll enjoy increased living space that enhances your daily life, see your property value rise, and have the freedom to customize your home to match your style. Don’t miss out on the opportunity to create a space that truly reflects your needs and aspirations—consider a home addition and transform your living experience today!
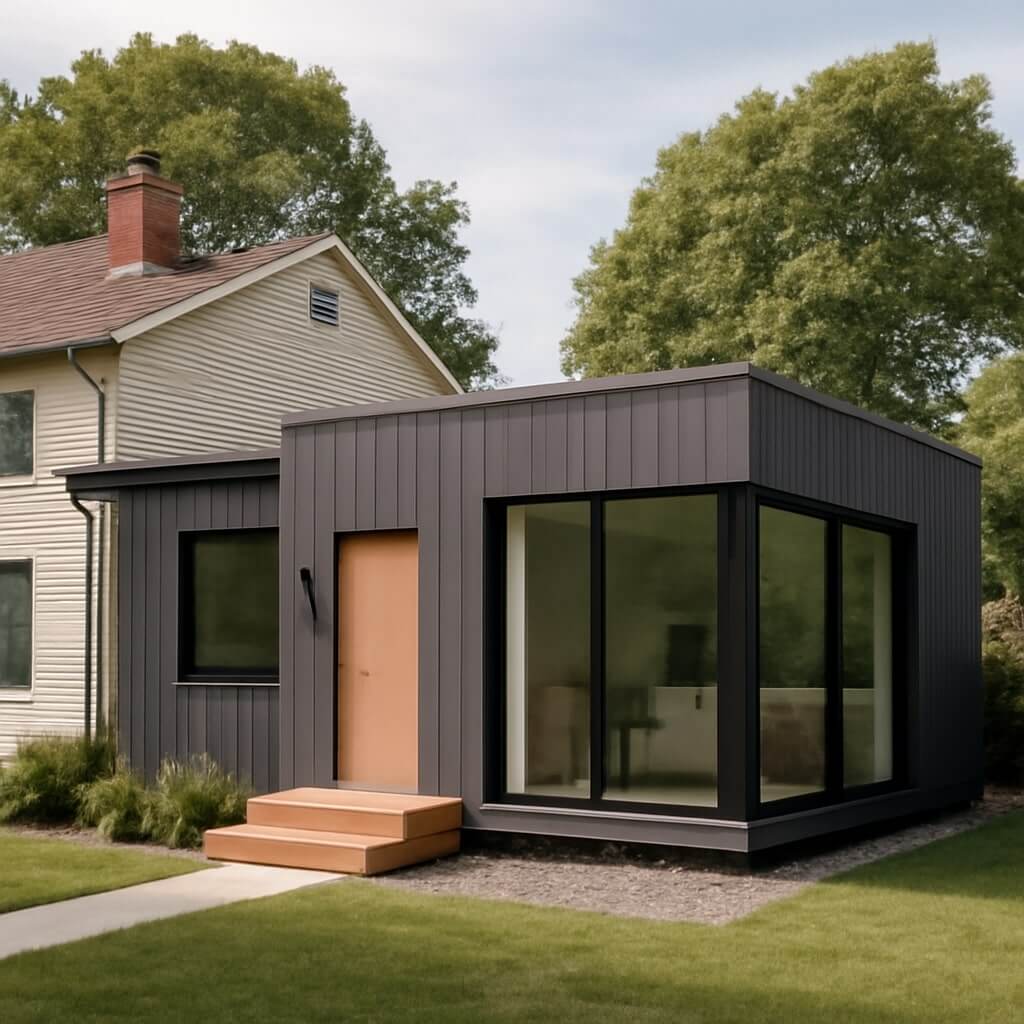
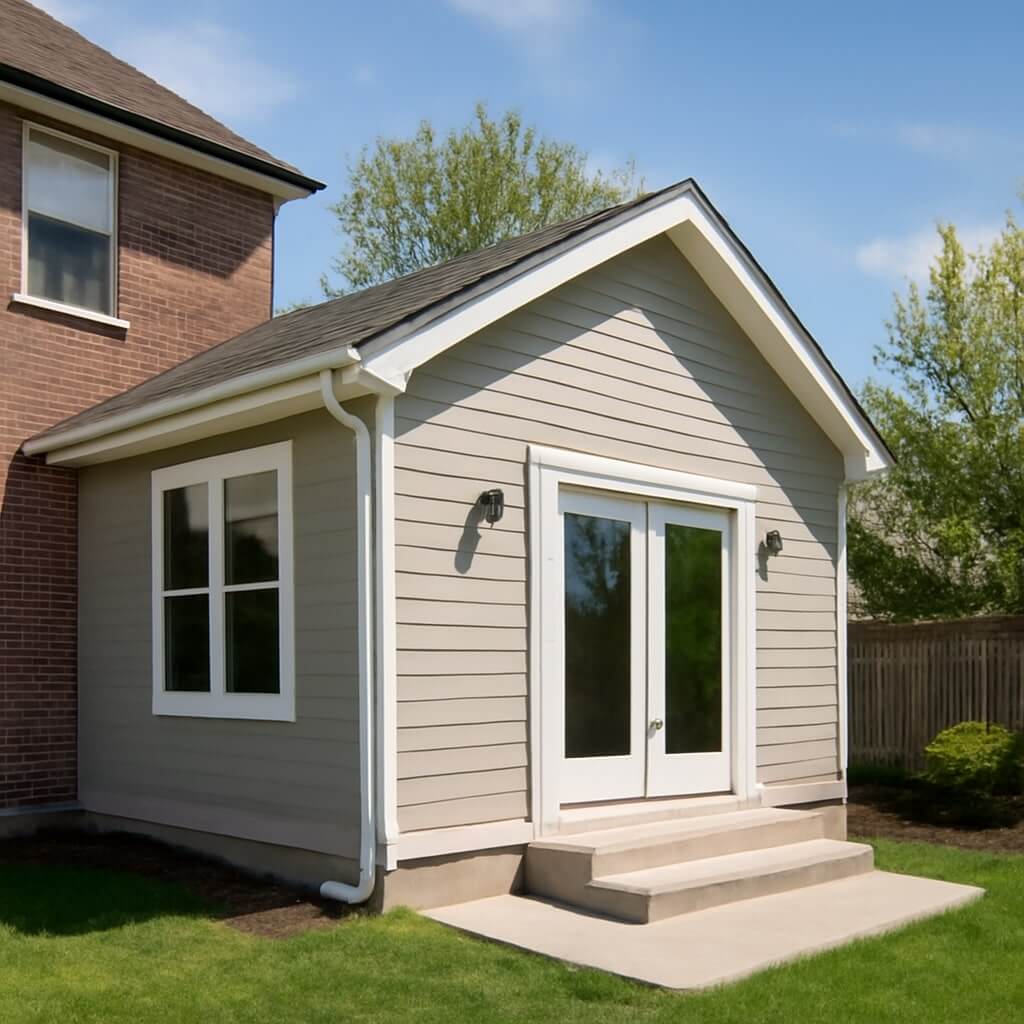
10 Design Ideas for Adding a Modular Addition to Your Existing Home
When you’re considering a modular addition to your home, it’s essential to balance functionality with aesthetics. Thoughtful design can transform your space, making it more versatile and appealing. From creating a cozy home office to establishing a tranquil reading nook, each idea serves a purpose. You might find that the right addition not only enhances your living experience but also integrates seamlessly with your existing structure. What possibilities await you?
Key Takeaways
- Consider a modular guest suite with smart storage solutions to enhance comfort and maximize space utility for visitors.
- Design a multi-functional playroom that adapts to kids’ needs, incorporating interactive learning areas and modular furniture for flexible arrangements.
- Create a cozy sunroom addition with large windows and strategic skylights to maximize natural light and blur indoor-outdoor boundaries.
- Implement a practical mudroom as a modular addition, featuring built-in storage and benches for organization and easy access to outdoor gear.
- Use high-quality materials and personalized design elements in your modular addition to elevate aesthetics and create a luxurious retreat atmosphere.
Create a Cozy Home Office Retreat
When you’re looking to create a cozy home office retreat, consider how the right design elements can transform your workspace into a haven of productivity and comfort.
Start with a color palette that inspires creativity—soft, muted tones can help you focus. Incorporate ergonomic furniture to enhance your posture and reduce fatigue.
Natural light is essential; position your desk near a window to boost your mood. Use plants for a touch of nature, enhancing air quality and aesthetics.
Finally, personalize your space with decor that reflects your personality, drawing from various design inspirations to make the home office uniquely yours.
Design a Multi-Functional Guest Suite
When designing a multi-functional guest suite, think about how to maximize space and utility.
Incorporating smart storage solutions and flexible furniture arrangements can transform the area for various uses, whether it’s hosting guests or serving as a private retreat.
Additionally, providing private outdoor access enhances the overall experience, allowing guests to enjoy the outdoors while maintaining their privacy.
Incorporate Smart Storage Solutions
While you may envision a guest suite as simply a place for visitors to rest, incorporating smart storage solutions transforms it into a multi-functional space that maximizes utility and comfort.
Consider these innovative ideas:
- Hidden compartments in furniture can store extra linens or personal items, keeping the room tidy.
- Vertical shelving utilizes wall space for books, decor, or essentials, adding character without crowding.
- A fold-out desk can serve as a workspace when needed, enhancing functionality.
Flexible Furniture Arrangements
To maximize the utility of a guest suite, you’ll want to embrace flexible furniture arrangements that adapt to various needs and occasions.
Consider using modular pieces that can be easily rearranged. A fold-out sofa bed can serve as seating during the day and a cozy sleeping option at night, creating adaptable spaces.
Incorporating movable tables allows for flexible layouts, accommodating different gatherings or activities.
Additionally, using lightweight furniture guarantees easy movement, letting you transform the area as needed.
This approach not only enhances functionality but also guarantees your guest suite feels inviting and personalized, regardless of who’s visiting.
Private Outdoor Access
Creating a guest suite with private outdoor access not only enhances the overall experience for your visitors but also elevates the functionality of the space.
Imagine a seamless flow between indoor comfort and outdoor tranquility, where guests can unwind in a private garden. Incorporating outdoor seating allows for leisurely mornings or evening gatherings.
- Design a pathway leading directly to the garden for easy access.
- Use sliding glass doors to invite natural light and views.
- Ascertain that the seating area is sheltered for year-round enjoyment.
This thoughtful design not only welcomes guests but also promotes privacy and relaxation.
Incorporate a Bright Sunroom
Incorporating a bright sunroom into your modular home can transform your living space by maximizing natural light and creating a welcoming atmosphere.
By choosing comfortable furnishings that invite relaxation, you can make this area a perfect retreat.
Additionally, integrating indoor-outdoor flow enhances the overall aesthetic and functionality, seamlessly connecting your home with nature.
Maximize Natural Light
While many homeowners seek to expand their living space, adding a bright sunroom not only enhances your home’s aesthetic but also maximizes natural light, creating a warm and inviting atmosphere.
To achieve this, consider strategic skylight installation and thoughtful window placement.
- Maximize southern exposure for ideal sunlight.
- Use energy-efficient glass to reduce heat loss.
- Incorporate large openings to blur indoor-outdoor boundaries.
Choose Comfortable Furnishings
A bright sunroom not only invites natural light but also serves as a perfect canvas for selecting furnishings that enhance comfort and style.
To achieve this, explore various furniture styles that resonate with your aesthetic while prioritizing comfort materials. Think plush sofas upholstered in soft fabrics that cradle you as you relax.
Incorporate lightweight chairs that are easy to rearrange, allowing for flexible layouts. Add layered textiles, like cozy throws and textured cushions, to create an inviting atmosphere.
Integrate Indoor-Outdoor Flow
Creating a seamless indoor-outdoor flow can greatly enhance the functionality and appeal of your modular home, especially when you incorporate a bright sunroom. This space not only invites natural light but also connects your living area to the outdoors.
By using sliding doors, you can effortlessly shift between spaces, making entertaining and relaxation more enjoyable.
- Choose vibrant indoor plants to create a lush atmosphere.
- Use large windows to maximize views and sunlight.
- Opt for durable, weather-resistant materials for flooring.
These elements will guarantee your sunroom becomes a favorite spot, blurring the line between inside and outside living.
Build a Spacious Playroom for Kids
Transforming a corner of your home into a spacious playroom for kids can greatly enhance their creative play and development. By designing dedicated creative play zones, you encourage imaginative exploration and social interaction.
Incorporate interactive learning areas that stimulate curiosity and cognitive growth. Consider using modular furniture that adapts to their evolving needs, allowing for flexible arrangements. Large windows can provide natural light, creating an inviting atmosphere.
Include storage solutions to keep toys organized and accessible. With thoughtful planning, your playroom can become a vibrant hub, fostering creativity and learning while seamlessly integrating into your home’s existing structure.
Add an Open Concept Kitchen Extension
Enhancing your home with an open concept kitchen extension not only boosts functionality but also fosters a sense of community among family and friends.
By reimagining your kitchen layout, you can seamlessly integrate modern appliances into a space that encourages interaction and collaboration.
- Create a versatile island for meal prep and casual dining.
- Use large windows to invite natural light and connect with outdoor spaces.
- Incorporate smart storage solutions to keep your kitchen organized and clutter-free.
This modern approach transforms your kitchen into the heart of your home, where memories are made and shared effortlessly.
Transform Into a Luxurious Master Suite
A luxurious master suite can elevate your home’s comfort and style, offering a personal retreat that blends relaxation with sophistication.
Elevate your home with a master suite that combines relaxation and sophistication for the ultimate personal retreat.
To achieve this, consider incorporating luxury amenities such as a spa-like bathroom, complete with a soaking tub and rainfall shower.
Opt for personalized design elements, like custom cabinetry and elegant lighting fixtures, to reflect your individual taste.
Use high-quality materials, such as natural stone and hardwood, to enhance the overall aesthetic.
Establish a Tranquil Reading Nook
Creating a tranquil reading nook in your modular home starts with selecting cozy furniture that invites relaxation.
Consider incorporating natural light sources, like large windows or skylights, to enhance the space’s ambiance and foster a serene environment.
Cozy Furniture Selection
Finding the right furniture can transform your modular home addition into a serene reading nook.
By carefully selecting pieces that embrace comfort and style, you create an inviting atmosphere. Incorporate cozy textiles like soft throws and plush cushions, which enhance the tactile experience.
Pair these with warm lighting options, such as table lamps or wall sconces, to set a calming mood.
- A spacious armchair for lounging
- A stylish side table for books and beverages
- A storage ottoman to keep your space tidy
These elements will guarantee your nook is perfect for unwinding with a good book.
Natural Light Sources
While you may focus on furniture and decor, the presence of natural light is essential in establishing a tranquil reading nook.
Consider strategic window placement to maximize sunlight exposure, creating a warm and inviting atmosphere. Large windows can frame picturesque views, while smaller ones can be arranged to guarantee light fills every corner.
Additionally, a skylight installation can greatly enhance the space, allowing sunlight to pour in from above. This not only brightens the nook but also fosters a sense of openness.
Together, these elements will transform your reading nook into a serene retreat, perfect for escaping into a good book.
Create a Functional Mudroom
A well-designed mudroom serves as the essential passage space between the outdoors and your home, helping to keep dirt and clutter at bay.
To achieve effective mudroom organization, consider integrating functional elements that enhance your entryway style.
- Built-in storage: Incorporate benches and cabinets for shoes and bags.
- Hooks and racks: Install these for coats and accessories, promoting easy access.
- Durable flooring: Choose materials that withstand wear and tear while being easy to clean.
Design an Outdoor Living Space
Creating an inviting outdoor living space can transform your home’s exterior into a functional extension of your indoor environment.
Consider integrating an outdoor kitchen, complete with a grill, sink, and countertop, to enhance your culinary experiences while enjoying nature.
Pair this with a cozy garden lounge, featuring comfortable seating and ambient lighting, to create a relaxing retreat for social gatherings or quiet evenings.
Incorporate natural elements like plants and stone pathways to seamlessly blend the space with your landscape.
Implement Smart Storage Solutions
Smart storage solutions can greatly enhance the functionality of your modular home addition, making the most of every square foot. By integrating smart designs, you can optimize space while keeping your environment organized.
Consider incorporating:
- Hidden compartments in furniture to store items discreetly
- Vertical storage options like tall shelves to utilize wall space efficiently
- Multi-functional furniture that serves as both seating and storage
These strategies not only declutter your space but also create a seamless look.
Embracing these innovative storage ideas guarantees your addition remains both stylish and practical, accommodating your lifestyle needs without sacrificing aesthetics.
Conclusion
Incorporating these ten design ideas for your modular addition not only enhances your home’s functionality but also elevates its aesthetic appeal. By focusing on innovative layouts, multi-functional spaces, and sustainable materials, you create an environment that reflects your personal style while promoting comfort and efficiency. Whether you’re crafting a cozy office or a vibrant playroom, each element plays a significant role in transforming your home into a more inviting and practical space that meets your evolving needs.

How to Expand Your Mobile Home With an Addition?
Expanding your mobile home can greatly enhance your living space and comfort. Start by evaluating your needs—what rooms or features will make your daily life better? Once you’ve got a clear vision, you’ll need to navigate zoning regulations to avoid legal issues. The design stage is where creativity meets practicality, but budgeting effectively is just as important. Are you ready to explore these steps and set your project in motion?
Key Takeaways
- Assess your space requirements and lifestyle changes to identify essential room needs for your mobile home addition.
- Research local zoning regulations to ensure compliance with land use and setback requirements for your expansion.
- Design the addition to harmonize with the existing layout, utilizing multi-functional furniture and optimizing vertical space.
- Create a realistic budget by researching material and labor costs, prioritizing key features, and setting aside a contingency fund.
- Decide whether to hire contractors or undertake a DIY project, weighing costs, skills, and time investment involved.
Assessing Your Needs and Goals
How do you envision your mobile home expanding? Start by evaluating your space requirements and lifestyle changes.
Are you welcoming a new family member, or do you require a dedicated workspace? Consider how much additional room you truly need.
Create a list of priorities: a larger kitchen, an extra bedroom, or maybe even a cozy den.
Think about how these changes will enhance your daily life and accommodate future needs.
By clearly defining your goals, you’ll make informed decisions that optimize your living environment.
Plan wisely, and your mobile home can grow to fit your evolving lifestyle seamlessly.
Understanding Zoning Regulations
Before you expand your mobile home, it’s essential to understand local zoning laws that can affect your plans.
You’ll need to navigate permitting requirements and be aware of setback regulations to guarantee your project stays compliant.
Local Zoning Laws
Understanding local zoning laws is essential when you’re planning to expand your mobile home, as these regulations can dictate what modifications are permissible in your area.
You’ll want to take into account the following:
- Zoning Classification: Identify your property’s zoning type for land use requirements.
- Setback Requirements: Verify your addition meets local setback regulations.
- Zoning Variances: If needed, apply for zoning variances to allow specific modifications.
- Permitted Uses: Check what types of additions are allowed under your zoning designation.
Being informed about these aspects will help you navigate the process smoothly and avoid potential legal issues.
Permitting Requirements Explained
Steering through the permitting process for your mobile home expansion can feel overwhelming, but getting it right is essential for a successful project.
Start by checking your local zoning regulations, as they dictate what’s permissible. You’ll need to complete an application, which typically includes detailed plans and specifications.
Keep in mind that the application timeline can vary considerably; it might take weeks or even months for approval. Be proactive in following up with the local authorities to guarantee everything’s on track.
Setback Regulations Overview
When planning your mobile home expansion, you’ll need to pay close attention to setback regulations, as they dictate how far structures must be from property lines. Ignoring these setback requirements can lead to fines or forced removals of your addition.
Here’s what to take into account:
- Local Zoning Codes: Check your municipality’s guidelines.
- Distance from Property Lines: Know the minimum required distances.
- Neighboring Structures: Verify your addition doesn’t encroach on their space.
- Future Developments: Anticipate any changes in zoning that may affect your plans.
Understanding these factors will help you navigate the expansion process smoothly.
Designing Your Addition
As you commence on the journey of designing your mobile home addition, consider how the new space will harmonize with your existing layout and lifestyle. Focus on popular design styles that complement your home while maximizing space optimization. Here’s a quick overview:
| Design Style | Key Features | Space Optimization Tips |
|---|---|---|
| Modern | Clean lines, minimalism | Use multi-functional furniture |
| Rustic | Natural materials, warmth | Incorporate built-ins |
| Contemporary | Sleek, current trends | Use vertical space wisely |
| Traditional | Classic, timeless elements | Keep layouts open |
Your thoughtful design choices will enhance your living experience.
Budgeting for Your Project
After you’ve crafted a design that reflects your style and enhances your mobile home, the next step involves creating a realistic budget for your addition.
Proper financial planning and accurate cost estimation are vital. Here’s how to get started:
- Research Costs: Gather information on materials and labor.
- Prioritize Needs: List essential features versus nice-to-haves.
- Set a Contingency Fund: Allocate 10-15% for unexpected expenses.
- Track Expenses: Keep a detailed account of your spending throughout the project.
Hiring Contractors vs. DIY
When it comes to expanding your mobile home, you’ll need to weigh the costs of hiring contractors against the potential savings of a DIY approach.
Consider your own skill level and whether you feel confident tackling the project on your own.
Making the right choice can greatly impact both your budget and the quality of the work.
Cost Considerations
Deciding whether to hire contractors or tackle your mobile home expansion as a DIY project can greatly impact your budget.
Here are some cost considerations to keep in mind:
- Material Costs: DIY often means saving on labor, but you’ll still need to invest in quality materials.
- Financing Options: Contractors may offer payment plans, while DIY projects require up-front material purchases.
- Time Investment: Consider how much time you can dedicate—time is money!
- Permitting Fees: Hiring professionals might streamline permits, which can save you headaches down the line.
Weigh these factors carefully to decide what’s best for your wallet.
Skill Level Assessment
Evaluating your skill level is essential when choosing between hiring contractors and diving into a DIY expansion for your mobile home. Consider your tools assessment, experience, and the project’s feasibility before making a decision. Here’s a quick comparison to help you decide:
| Factor | DIY | Hiring Contractor |
|---|---|---|
| Cost | Lower | Higher |
| Time Commitment | Significant effort | Professional speed |
| Expertise Required | Moderate to High | Specialized skills |
| Control | Full | Limited |
| Stress Level | Potentially high | Generally lower |
Choose wisely based on your capabilities!
Navigating the Construction Process
As you commence on the journey of expanding your mobile home, understanding the construction process can make a significant difference in the success of your project.
To navigate this efficiently, consider these steps:
- Plan: Outline your goals and budget.
- Select Construction Materials: Choose durable materials that fit your climate and style.
- Create a Project Timeline: Establish realistic deadlines for each phase.
- Hire Professionals or DIY: Decide whether you’ll need help or tackle the project yourself.
Conclusion
Expanding your mobile home with an addition can greatly enhance your living space and comfort. By carefully evaluating your needs, understanding zoning regulations, and designing harmonized spaces, you’ll create a functional and inviting environment. Don’t forget to budget wisely and choose between hiring professionals or tackling the project yourself. With careful planning and execution, you’ll transform your mobile home into a space that truly fits your lifestyle. Now, get started on making your vision a reality!
How to Plan Adding an Addition to Your Ranch Home
When it comes to adding an addition to your ranch home, you’ve got a lot to take into account. Start by identifying your specific needs—maybe it’s an extra bedroom or a cozy home office. A well-thought-out plan can enhance your daily life and family interactions. But before you jump in, you’ll need to navigate budgets, permits, and design choices that blend seamlessly with your existing space. So, what’s next on your list?
Key Takeaways
- Assess your family’s needs to determine the purpose of the home addition, such as an office, playroom, or extra bedroom.
- Establish a realistic budget by researching material and labor costs, including permits to prevent unexpected expenses.
- Familiarize yourself with local building codes and zoning regulations to ensure compliance before starting the project.
- Choose a design that complements your ranch home’s architecture while maximizing space, natural light, and comfort.
- Hire qualified contractors with relevant experience and strong references to ensure quality work and adherence to local regulations.
Define Your Goals and Needs
Have you ever considered what you truly want from your home addition? Start by identifying space requirements—how many rooms or areas do you need? Is it a cozy office, a playroom for the kids, or an extra bedroom?
Next, prioritize family needs. Think about how your family lives and interacts. Will a larger kitchen help with gatherings, or does your family need a quiet retreat?
Make a list of essential features and desired amenities. This process will guide your vision, ensuring your addition enhances your lifestyle and meets your practical needs, creating a harmonious space for everyone.
Set a Realistic Budget
When it comes to setting a budget for your home addition, it’s essential to estimate the construction costs accurately.
Don’t forget to factor in permits, as they can add unexpected expenses to your project.
With a clear financial plan, you’ll be better equipped to bring your vision to life without breaking the bank.
Estimate Construction Costs
Estimating construction costs is a crucial step in planning your home addition, as it sets the foundation for your entire project.
Start with a thorough cost estimation by researching current material pricing for everything from lumber to fixtures. Don’t forget to include labor costs, as skilled tradespeople are indispensable for quality work.
Create a detailed list of necessary materials, and reach out to suppliers for quotes to guarantee you’re budgeting accurately. By understanding these expenses upfront, you’ll avoid surprises later and keep your project on track.
A well-planned budget empowers you to make informed decisions throughout the construction process.
Factor in Permits
As you create your budget, don’t forget to factor in permits, which can greatly affect your overall costs.
Different permit types—like building, electrical, and plumbing—may be necessary depending on your addition’s scope. Research your local regulations to understand the application process; it can be time-consuming but essential.
You might encounter fees that vary by project size and complexity. Allocate funds for these permits in your budget to avoid surprises later.
Planning ahead will help you stay on track financially and guarantee your dream addition complies with local laws, so you can build with peace of mind.
Research Local Building Codes and Permits
Before you start your home addition, it’s essential to understand your local zoning regulations, as they can dictate what you can and can’t do.
You’ll also need to obtain the necessary permits to keep your project compliant and avoid costly fines.
Understand Zoning Regulations
Understanding zoning regulations is essential for guaranteeing your home addition project goes smoothly.
Start by checking your local zoning classifications, as they dictate what you can build and where. Different zones have specific rules about the types of structures allowed.
You’ll also need to pay close attention to property setbacks, which define how far your addition must be from property lines. Ignoring these limits can lead to costly adjustments or fines.
Obtain Necessary Permits
When planning your home addition, securing the necessary permits is an essential step you can’t afford to overlook.
Start by researching local building codes to understand what’s required. You’ll need to complete a permit application, detailing your project specifics.
Pay attention to the permit timeline, as it varies based on your location and the complexity of your addition. Delays can happen, so factor this into your overall project schedule.
Keep a checklist of required documents, and don’t hesitate to ask questions if you’re unsure. A solid foundation of permits will pave the way for a smoother construction process.
Consult Local Authorities
After securing the necessary permits, the next step involves consulting local authorities to guarantee your home addition aligns with building codes and regulations.
This consultation process is essential, as local regulations can vary greatly.
- Schedule a meeting with your local building department.
- Gather information on zoning laws, safety codes, and design standards.
- Prepare to discuss your plans and any potential concerns.
Choose the Right Design
How can you guarantee your home addition not only meets your needs but also enhances your property’s aesthetic?
Start by exploring various design styles that complement your ranch home’s existing architecture. Whether you prefer a modern, rustic, or traditional look, make certain it flows seamlessly with your current structure.
Next, focus on a functional layout that maximizes space while maintaining comfort. Think about how the new area will be used and arrange it accordingly.
Use natural light and open spaces to create an inviting atmosphere. A thoughtful design choice can greatly elevate both your living experience and your home’s overall appeal.
Hire Qualified Professionals
While you might be tempted to tackle your home addition on your own, hiring qualified professionals can save you time, stress, and potential pitfalls.
The right contractor can turn your vision into reality, ensuring everything’s up to code. During the hiring process, consider the following contractor qualifications:
- Proven experience with home additions similar to yours
- Strong references and reviews from past clients
- Necessary licenses and insurance for protection
Plan for Disruption and Living Arrangements
Since home additions can disrupt your daily routine, it’s essential to plan ahead for potential inconveniences.
Consider whether you’ll need temporary housing, especially if construction impacts key areas of your home. Research local rental options or ask friends and family about available space.
When it comes to noise management, communicate with your contractors about work hours and sound expectations. You might invest in soundproofing solutions or create a quiet zone in your home.
Preparing for these disruptions will help you maintain some semblance of normalcy and guarantee that you stay comfortable throughout the renovation process.
Prepare for Construction and Finishing Touches
After you’ve navigated the challenges of living arrangements, it’s time to turn your attention to the construction phase and those all-important finishing touches.
Once you’ve tackled living arrangements, focus on the construction phase and the essential finishing touches.
You’ll want to keep a close eye on the construction timeline, guaranteeing everything stays on track. Choose your finishing materials wisely, as they’ll define your space’s look and feel.
Consider these key elements:
- Quality Finishing Materials: Invest in durable options that enhance your home’s value.
- Color Palette: Select hues that complement your existing decor.
- Functional Design: Confirm the layout flows seamlessly with the rest of your home.
Your dream addition awaits!
Conclusion
Adding an addition to your ranch home can transform your living space and enhance your family’s lifestyle. By clearly defining your needs, setting a budget, and collaborating with skilled professionals, you’ll guarantee a smooth process from start to finish. Remember to embrace the temporary disruptions with a positive mindset, and soon enough, you’ll enjoy the fruits of your labor—a beautiful, functional space that brings your family closer together. Get ready to create memories in your new home!
10 Inspiring Addition Ideas for Your Ranch Home
If you’re looking to enhance your ranch home, there are plenty of inspiring addition ideas to contemplate. From sunrooms that invite natural light to functional mudrooms that keep things organized, each option can greatly improve your living space. Imagine entertaining friends on a new outdoor deck or creating a cozy fireplace feature for those chilly evenings. Let’s explore how these additions can transform your home and elevate your everyday experience.
Key Takeaways
- Consider a sunroom expansion for natural light and seamless indoor-outdoor living, enhancing relaxation and entertainment options.
- Create an outdoor entertaining deck, blending aesthetics and functionality for gatherings with various material choices and lighting options.
- Transform your entryway with an inviting front porch featuring comfortable seating and decorative elements for a warm welcome.
- Design a functional mudroom to organize daily essentials, featuring hooks, baskets, and shelving for a clutter-free home.
- Convert a spare room into a home office and guest suite, providing a productive workspace and cozy accommodations for visitors.
Expanding Your Living Room With a Sunroom
If you’ve ever dreamed of basking in natural light while enjoying the beauty of your surroundings, expanding your living room with a sunroom could be the perfect solution.
Imagine sipping your morning coffee, enveloped by warm sunlight filtering through expansive glass. Thoughtful sunroom design enhances your space, creating a seamless shift between indoors and outdoors.
You can select from various styles—traditional, modern, or rustic—that complement your ranch home’s character. With the right furnishings and plants, your sunroom becomes a serene retreat for relaxation or entertaining.
Embrace the bright atmosphere and elevate your living experience with this inviting addition.
Creating a Functional Mudroom
As you embrace the practicalities of ranch living, creating a functional mudroom can alter the way you manage daily life. A well-organized mudroom enhances efficiency and keeps your home tidy. Consider these mudroom organization tips to elevate your space:
| Storage Solutions | Benefits |
|---|---|
| Hooks for coats | Keeps items off the floor |
| Baskets for shoes | Reduces clutter and mess |
| Shelving for gear | Creates designated spaces |
With smart storage solutions, your mudroom can be a welcoming shift zone that simplifies your routines and protects your home from the outdoors.
Designing an Inviting Front Porch
Designing an inviting front porch transforms your ranch home’s entryway into a warm greeting for guests and a cozy retreat for yourself.
Start with comfortable, inviting seating—think rocking chairs or a charming bench—where you can unwind or chat with neighbors.
Create a cozy atmosphere with inviting seating, like rocking chairs or a charming bench, perfect for relaxation and neighborly chats.
Enhance your front porch decor with vibrant potted plants, colorful cushions, and soft throws that add a touch of personality.
Consider string lights or lanterns to create a welcoming ambiance during the evening.
Adding a Deck for Outdoor Entertaining
When you add a deck to your ranch home, you create an ideal space for outdoor entertaining that seamlessly blends with your lifestyle. Choose from various deck materials like wood, composite, or vinyl to match your home’s aesthetic. Enhance your gatherings with outdoor lighting, setting the perfect mood for evenings under the stars.
Here’s a quick comparison of popular deck materials:
| Material | Durability | Maintenance |
|---|---|---|
| Wood | Moderate | High |
| Composite | High | Low |
| Vinyl | Very High | Very Low |
With the right choices, your deck will be the ultimate entertaining oasis!
Incorporating a Home Office Space
Creating a dedicated home office space in your ranch house can transform your productivity and comfort while working from home.
Start by selecting a quiet corner or an underutilized room to serve as your home office. Embrace natural light to energize your workspace design; consider large windows or a bright color palette.
Invest in ergonomic furniture that promotes comfort, ensuring you can focus for extended periods. Personalize the space with inspiring artwork or plants.
With thoughtful organization and the right technology, your home office will become a haven for creativity and efficiency, making remote work enjoyable and productive.
Enhancing Your Kitchen With a Breakfast Nook
A breakfast nook can breathe new life into your kitchen, turning it into a cozy gathering spot for family and friends.
Imagine a charming corner with a built-in breakfast bar, where you can sip your morning coffee or enjoy a quick meal.
Envision a delightful nook featuring a built-in breakfast bar, perfect for savoring your morning coffee or a quick bite.
Opt for cozy seating with plush cushions that invite you to linger longer.
Enhance the ambiance with soft lighting and decorative accents, making it a perfect place for casual conversations.
With a well-designed nook, you’ll create a functional space that complements your ranch home’s style while adding warmth and character to your kitchen.
Building a Cozy Fireplace Feature
While winter nights invite you to snuggle up by the fire, building a cozy fireplace feature can transform your ranch home into a warm and inviting retreat.
Choose fireplace materials like stone, brick, or stucco to create a rustic yet elegant ambiance. Consider various design styles; a modern linear fireplace provides a sleek look, while a traditional wood-burning option adds a classic charm.
Surround your fireplace with comfortable seating and soft textiles to enhance the warmth. With the right combination of materials and design, your fireplace can become the heart of your home, perfect for gathering with family and friends.
Transforming a Spare Room Into a Guest Suite
After enjoying the warmth of your new fireplace on chilly evenings, you might find your home is ready to welcome guests in style.
Transform that spare room into a cozy guest suite by choosing decor styles that reflect your personal taste while ensuring comfort.
Focus on space optimization by incorporating multifunctional furniture, like a fold-out sofa or storage ottomans.
Don’t forget essential guest amenities—soft linens, a bedside table, and a welcoming touch like fresh flowers.
With thoughtful design, you’ll create an inviting atmosphere that makes your guests feel right at home, turning every visit into a memorable experience.
Adding a Garden Room for Indoor Plants
If you dream of nurturing vibrant indoor plants while enjoying a serene space, adding a garden room can transform your ranch home into a botanical haven.
Imagine a sunlit retreat where you can practice indoor plant care, surrounded by lush greenery. With thoughtful garden room design, you can create an environment that promotes healthy growth and relaxation.
Incorporate shelves for your favorite pots, a cozy seating area, and ample natural light to encourage flourishing foliage. This dedicated space not only enhances your home’s aesthetics but also provides a peaceful sanctuary where you can unwind while tending to your plant collection.
Installing Energy-Efficient Windows for Better Lighting
Upgrading to energy-efficient windows can transform your ranch home by maximizing natural light while minimizing energy costs.
With various types of energy-efficient glass available, you can choose options that suit your style and climate needs.
Plus, knowing a few installation tips can make the process smoother and more rewarding.
Benefits of Energy-Efficient Windows
When you choose to install energy-efficient windows, you’re not just enhancing the aesthetics of your ranch home; you’re also inviting abundant natural light while greatly reducing energy costs.
These windows offer impressive energy savings by minimizing heat loss in winter and keeping your space cool in summer.
Plus, they provide UV protection, safeguarding your furniture and decor from fading.
Imagine basking in sunlight without worrying about skyrocketing utility bills or sun damage.
With energy-efficient windows, you’ll create a brighter, more comfortable environment that’s both eco-friendly and budget-conscious, making your ranch home a truly inviting haven.
Types of Energy-Efficient Glass
Have you ever considered how different types of energy-efficient glass can transform the lighting in your ranch home?
Low E coatings are a game-changer, reflecting heat while allowing natural light to flood your space. This means you can enjoy bright, airy rooms without sacrificing comfort.
Pair that with argon gas-filled windows, which provide extra insulation, keeping your home cozy year-round. These innovations minimize energy loss, ultimately reducing your utility bills.
By choosing the right energy-efficient glass, you not only enhance your home’s aesthetic but also create a more sustainable living environment.
Let the light shine in, while staying energy-smart!
Installation Tips and Techniques
Installing energy-efficient windows can be a game-changer for your ranch home, enhancing both lighting and comfort.
Start with solid foundation preparation to guarantee your windows fit snugly. Measure carefully and choose windows that match your home’s style.
When it comes to insulation techniques, use high-quality foam or fiberglass to seal gaps, preventing drafts and maximizing energy efficiency. Remember to apply caulk around the edges for added protection against moisture.
Finally, don’t forget to check local building codes and consider hiring a professional if you’re unsure about any step.
Enjoy brighter, more comfortable spaces with your new windows!
Conclusion
By embracing these inspiring addition ideas, you can transform your ranch home into a more functional and beautiful space. Imagine basking in the warmth of a sunroom or hosting friends on a stylish deck. Enhancing your entryway with a welcoming porch or creating a cozy guest suite adds both charm and comfort. With energy-efficient upgrades, you’ll not only elevate your living experience but also enjoy peace of mind. Start planning your dream additions today, and watch your home flourish!
3 Essential Tips for Planning Ranch Home Additions
When you’re considering ranch home additions, it’s essential to approach the project with a strategic mindset. You need to understand local regulations and permits, which can greatly impact your plans. Additionally, choosing the right materials and design elements will guarantee your addition harmonizes with your existing space. Finally, think about how functionality and flow will enhance your home’s layout. Each decision plays a significant role in the overall success of your project. What’s your next step?
Key Takeaways
- Research local zoning laws and obtain necessary permits to ensure compliance before starting your ranch home addition.
- Choose durable, aesthetically pleasing materials that align with the existing architecture of your ranch home.
- Prioritize functionality and flow by planning an optimized layout that accommodates natural movement patterns.
- Engage with contractors early to develop a realistic timeline and budget for materials and labor.
- Incorporate design elements that complement your personal style while enhancing the overall functionality of the space.
Understand Local Regulations and Permits
Before diving into your ranch home addition project, it’s essential to understand local regulations and permits, as they can greatly impact your plans.
Start by researching zoning laws in your area; these dictate what you can build and where. Familiarize yourself with restrictions like height, setbacks, and land use.
Research local zoning laws to understand building regulations, including height, setbacks, and land use restrictions.
Next, navigate the permit process, which can be tedious but is vital for compliance. Gather necessary documents and be prepared to submit detailed plans.
Engaging with local authorities early can help clarify requirements and streamline your project, ultimately saving you time and preventing potential roadblocks down the line.
Choose the Right Materials and Design Elements
Once you’ve navigated the maze of local regulations and secured the necessary permits, the next step in your ranch home addition project is selecting the right materials and design elements. Your choices should guarantee design cohesion, blending seamlessly with your existing structure. Focus on durable, aesthetically pleasing materials that resonate with your style.
| Material Type | Pros | Cons |
|---|---|---|
| Brick | Durable, Classic | Can be costly |
| Wood | Warm, Versatile | Requires maintenance |
| Vinyl | Low-cost, Low-maintenance | Less customizable |
| Stone | Natural, Unique | Heavy, Expensive |
Consider Functionality and Flow in Your Layout
While planning your ranch home addition, it’s crucial to take into account how the new space will function and flow with your existing layout.
Focus on space optimization by ensuring that the addition complements your current design. Consider traffic patterns; you don’t want your guests to feel cramped or lost. Map out natural pathways between rooms, allowing for ease of movement.
Think about how the new area interacts with existing spaces—should it be open or more defined? Prioritize function without sacrificing style, creating a cohesive environment that enhances your lifestyle while maintaining a harmonious flow throughout your home.
Conclusion
Incorporating these three essential tips will greatly enhance your ranch home addition project. By understanding local regulations, selecting the right materials, and prioritizing functionality, you’ll create a space that not only meets your needs but also complements your existing home. A well-planned addition can improve your living environment and increase your property’s value. So, take the time to carefully consider each aspect, ensuring your new space is harmonious, inviting, and tailored to your lifestyle.
10 Top Contractors for Home Additions in Newport Beach
When you’re considering a home addition in Newport Beach, choosing the right contractor is essential. With so many options available, it can be overwhelming to find one that aligns with your vision and needs. The top contractors in the area not only bring expertise but also a client-focused approach that can transform your space. Let’s explore the standout choices that can elevate your home to new heights.
Key Takeaways
- Coastal Builders Group specializes in blending coastal aesthetics with modern design, focusing on sustainable materials for home additions in Newport Beach.
- Newport Beach Construction is adept at navigating local regulations, enhancing property value through stylish outdoor areas and expanded living spaces.
- Pacific Home Remodeling offers innovative design solutions, collaborating with homeowners to align visions with practical home addition enhancements.
- OC Home Additions emphasizes contemporary styles, creating functional layouts with abundant natural light through a collaborative design process.
- Signature Home Improvements is known for customized designs and high-quality craftsmanship, ensuring smooth project management and enhanced home functionality.
Coastal Builders Group
Coastal Builders Group stands out as a premier choice for home additions in Newport Beach. You’ll appreciate their commitment to blending coastal aesthetics with modern design, ensuring your home reflects the beauty of its surroundings.
Their team uses sustainable materials, minimizing environmental impact while maximizing durability and style. You’ll find that each project is tailored to your specific needs, enhancing functionality without compromising on design.
Newport Beach Construction
When considering home additions, it’s vital to choose a contractor who understands the unique demands of Newport Beach construction.
Local regulations can be complex, and staying compliant with Newport Beach regulations is fundamental for a successful project.
By keeping up with the latest construction trends, a knowledgeable contractor can help you design and build a space that not only meets your needs but also enhances your property’s value.
Whether you’re looking to expand your living space or add a stylish outdoor area, selecting the right contractor guarantees your project aligns with both your vision and the community’s standards.
Pacific Home Remodeling
For homeowners in Newport Beach looking to expand their living spaces, Pacific Home Remodeling stands out as a premier choice.
They specialize in innovative home design, transforming your ideas into reality while keeping up with the latest renovation trends.
Their skilled team works closely with you, ensuring your vision aligns with practical solutions.
Whether you’re considering a simple addition or a complete overhaul, Pacific Home Remodeling brings expertise and creativity to each project.
You’ll appreciate their commitment to quality craftsmanship and attention to detail, making your home addition not just functional, but a beautiful enhancement to your lifestyle.
OC Home Additions
If you’re considering expanding your home in Newport Beach, OC Home Additions offers a thorough approach that caters to your specific needs and desires.
They stay updated on the latest home addition trends, ensuring your project reflects contemporary styles while maximizing functionality.
When planning your addition, you’ll want to think about design considerations like layout, natural light, and materials that complement your existing structure.
OC Home Additions collaborates with you throughout the process, transforming your vision into reality.
Trust their expertise to create a seamless blend of aesthetics and practicality, making your home expansion both beautiful and functional.
California Design and Construction
As you explore options for expanding your home in Newport Beach, California Design and Construction stands out with its commitment to quality and innovation.
They focus on creating spaces that not only enhance your home but also reflect sustainable design principles and modern aesthetics.
Key features include:
- Energy-efficient materials
- Open floor plans that promote natural light
- Eco-friendly building practices
- Customizable designs tailored to your lifestyle
- Attention to detail in every project
With California Design and Construction, you’ll achieve the perfect blend of functionality and style, ensuring your home addition is both beautiful and environmentally responsible.
Platinum Home Builders
Platinum Home Builders brings a fresh perspective to home additions in Newport Beach, merging craftsmanship with advanced technology.
Their commitment to platinum quality guarantees that every project reflects durability and aesthetic appeal. You’ll appreciate their attention to detail and dedication to client satisfaction, which enhances their builder reputation in the area.
With a team of skilled professionals, they guide you through the design process, making your vision a reality.
Their skilled professionals are dedicated to guiding you through the design process, turning your vision into reality.
Whether you’re considering a spacious family room or a modern kitchen, Platinum Home Builders is your go-to choice for exceptional home additions that elevate your living space.
Signature Home Improvements
When it comes to home additions, Signature Home Improvements stands out with its deep expertise in the field.
You’ll appreciate their streamlined design and build process, which guarantees a seamless experience from start to finish.
Plus, they uphold high quality and material standards, assuring your project not only meets but exceeds expectations.
Expertise in Home Additions
Whether you’re dreaming of a spacious family room or a modern kitchen extension, Signature Home Improvements brings unparalleled expertise in home additions.
Their team understands the latest design trends and excels in space optimization, ensuring your vision becomes reality.
Here are some reasons to choose them:
- Customized designs tailored to your lifestyle
- Skilled craftsmanship that stands the test of time
- Effective project management for smooth execution
- Innovative solutions for maximizing space
- Commitment to customer satisfaction and quality
With Signature Home Improvements, you’re not just adding space; you’re enhancing your home’s value and functionality.
Let them transform your dreams into a stunning reality!
Design and Build Process
Signature Home Improvements takes pride in its seamless design and build process, ensuring that every detail aligns with your vision from start to finish.
You’ll collaborate closely with experienced designers who stay up-to-date on the latest design trends, helping you create a space that reflects your style.
Throughout the process, we prioritize budget considerations, offering transparent estimates and cost-effective solutions.
By integrating your preferences with practical insights, we create a plan that not only meets your needs but also enhances your property’s value.
Trust us to turn your dream addition into a reality, all while keeping your financial goals in mind.
Quality and Material Standards
At Signature Home Improvements, we recognize that the foundation of any successful home addition lies in the quality of materials and craftsmanship used.
We’re committed to adhering to strict building codes and utilizing sustainable materials for every project.
You can expect:
- Durable, high-quality products
- Environmentally-friendly options
- Compliance with local regulations
- Expert craftsmanship and attention to detail
- Timely project completion
J.M. Construction
When considering J.M. Construction for your home addition, you’ll appreciate their impressive project portfolio that showcases their expertise.
They specialize in creating seamless expansions that enhance your living space while maintaining aesthetic appeal.
Plus, their competitive pricing strategies guarantee you get quality without breaking the bank.
Project Portfolio Highlights
J.M. Construction stands out with an impressive project portfolio that reflects the latest design trends while keeping budget considerations in mind.
Their diverse projects showcase their adaptability and expertise, ensuring your home addition meets your unique needs.
Here are some highlights:
- Modern open-concept family rooms
- Luxurious master suites with en-suite bathrooms
- Eco-friendly extensions using sustainable materials
- Outdoor living spaces that enhance curb appeal
- Creative storage solutions integrated into design
Expertise in Home Additions
With a strong foundation built from a diverse project portfolio, J.M. Construction excels in home additions.
Their expertise in home expansion guarantees that your space meets both functional and aesthetic needs. They collaborate closely with you to understand your vision, integrating innovative architectural design that enhances your home’s value and style.
Whether you’re looking to add a new room or expand your living area, their skilled team brings your ideas to life with precision and care.
Trust J.M. Construction to transform your home into a space that reflects your lifestyle while maximizing its potential. Your dream addition awaits!
Competitive Pricing Strategies
Understanding the importance of budget in home additions, J.M. Construction employs competitive pricing strategies that guarantee you get value without compromising quality.
By conducting thorough market analysis, they tailor pricing models to suit your needs. Here’s what you can expect:
- Transparent pricing breakdowns
- Flexible financing options
- Value-driven packages
- Regular updates on project costs
- Post-project support
J.M. balances quality and affordability, so you can invest wisely.
With their expertise, you’re not just another project; you’re a valued client, ensuring your home addition meets both your vision and your financial plan.
Coastal Living Homes
Coastal living homes embody the essence of seaside tranquility, seamlessly blending indoor comfort with outdoor beauty.
You’ll notice that coastal architecture trends emphasize open spaces, large windows, and natural materials that invite the ocean breeze inside. These homes often feature beachfront property styles, showcasing vibrant colors and textures that reflect the surrounding landscape.
Think about incorporating features like expansive decks, shaded patios, and lush landscaping to enhance your connection to nature.
Golden State Builders
When considering home additions, Golden State Builders stands out with a range of services tailored to your needs.
You’ll appreciate their impressive project gallery, showcasing successful transformations that inspire.
Let’s explore what makes them a top choice in Newport Beach.
Services Offered
As you explore options for home additions in Newport Beach, Golden State Builders stands out with an extensive range of services tailored to meet your specific needs.
They focus on modern home design and stay updated with current construction trends to guarantee your project is both stylish and functional.
Their key services include:
- Customized home addition plans
- Expert architectural consultations
- Thorough construction management
- High-quality remodeling solutions
- Sustainable building practices
With Golden State Builders, you’ll get a seamless experience from concept to completion, guaranteeing your home addition enhances your lifestyle while adding value to your property.
Project Gallery
Golden State Builders showcases an impressive project gallery that highlights their expertise in home additions.
You’ll find a diverse range of project designs that reflect modern architectural trends, ensuring your home not only meets your needs but also stands out in style.
Each project emphasizes quality craftsmanship and innovative solutions, giving you insights into the possibilities for your own space.
Whether you’re considering a cozy extension or a grand renovation, their gallery serves as inspiration, demonstrating how thoughtful project design can transform a house into a dream home.
Immerse yourself in their visuals and envision the potential for your own property!
Conclusion
When it comes to home additions in Newport Beach, choosing the right contractor makes all the difference. Each of these top ten companies offers unique strengths, from sustainable practices to innovative designs and quality craftsmanship. By partnering with one of these experts, you’re not just enhancing your home; you’re investing in your property’s future. So, take the time to explore your options and find the perfect match for your vision and needs. Your dream home awaits!
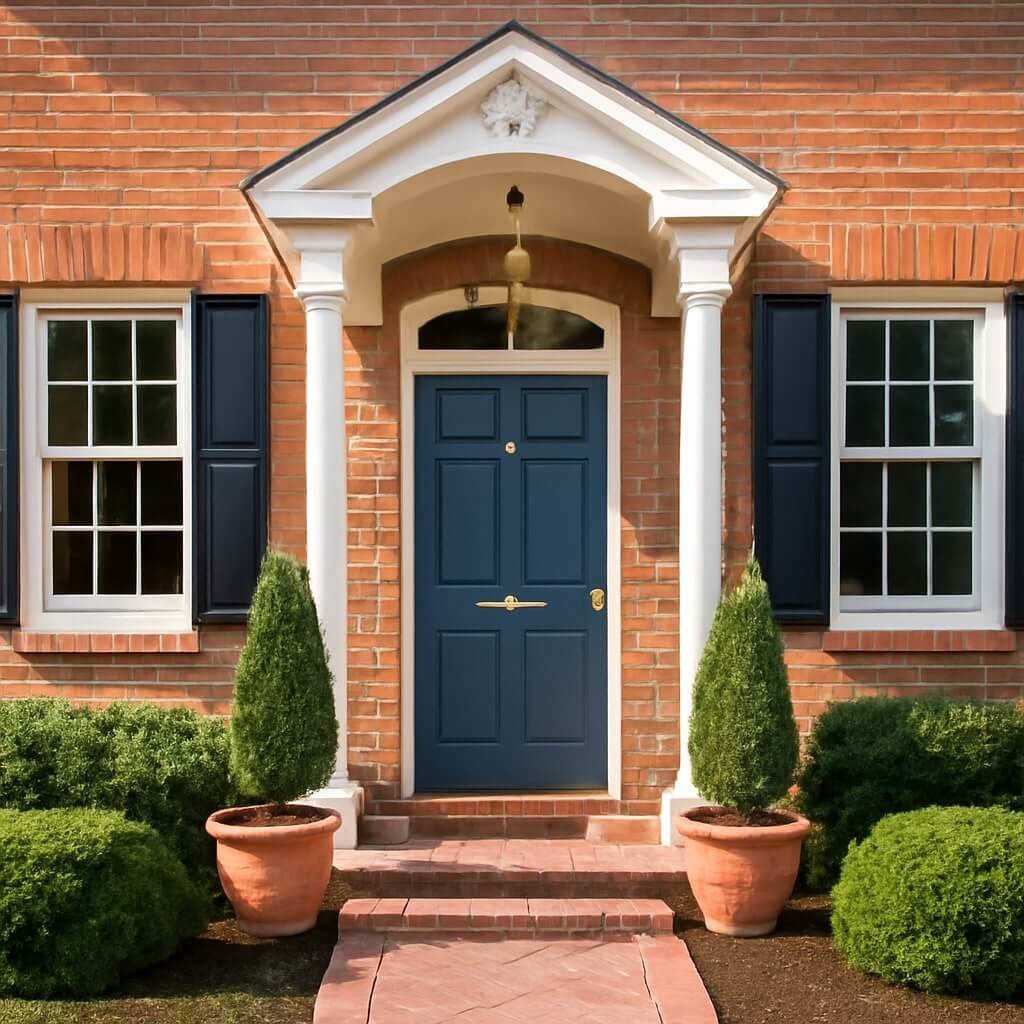
5 Essential Additions for Your Brick Home
If you own a brick home, enhancing its charm and functionality is easier than you might think. By focusing on a few key additions, you can boost your home’s curb appeal and comfort. From classic front porch enhancements to stylish window shutters, there are practical options to contemplate. Plus, don’t overlook outdoor spaces and landscaping that can transform your property. Let’s explore these essential additions that can make a significant difference.
Key Takeaways
- Enhance curb appeal with classic front porch features like swings and decorative railings for a welcoming entrance.
- Install stylish window shutters to complement brickwork while providing light control and privacy.
- Invest in energy-efficient insulation solutions to maintain comfortable temperatures and reduce energy bills.
- Create inviting outdoor living spaces with comfortable furniture and fire pits for gatherings and relaxation.
- Implement beautiful landscaping features, such as vibrant flower beds and decorative pathways, to elevate your home’s exterior charm.
Classic Front Porch Enhancements
When you enhance your classic front porch, you not only boost your home’s curb appeal but also create a welcoming space for family and friends.
A charming porch swing can transform your entryway into a cozy retreat, inviting relaxation and conversation. Pair it with decorative railings that reflect your style; they can add character and safety without compromising the view.
Consider adding potted plants or hanging flowers to bring life and color to the space. By focusing on these elements, you’ll create an inviting atmosphere that showcases your personality while making your brick home stand out in the neighborhood.
Stylish Window Shutters
Adding stylish window shutters can dramatically enhance the character of your brick home while providing practical benefits. They offer both decorative styles and functional options that can transform your exterior.
Consider these three key points:
- Aesthetic Appeal: Choose from various colors and designs to complement your brickwork.
- Light Control: Adjustable shutters let you manage natural light and privacy effectively.
- Durability: High-quality materials withstand weather elements, ensuring long-lasting beauty.
With the right shutters, you’ll not only elevate your home’s charm but also enjoy the functional advantages they bring.
It’s a simple yet impactful upgrade!
Energy-Efficient Insulation Solutions
While maintaining a comfortable temperature in your brick home, energy-efficient insulation solutions can considerably reduce your energy bills.
Consider using spray foam insulation, which expands to fill gaps, creating an impressive air seal that keeps your home cozy year-round.
Alternatively, cellulose insulation, made from recycled paper, offers excellent thermal performance and is environmentally friendly. It’s blown into walls and attics, minimizing energy loss.
By investing in these insulation options, you’ll not only enjoy a more comfortable living space but also lower utility costs.
Choose the right insulation to enhance your home’s efficiency and sustainability.
Inviting Outdoor Living Spaces
To create an inviting outdoor living space, you can seamlessly blend comfort and aesthetics, transforming your backyard into a personal retreat.
Start by incorporating essential elements that enhance relaxation and enjoyment:
- Comfortable outdoor furniture: Choose weather-resistant seating options like lounge chairs or a cozy sectional to encourage gatherings.
- A fire pit: Add a fire pit for warmth and ambiance, perfect for evening chats or roasting marshmallows.
- Soft lighting: Use string lights or lanterns to create an enchanting atmosphere after sunset.
These additions will turn your outdoor area into a welcoming haven for family and friends.
Enjoy your new space!
Beautiful Landscaping Features
Beautiful landscaping features can transform your brick home’s exterior, making it not just visually appealing but also inviting.
Start by incorporating vibrant flower bed designs that complement your brick’s color, choosing perennials for lasting beauty. Arrange the beds in curvy shapes for a softer look.
Next, consider decorative pathways; they guide visitors and enhance your yard’s flow. Use materials like stone or brick pavers to match your home’s aesthetic.
Add lighting along these paths to create a warm ambiance at night.
With these thoughtful touches, you’ll create a stunning landscape that highlights your brick home beautifully.
Conclusion
By implementing these five essential additions, you can transform your brick home into a stylish and functional haven. From enhancing your front porch for curb appeal to creating inviting outdoor spaces, each improvement adds value and comfort. Stylish window shutters and energy-efficient insulation not only elevate aesthetics but also boost energy savings. Finally, beautiful landscaping ties it all together, making your home a vibrant and welcoming retreat. Start planning your upgrades today and enjoy the benefits for years to come!