
3 Local Contractors for Your Milwaukie Home Addition
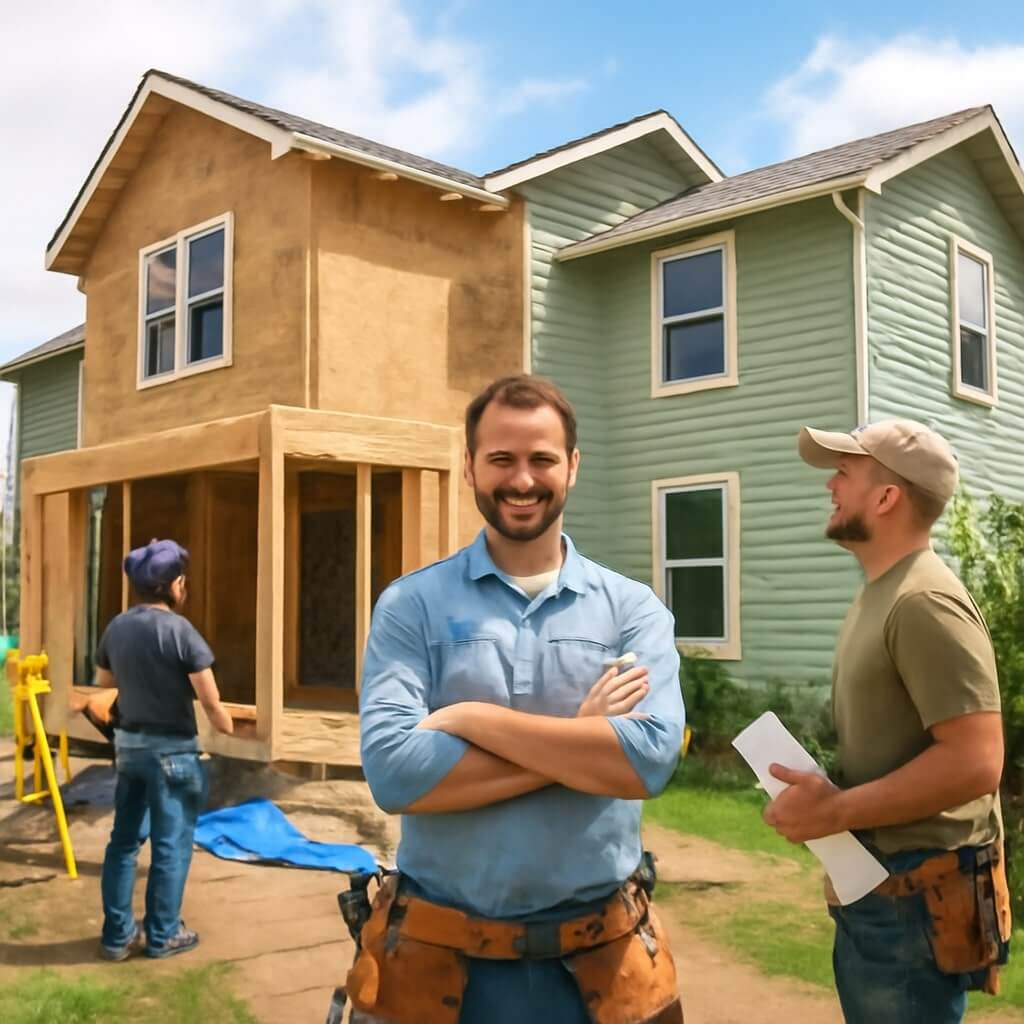
If you’re considering a home addition in Milwaukie, choosing the right contractor can make all the difference. With so many options, it’s essential to find a professional who aligns with your vision and needs. Three local contractors stand out for their unique strengths in transforming spaces, fostering collaboration, and delivering innovative designs. Let’s explore what each brings to the table and how they can help you create the perfect addition to your home.
Key Takeaways
- Contractor A specializes in space optimization and offers seamless room additions with a focus on quality craftsmanship and project management.
- Contractor B has extensive experience in home renovations, collaborating closely with clients to realize their visions while minimizing disruptions.
- Contractor C focuses on custom designs and sustainable materials, ensuring energy efficiency and aesthetic enhancements for your home addition.
- All contractors prioritize transparent communication, ensuring projects stay on schedule and within budget for a smooth renovation experience.
- Each contractor is committed to delivering exceptional quality and client satisfaction, making them reliable choices for your Milwaukie home addition.
Contractor A: Transforming Spaces With Expertise
When you’re considering a home addition, Contractor A stands out as a top choice thanks to their expertise in transforming spaces.
They excel in space optimization, ensuring every square foot is utilized effectively. With their thorough project management, you won’t have to worry about timelines or budgets spiraling out of control.
Contractor A’s team communicates openly, keeping you informed every step of the way. They’re dedicated to delivering quality craftsmanship that exceeds your expectations.
Whether you need extra rooms or a modernized layout, Contractor A has the skills and experience to bring your vision to life seamlessly.
Contractor B: Your Trusted Partner for Home Additions
Finding the right partner for your home addition can make all the difference, and Contractor B is just that.
With years of experience in home renovation, they understand your vision and work closely with you to bring it to life. Their expert project management guarantees that every detail is handled efficiently, minimizing disruptions to your daily routine.
You’ll appreciate their transparent communication and commitment to quality, making certain that your project stays on schedule and within budget.
When you choose Contractor B, you’re not just hiring a contractor; you’re gaining a trusted ally dedicated to enhancing your home and lifestyle.
Contractor C: Innovative Designs and Quality Craftsmanship
If you’re looking for a contractor who combines innovative designs with quality craftsmanship, Contractor C stands out as a top choice.
They specialize in creating custom designs tailored to your unique vision, ensuring your home addition reflects your personal style.
With an emphasis on sustainable materials, Contractor C prioritizes eco-friendly options that not only enhance aesthetics but also promote energy efficiency.
Their skilled team takes pride in meticulous attention to detail, guaranteeing durability and functionality alongside stunning visuals.
When you partner with Contractor C, you’re choosing a commitment to excellence that transforms your Milwaukie home into a remarkable living space.
Conclusion
When it comes to home additions in Milwaukie, you’ve got fantastic options. Whether you prioritize space optimization, a collaborative renovation process, or innovative, sustainable designs, these three contractors have the expertise to turn your vision into reality. By choosing one of these professionals, you can guarantee that your home addition not only meets your needs but also enhances your living space. Take the next step towards your dream home and connect with one of these trusted contractors today!
Key Considerations for Your Home Addition Planner
When planning your home addition, you’ll need to navigate several critical factors to guarantee success. Understanding local building codes and securing the right permits is essential to avoid costly delays. You’ll also want to establish a realistic budget that covers all expenses, including contingencies. As you think about design and materials, remember that functionality and quality go hand in hand. But how do you effectively manage the timeline and disruptions that inevitably arise?
Key Takeaways
- Research local building codes and obtain necessary permits to ensure compliance and avoid project delays.
- Establish a realistic budget that accounts for materials, labor, and unexpected costs.
- Design a functional layout that meets your lifestyle needs and complements your existing home.
- Select quality, sustainable materials to enhance durability and reduce maintenance efforts.
- Plan for disruptions and manage timelines effectively to keep the project on track.
Understanding Local Building Codes and Permits
When planning a home addition, understanding local building codes and permits is essential to guarantee your project runs smoothly.
Start by researching zoning regulations that apply to your property; these rules dictate what you can build and where. Each municipality has specific guidelines, so familiarize yourself with your area’s requirements.
Next, prepare your permit application meticulously, including necessary drawings and documents. Incomplete applications can lead to delays or rejections.
Establishing a Realistic Budget
How can you guarantee your home addition project stays within financial limits? Start with accurate cost estimation; itemize expenses like materials, labor, and permits.
Don’t forget to factor in unexpected costs—set aside at least 10% of your budget for contingencies.
Explore various funding options, such as home equity loans or personal loans, to ascertain you have the necessary capital.
Research local grants or incentives that might be available for home improvements.
Choosing the Right Design and Layout
What factors should you consider when choosing the right design and layout for your home addition? First, prioritize modern aesthetics that complement your existing structure while ensuring visual harmony.
Think about how the new space will flow with your current layout, creating functional spaces for daily use. Consider your lifestyle needs—do you require a home office, an expanded kitchen, or a playroom?
Visualize the arrangement of furniture and traffic patterns to maximize usability. Finally, remember to incorporate natural light and efficient storage solutions, enhancing both beauty and practicality.
A well-planned design elevates your home’s overall functionality and appeal.
Selecting Quality Materials
Selecting quality materials for your home addition is essential to ensuring durability, aesthetics, and overall value. Opting for sustainable materials not only benefits the environment but also enhances material durability, reducing long-term maintenance costs. Here’s a comparison to guide you:
| Material Type | Benefits | Considerations |
|---|---|---|
| Bamboo | Eco-friendly, strong | Requires proper treatment |
| Recycled Steel | High durability, recyclable | Corrosion potential |
| Engineered Wood | Stable, versatile | Sensitive to moisture |
| Natural Stone | Aesthetic appeal, durable | Higher cost |
| Insulated Concrete | Energy-efficient, strong | Heavy, requires skilled labor |
Choose wisely!
Planning for Disruption and Timeline Management
Choosing quality materials sets the foundation for your home addition, but as you commence on this project, it’s essential to prepare for the inevitable disruptions that come with construction.
Effective disruption management involves anticipating potential delays and communicating openly with your contractor. Regularly assess your project’s progress and be ready to implement timeline adjustments when unexpected issues arise, such as weather or material shortages.
Create a buffer in your schedule to accommodate these changes, ensuring your vision remains intact while minimizing stress. By proactively managing disruptions, you’ll keep your home addition on track and maintain a harmonious living environment throughout the process.
Conclusion
To sum up, planning your home addition requires a careful balance of technical knowledge and creative vision. By understanding local building codes and securing permits, establishing a realistic budget, choosing the right design, selecting quality materials, and effectively managing your timeline, you’ll set the stage for a successful project. Stay proactive and maintain clear communication with your contractors to navigate challenges smoothly. With these considerations in mind, you’re well on your way to creating the perfect space for your needs.

7 Common Mistakes to Avoid When Requesting Home Addition Quotes
When you’re planning a home addition, it’s easy to get caught up in the excitement. But that excitement can lead to mistakes that cost you time and money. From not setting a realistic budget to overlooking permits, each misstep can complicate your project. Understanding these common pitfalls is essential for a smooth process. Let’s explore what you need to keep in mind to guarantee your home addition goes off without a hitch.
Key Takeaways
- Failing to define a clear project scope can lead to overspending and delays in the home addition process.
- Rushing the quote process may result in poor decisions; take time to compare multiple quotes thoroughly.
- Not researching local permits and regulations can cause costly delays and complications later on.
- Neglecting to provide detailed specifications can lead to miscommunication and unexpected costs with contractors.
- Overlooking contractor reputation and warranty options may lead to future issues and dissatisfaction with the work done.
Failing to Set a Realistic Budget
When you commence a home addition project, one of the biggest missteps is failing to set a realistic budget. Many homeowners underestimate costs, ignoring budget limitations that can derail their plans.
Start by researching typical expenses for your desired addition and consider all aspects, including materials, labor, and permits.
Explore various funding options, like savings, loans, or home equity lines, to guarantee you’re prepared. By establishing a clear budget from the outset, you’ll avoid surprises later on and keep your project on track.
Not Defining Your Project Scope Clearly
Setting a realistic budget is just the first step in your home addition journey; without clearly defining your project scope, you risk overspending and facing delays.
To guarantee communication clarity and project flexibility, consider these key elements:
- Specific room dimensions and layouts
- Desired materials and finishes
- Timeline expectations
- Functional requirements (e.g., plumbing, electrical)
- Budget constraints
Ignoring the Importance of Permits and Regulations
When planning your home addition, don’t overlook the significance of permits and regulations.
Researching local building codes and understanding the permit application process is essential to avoid costly delays.
Also, make sure to check zoning restrictions, as they can greatly impact your project’s feasibility.
Research Local Building Codes
Before diving into your home addition project, you need to grasp the significance of local building codes and regulations. Ignoring these can lead to costly delays and complications.
Here are key points to reflect on:
- Understand local building regulations
- Identify compliance requirements for your area
- Research zoning laws specific to your property
- Check for restrictions regarding height and structure
- Consult with professionals who know local codes
Understand Permit Application Process
Steering the permit application process is vital for a successful home addition project, yet many homeowners overlook its importance.
Understanding the different permit types you may need can save you time and money. Research local regulations to determine which permits apply to your project.
Be mindful of application timelines—some permits may take weeks or even months to process. Delaying your application could stall your project, leading to frustration and increased costs.
By proactively managing the permit process, you’ll guarantee your home addition complies with local laws and keeps your project on track.
Don’t skip this vital step!
Check Zoning Restrictions
Steering through the permit application process is just the beginning; checking zoning restrictions is equally important for your home addition project.
Ignoring zoning laws can lead to costly setbacks. Here’s what you need to take into account:
- Local regulations vary by area
- Setback requirements may limit your design
- Height restrictions can affect your plans
- Zoning classifications dictate allowable uses
- Non-compliance can result in fines or removal
Rushing the Quote Process
When you’re rushing the quote process, you might overlook the importance of detailed planning.
Taking the time to compare quotes can save you money and guarantee you choose the best option for your home.
Don’t underestimate the value of a thorough approach; it can make all the difference in your project’s success.
Importance of Detailed Planning
A well-thought-out plan can make all the difference when you’re requesting quotes for a home addition.
Taking your time to detail your project guarantees you communicate effectively with contractors and avoids costly mistakes.
Consider these key elements:
- Clear project timeline
- Defined design aesthetics
- Specific materials and finishes
- Budget constraints
- Functional requirements
Allow Time for Comparisons
Although you might feel pressured to get your home addition underway, rushing the quote process can lead to poor decisions and missed opportunities.
Effective time management is essential here. Take the time to gather multiple quotes and evaluate them with a solid comparison strategy. This allows you to assess costs, materials, and timelines more clearly.
Don’t hesitate to ask questions—clarity can save you headaches later. By avoiding haste, you’re more likely to find the best contractor and guarantee your addition meets your vision and budget.
Overlooking the Value of Detailed Specifications
Detailed specifications are the backbone of any successful home addition project.
When you overlook them, you risk miscommunication and unexpected costs.
Here’s what to include in your detailed plans:
- Accurate measurements of existing spaces
- Material choices and quality
- Specific design features
- Budget breakdown
- Timeline for completion
Neglecting to Compare Multiple Quotes
One of the biggest mistakes homeowners make when requesting quotes for a home addition is neglecting to compare multiple estimates. By doing so, you risk settling for less competitive pricing and potentially inaccurate quotes.
Each contractor may offer different services, materials, and timelines, which can greatly impact your project’s overall cost and quality. Evaluating quote accuracy helps you avoid unexpected expenses down the line.
Additionally, don’t forget to assess contractor reputation; a lower price isn’t always best if the contractor lacks positive reviews.
Take the time to compare, and you’ll make a more informed decision for your home addition.
Forgetting to Ask About Warranties and Follow-Up Services
When you’re excited about your home addition project, it’s easy to overlook important details like warranties and follow-up services.
However, asking about these aspects can save you headaches later. Consider the following:
- What warranty coverage do they offer?
- How long is the warranty valid?
- Are there specific conditions for the warranty?
- What types of follow-up services are included?
- How do they handle warranty claims?
Conclusion
By avoiding these common mistakes, you’ll set yourself up for a smoother home addition process. Take the time to create a realistic budget, define your project scope, and understand local regulations. Don’t rush the quote process—gather multiple quotes and compare them carefully. Finally, remember to ask about warranties and follow-up services. With these strategies, you’ll be better equipped to make informed decisions and achieve your dream home addition without unnecessary headaches.
5 Key Factors for Planning a Seattle Home Addition
Planning a home addition in Seattle can be both exciting and challenging. You’ll need to navigate zoning laws, secure permits, and set a realistic budget. It’s essential to choose designs that fit your home’s character and find the right contractor to bring your vision to life. Plus, you should prepare for the inevitable construction disruption. Knowing these five key factors can set you on the path to a successful project. Let’s explore each one.
Key Takeaways
- Understand Seattle’s zoning laws and engage with the local zoning office for necessary permits and compliance.
- Create a detailed budget that includes labor, materials, and permits, and explore financing options.
- Choose designs and materials that complement your home’s current aesthetics while considering modern trends and energy efficiency.
- Hire a qualified contractor with a successful track record in home additions, ensuring clear communication and transparency in costs.
- Prepare for construction disruptions by setting realistic expectations for temporary living arrangements and overall project timelines.
Understanding Zoning Laws and Permits
When you’re planning a home addition in Seattle, how well do you understand the zoning laws and permits that could affect your project?
Familiarizing yourself with zoning regulations is vital, as they dictate what you can and can’t build on your property. Engaging with your local zoning office can help clarify these rules.
Additionally, maneuvering through the permit process is essential; you’ll need the appropriate permits to avoid penalties or delays. It’s a good idea to gather all necessary documentation and consult with professionals who can guide you through this complex landscape, ensuring your addition meets all legal requirements.
Budgeting for Your Home Addition
Once you’ve navigated the zoning laws and secured the necessary permits, the next step is to focus on budgeting for your home addition. Start by gathering cost estimations for labor, materials, and any additional expenses. Consider your financing options, such as home equity loans or personal loans, to fund your project effectively.
| Item | Estimated Cost | Financing Options |
|---|---|---|
| Labor | $10,000 | Home Equity Loan |
| Materials | $15,000 | Personal Loan |
| Permits & Fees | $2,000 | Savings |
Planning these aspects carefully guarantees a smoother process.
Choosing the Right Design and Materials
As you begin your home addition journey, choosing the right design and materials is essential for achieving a seamless integration with your existing space.
Stay updated on current design trends to guarantee your addition complements your home’s aesthetic. Consider open floor plans or energy-efficient designs that enhance functionality.
When it comes to material options, think about durability and maintenance; hardwood floors or natural stone can add warmth and character.
Don’t forget to match colors and textures with your home’s exterior and interior, creating a cohesive look.
Thoughtful choices here will make your addition feel like a natural extension of your home.
Hiring the Right Contractor
Finding the right contractor is just as important as choosing the perfect design and materials for your home addition. You want someone who understands your vision and can execute it flawlessly.
Here are some key factors to take into account:
- Contractor Qualifications: Check their licenses, insurance, and references.
- Experience: Look for someone with a proven track record in home additions.
- Communication Strategies: Confirm they’re responsive and keep you updated throughout the process.
- Budget Transparency: They should provide clear estimates and be upfront about costs.
Choosing wisely now will save you time and stress later!
Planning for Disruption and Timeline Expectations
While planning your home addition, it’s essential to prepare for the inevitable disruptions that come with construction. You might experience construction noise and the need for temporary living arrangements, so it’s important to set realistic expectations.
Here’s a simple breakdown:
| Phase | Duration | Considerations |
|---|---|---|
| Preparation | 1-2 weeks | Permits, design finalization |
| Demolition | 1 week | Dust, noise, debris |
| Construction | 6-12 weeks | Ongoing noise, limited access |
| Finishing Touches | 1-2 weeks | Clean-up, inspection |
Communicate with your contractor regularly to navigate these challenges smoothly.
Conclusion
In conclusion, planning your Seattle home addition requires careful consideration of zoning laws, budgeting, design choices, contractor selection, and potential disruptions. By addressing these five key factors, you’ll not only streamline the process but also guarantee your project aligns with your vision and needs. Remember, taking the time to prepare will lead to a smoother experience and a successful addition that enhances your home for years to come. Enjoy the journey of creating your perfect space!
10 Stunning Design Ideas for Home Additions in Stafford
When it comes to enhancing your home in Stafford, thoughtful design can transform your space dramatically. Consider how an expansive sunroom or a modern open-concept living area can create a seamless connection to the outdoors. Each addition should not only serve a purpose but also enrich your home’s aesthetic. Explore how these additions can elevate your living experience, and you’ll find yourself inspired to rethink your space in ways you hadn’t imagined.
Key Takeaways
- Incorporate expansive sunrooms with floor-to-ceiling windows to maximize natural light and connect indoor spaces with nature.
- Design modern open-concept living areas that seamlessly blend indoor and outdoor spaces for enhanced connectivity and a harmonious atmosphere.
- Create cozy home offices using ergonomic furniture and minimalist storage solutions to optimize comfort and functionality while promoting productivity.
- Develop charming in-law suites featuring separate entrances and en-suite bathrooms for guest comfort and privacy, balancing sophistication with usability.
- Focus on enhancing brightness and airiness through natural ventilation and cohesive decor to create a warm and inviting environment.
Expansive Sunroom Retreats
When you envision your ideal home addition, consider how an expansive sunroom can transform your living space into a serene retreat.
Imagine floor-to-ceiling windows flooding the area with natural light, creating an inviting atmosphere.
Envision expansive windows that fill your sunroom with radiant light, crafting an atmosphere of warmth and welcome.
To enhance your sunroom decor, choose soft furnishings in earthy tones that complement the outdoors.
Incorporate sunroom plants like ferns, succulents, and tropical varieties to breathe life into the space and improve air quality.
Position them strategically for best sunlight, and use stylish pots that reflect your personal taste.
This combination of thoughtful decor and lush greenery will make your sunroom a peaceful sanctuary.
Modern Open-Concept Living Areas
In modern open-concept living areas, you’ll find a seamless flow between indoor and outdoor spaces, enhancing your home’s connectivity to nature.
Large glass doors and strategically placed windows maximize natural light, creating an inviting atmosphere that feels spacious and airy.
This design not only elevates aesthetics but also promotes a sense of well-being and harmony throughout your home.
Seamless Indoor-Outdoor Flow
Creating a seamless indoor-outdoor flow in your home not only enhances the aesthetic appeal but also maximizes your living space.
To achieve this, consider installing large sliding doors that effortlessly connect your living area to an outdoor patio or garden. These features invite natural light and fresh air, transforming your home into a tranquil retreat.
Incorporating indoor gardens can further enhance this connection, allowing you to enjoy greenery year-round.
Use consistent flooring materials to unify spaces and create visual continuity. This design approach fosters a sense of openness, making your home feel more expansive and integrated with nature.
Maximizing Natural Light
Emphasizing natural light in modern open-concept living areas not only enhances the ambiance but also fosters a welcoming atmosphere.
To achieve this, consider skylight installation for an overhead glow that brightens even the darkest corners. Pair this with window optimization; strategically place larger windows or sliding glass doors to maximize sunlight exposure.
Utilize reflective surfaces and light-colored materials to amplify brightness throughout the space. Incorporating these elements creates a harmonious environment where light flows freely, connecting your indoor and outdoor spaces.
With thoughtful planning, you can transform your home into a radiant haven that feels expansive and inviting.
Stylish Kitchen Extensions
While a kitchen extension can greatly enhance your home’s functionality and aesthetics, it also offers an opportunity to express your personal style.
Consider these stylish ideas to elevate your space:
- Bold kitchen color schemes: Choose rich navy cabinets paired with warm wood accents for a striking contrast.
- Innovative storage solutions: Install pull-out pantry shelves and hidden drawers to maximize space without sacrificing design.
- Open-concept layouts: Create a seamless flow between the kitchen and dining area, inviting conversation and connection.
These elements not only beautify your kitchen but also make it a practical hub for family and friends.
Cozy Home Offices
How can you transform a small corner of your home into a cozy office that inspires productivity and creativity? Start by integrating ergonomic furniture to enhance comfort during long working hours. Consider adding personal touches like artwork or plants to create a stimulating environment.
| Element | Description |
|---|---|
| Desk | Compact, stylish design |
| Chair | Adjustable, supportive seating |
| Lighting | Soft, adjustable brightness |
| Storage Solutions | Minimalist shelves and bins |
This setup fosters efficient remote workspaces, ensuring you stay focused and inspired throughout your day.
Elegant Master Suite Additions
Creating a serene and inviting master suite can elevate your home’s overall appeal while providing a personal retreat.
Imagine indulging in a space designed with:
- Luxurious amenities, such as a soaking tub and rainfall shower, creating a spa-like experience.
- Elegant decor, featuring soft color palettes and textured fabrics that promote relaxation.
- Private balconies that offer a peaceful outdoor escape, perfect for morning coffee or evening stargazing.
These elements not only enhance your comfort but also add significant value to your property.
Transform your master suite into a sanctuary where you can unwind and recharge after a long day.
Inviting Outdoor Living Spaces
What makes an outdoor space truly inviting? It’s all about creating a seamless blend of comfort and functionality.
Imagine designing an outdoor kitchen equipped with sleek appliances, ample counter space, and cozy seating for entertaining. Surround this area with lush greenery and ambient lighting to enhance the atmosphere.
For relaxation, consider serene patios adorned with plush furniture and soft textiles that beckon you to unwind. Incorporate features like fire pits or water elements to elevate the sensory experience.
Functional Mudrooms
While designing a functional mudroom, you’ll want to prioritize both organization and ease of use. Effective mudroom organization enhances your home’s efficiency, and smart storage solutions make it a welcoming passage space.
Consider incorporating:
- Built-in benches with hidden storage for shoes and bags, keeping the area clutter-free.
- Wall-mounted hooks for coats and accessories, providing easy access and reducing floor mess.
- Cubby shelves for sorting items, allowing each family member to have their designated space.
With these elements, your mudroom becomes a practical and stylish entryway that supports your daily routines effortlessly.
Versatile Basement Conversions
A well-organized mudroom sets the stage for maximizing the potential of your home, leading naturally to the often-underutilized space of your basement.
With a thoughtful basement layout, you can transform this area into anything from a cozy family room to a sleek home office.
Consider various conversion styles like a rustic retreat featuring reclaimed wood or a modern space with clean lines and vibrant colors.
Make certain you incorporate adequate lighting and ventilation to create an inviting atmosphere.
Charming In-Law Suites
Creating a charming in-law suite can greatly enhance your home’s functionality and appeal, especially when you want to provide a comfortable space for family members or guests.
To achieve in-law privacy and guarantee cozy accommodations, consider these design elements:
- Separate Entrance: A private entry allows your guests to come and go freely.
- Compact Kitchenette: A small kitchen area offers convenience for meal preparation.
- Stylish Bathroom: An en-suite bathroom adds luxury and privacy.
These features not only create a welcoming environment but also maintain independence, making your in-law suite a beloved addition to your home.
Bright and Airy Conservatories
When you’re considering a bright and airy conservatory, think about how natural light can transform your space.
Large glass panels not only invite sunlight but also create a seamless connection with your garden.
With stylish furnishing options, you can enhance the aesthetic while maintaining a functional retreat.
Natural Light Enhancement
Transforming your home with a conservatory can flood your space with natural light, making it feel bright and airy.
To enhance this effect, consider implementing these elements:
- Skylights: Allow sunlight to pour in from above, creating a warm, inviting atmosphere.
- Large Glass Panels: Use expansive windows to connect your indoor space with nature, offering breathtaking views.
- Light Color Palettes: Incorporate soft whites and pastel hues on walls and furnishings to reflect light and amplify brightness.
Additionally, integrate natural ventilation strategies, like operable windows, to maintain a fresh, lively environment in your new conservatory.
Stylish Furnishing Options
A bright and airy conservatory invites a unique opportunity for stylish furnishing that complements its natural light-filled design.
You can enhance the space with modern decor, focusing on clean lines and minimalist aesthetics. Incorporate creative upholstery in soft, breathable fabrics, like linen or cotton, to maintain an inviting atmosphere.
Consider a mix of textures with plush cushions and sleek furniture, creating a balance between comfort and sophistication. Use light colors to amplify the brightness, and add greenery for a revitalizing touch.
Ultimately, your choices should reflect a cohesive style that harmonizes with the serene ambiance of your conservatory.
Conclusion
By embracing these stunning design ideas for your home addition in Stafford, you’re not just enhancing your living space; you’re elevating your entire lifestyle. Whether you opt for a sun-drenched retreat or a cozy home office, each addition brings unique functionality and aesthetic appeal. Focus on cohesive styles and vibrant colors to guarantee your new space harmonizes with your home’s character. Ultimately, these enhancements will create a welcoming atmosphere that resonates with comfort and sophistication for you and your loved ones.

10 Local Contractors for Home Additions in Stoneham
If you’re considering a home addition in Stoneham, you’re in luck. There are skilled local contractors ready to help bring your vision to life. From personalized design consultations to innovative solutions, these experts offer a range of services tailored to your needs. Whether you’re after extra space or a stylish upgrade, you’ll want to know about the top ten contractors in the area and what they can do for your home.
Key Takeaways
- Apex Remodeling Solutions offers personalized design consultations and expert project management for seamless home addition transformations in Stoneham.
- New Horizons Builders specializes in custom home additions, providing personalized service and transparent pricing with no hidden costs.
- Stoneham Remodeling Experts focus on quality craftsmanship and the latest remodeling trends, ensuring client visions are realized with attention to detail.
- Innovative Home Solutions embraces sustainable design practices, incorporating eco-friendly materials and smart technology for modern home enhancements.
- Quality Craftsmanship Group combines innovative techniques with quality assurance, delivering durable and aesthetically pleasing home additions tailored to homeowner needs.
ABC Home Renovations
When it comes to home additions, ABC Home Renovations stands out as a trusted partner for homeowners.
You’ll appreciate their keen understanding of current renovation trends, ensuring your home design aligns with modern aesthetics and functionality.
Their insight into renovation trends guarantees your home design is both stylish and functional.
Their experienced team takes the time to listen to your ideas, transforming them into reality while maintaining a seamless workflow.
Whether you’re envisioning a new room or enhancing your existing space, ABC Home Renovations tailors each project to fit your needs and budget.
With their commitment to quality craftsmanship and attention to detail, you can feel confident in your decision to collaborate with them.
Stoneham Builders
When considering home additions, Stoneham Builders stands out as one of the top local contractors in the area.
You can expect quality construction services that prioritize both craftsmanship and your unique vision.
With their expertise, your project won’t only meet your needs but also enhance your home’s value.
Top Local Builders
Are you looking to expand your living space with a home addition? Choosing the right builder is vital for your project’s success.
In Stoneham, top local builders are well-versed in the latest construction trends and innovative home design techniques. They understand how to seamlessly integrate your addition with your existing space while maximizing functionality and aesthetic appeal.
By collaborating with experienced contractors, you can guarantee that your vision becomes a reality. These builders also prioritize quality materials and craftsmanship, so your investment stands the test of time.
Don’t settle for less; select a builder who truly understands your needs.
Quality Construction Services
Quality construction services are essential for ensuring that your home addition meets both your expectations and local building standards.
When you choose Stoneham builders, you get expert craftsmanship and a commitment to quality. They specialize in custom home designs tailored to your lifestyle, ensuring that every detail reflects your vision.
Additionally, prioritizing sustainable building practices, they utilize eco-friendly materials and energy-efficient techniques, benefiting both your wallet and the environment.
Elite Construction Services
If you’re looking to expand your living space, Elite Construction Services stands out as a top choice for home additions.
Their team is known for delivering elite craftsmanship, ensuring every project meets the highest standards. They utilize innovative techniques that not only enhance the aesthetic appeal but also improve functionality.
Whether you’re adding a new room or expanding your kitchen, they focus on your unique vision while maintaining structural integrity.
With a commitment to quality and customer satisfaction, you can trust them to turn your dreams into reality, making your home more spacious and inviting.
Choose Elite Construction for your next project.
Home Addition Pros
When you’re considering a home addition, choosing pros with expertise in design is essential for creating a space that fits your needs and style.
These specialists use quality construction materials to guarantee your addition lasts for years, adding value to your home.
Plus, they understand the importance of timely project completion, so you can enjoy your new space without unnecessary delays.
Expertise in Design
While you might’ve a vision for your home addition, translating that vision into a practical and aesthetically pleasing design requires expert knowledge.
Local contractors possess the skills to integrate current design trends with your unique style. They’ll help you optimize space, ensuring every square foot serves a purpose.
Their experience allows them to suggest innovative layouts that enhance functionality while maintaining visual appeal. By collaborating with professionals, you can avoid common pitfalls and create a seamless connection between your existing home and the new addition.
Trusting their expertise will turn your dream into a reality you’ll love for years to come.
Quality Construction Materials
Choosing the right construction materials is vital for any home addition project. By opting for sustainable materials, you not only enhance your home’s aesthetic but also contribute to environmental preservation.
For instance, reclaimed wood or recycled steel can elevate your design while minimizing waste. Additionally, prioritizing construction safety is essential; using high-quality, durable materials guarantees your addition withstands the test of time.
Always consult with your contractor about the best options available for your specific needs, as they can provide insights into materials that offer both sustainability and safety.
Making informed choices will lead to a successful and lasting home addition.
Timely Project Completion
Timely project completion is essential for any home addition, as it not only minimizes disruption to your daily life but also helps you stick to your budget.
To guarantee your project stays on track, focus on these key aspects:
- Timely Communication: Regular updates from your contractor keep you informed.
- Project Scheduling: A well-structured timeline helps manage expectations.
- Flexibility: Be ready to adapt to unexpected delays while maintaining progress.
- Check-ins: Schedule frequent progress reviews to address any issues promptly.
Dream Space Contractors
When you’re ready to transform your home into the dream space you’ve always envisioned, Dream Space Contractors can turn that vision into reality.
They specialize in innovative dream space ideas that cater to your unique needs and preferences. Whether you want an expanded living area or a cozy reading nook, their team excels in space optimization, ensuring every square foot serves a purpose.
With a keen eye for detail and a commitment to quality, Dream Space Contractors will guide you through the entire process, from initial consultation to final touches.
With meticulous attention to detail and a dedication to excellence, Dream Space Contractors will accompany you every step of the way.
Your dream space is just a project away!
Quality Craftsmanship Group
If you’re looking for impeccable craftsmanship that stands the test of time, the Quality Craftsmanship Group is your go-to partner for home additions.
They combine innovative craftsmanship techniques with rigorous quality assurance to guarantee your project exceeds expectations.
Here are four reasons to choose them:
- Skilled Artisans: Their experts bring years of experience to every project.
- Custom Designs: They tailor each addition to fit your unique style and needs.
- Durability Focus: They use only high-quality materials for lasting results.
- Transparent Communication: You’ll always be informed throughout the process.
Transform your home with confidence!
Apex Remodeling Solutions
When considering home additions, Apex Remodeling Solutions stands out with a wide range of services tailored to your needs.
Their extensive project experience and expertise guarantee that your vision is executed with precision and care.
You can trust Apex to transform your space while maintaining high standards of quality and craftsmanship.
Services Offered by Apex
Apex Remodeling Solutions offers an extensive range of services tailored to transform your living space through home additions.
With a keen eye on current home addition trends and design inspiration, you can trust Apex to bring your vision to life.
They provide:
- Custom design consultations to align with your style.
- Expert construction services ensuring quality and durability.
- All-encompassing project management for seamless execution.
- Energy-efficient solutions that enhance comfort and sustainability.
Project Experience and Expertise
With a proven track record in home additions, Apex Remodeling Solutions brings a wealth of project experience and expertise to every renovation.
You’ll benefit from their meticulous project management, ensuring timelines and budgets stay on track.
Their team excels in providing personalized design consultations, helping you visualize your dream space while considering functionality and style.
They’ve tackled various projects, from expanding kitchens to creating cozy family rooms, each tailored to meet your unique needs.
With Apex, you’re not just getting a contractor; you’re gaining a partner dedicated to transforming your home into the perfect oasis.
Experience the difference today!
New Horizons Builders
New Horizons Builders stands out among local contractors specializing in home additions, offering a blend of expertise and personalized service that turns your vision into reality.
They prioritize your needs while maneuvering through the complexities of home design and securing building permits efficiently.
Here’s what you can expect:
- Customized Design: Tailored solutions that align with your lifestyle.
- Expert Guidance: Knowledgeable staff to assist you through every step.
- Timely Project Completion: Adherence to schedules without compromising quality.
- Transparent Pricing: Clear estimates that guarantee no hidden costs.
With New Horizons Builders, your dream home addition is within reach!
Stoneham Remodeling Experts
If you’re looking to enhance your living space, Stoneham Remodeling Experts offers impressive solutions tailored to your specific needs.
With a keen eye for stoneham design, they stay ahead of the curve by incorporating the latest remodeling trends.
Whether you’re dreaming of an open-concept kitchen or a luxurious bathroom retreat, their skilled team assures quality craftsmanship and attention to detail.
They’ll collaborate closely with you, ensuring your vision comes to life seamlessly.
By choosing Stoneham Remodeling Experts, you’re investing in not just a project, but a transformation that elevates your home’s aesthetic and functionality.
Experience the difference today!
Innovative Home Solutions
As you explore ways to enhance your home, innovative solutions can transform ordinary spaces into extraordinary ones.
Embracing sustainable design and modern aesthetics not only boosts your home’s appeal but also aligns with eco-friendly practices.
Consider these innovative ideas:
- Green Roofs: Enhance insulation and promote biodiversity.
- Smart Home Technology: Improve efficiency and convenience.
- Modular Furniture: Maximize space while maintaining style.
- Natural Materials: Use reclaimed wood or bamboo for a stylish, eco-friendly touch.
Conclusion
When it comes to home additions in Stoneham, you have a wealth of talented contractors at your fingertips. From Apex Remodeling Solutions’ personalized approach to New Horizons Builders’ focus on transparency, each option offers unique strengths to suit your needs. Whether you’re looking for innovative designs or sustainable materials, these local experts are ready to transform your living space. Don’t hesitate to reach out and start your journey toward creating the perfect home addition today!

What Benefits Can You Expect From a Home Addition Value Calculator?
When considering a home addition, a value calculator can be an essential tool for you. It provides accurate valuation estimates, helping you understand how much value your renovations could add to your property. By analyzing local market trends, you can align your improvements with buyer expectations. This data-driven approach aids in budgeting and prioritizing projects, ensuring that you make informed decisions. But how exactly can these insights influence your renovation strategy?
Key Takeaways
- Provides accurate valuation estimates to help homeowners understand potential home worth post-addition.
- Supports informed decision-making by assessing projected costs against potential returns effectively.
- Helps identify essential features that enhance functionality and overall property value.
- Aids in navigating local market trends to ensure alignment with buyer preferences and property appreciation rates.
- Reduces the risk of costly mistakes by offering data-driven insights into home renovations.
Accurate Valuation Estimates
Accurate valuation estimates are essential for homeowners considering a home addition, as they directly influence investment decisions.
You need to guarantee calculation accuracy to avoid overestimating costs or undervaluing potential returns. Various valuation methodologies, such as the cost approach or the sales comparison approach, can provide different insights into your home’s worth post-addition.
Understanding Local Market Trends
To make informed decisions about your home addition, you need to analyze current property values in your area.
Understanding how neighborhood demand influences these values can greatly impact your return on investment.
Current Property Values
Understanding current property values is essential for homeowners considering a home addition, as local market trends directly impact these valuations.
To make informed decisions, you should analyze property appreciation rates in your area, which often reflect broader economic conditions.
Pay attention to recent market fluctuations, as these can greatly affect your home’s value post-addition.
By tracking comparable properties and evaluating their appreciation, you’ll gain insights into potential returns on your investment.
Utilizing a home addition value calculator can further refine your understanding, helping you navigate the complexities of property values in a dynamic market.
Neighborhood Demand Analysis
As you evaluate your options for a home addition, analyzing neighborhood demand can provide critical insights into how local market trends might influence your investment.
Understanding market competition in your area helps you identify what features potential buyers prioritize. By examining recent sales data, you can gauge buyer preferences and determine which upgrades will yield the highest return.
Additionally, evaluating the availability of similar properties can reveal if your addition will stand out or blend in. This data-driven approach allows you to make informed decisions, ensuring that your investment aligns with current market dynamics and future buyer expectations.
Budgeting for Your Project
When budgeting for your home addition, it’s vital to accurately estimate project costs based on materials, labor, and unforeseen expenses.
Prioritizing essential features can help you allocate your budget effectively, ensuring that you invest in elements that enhance both functionality and value.
A well-structured budget not only keeps your project on track but also maximizes your return on investment.
Estimating Project Costs
Estimating project costs accurately is essential for any home addition, as it sets the foundation for your budgeting process.
A detailed cost breakdown helps you identify all necessary expenses, from materials to labor, ensuring you’re prepared for financial commitments. By analyzing data on similar projects, you can predict expenses more reliably.
Additionally, incorporating a project timeline into your estimate allows you to account for potential delays and extra costs, which often arise in construction.
This thorough approach not only keeps your budget on track but also empowers you to make informed decisions throughout the home addition process.
Prioritizing Essential Features
After you’ve established an extensive budget for your home addition, the next step involves identifying which features are most important to you. Feature prioritization helps focus your spending on essential features that enhance your home’s value and livability.
| Feature | Importance Level | Estimated Cost |
|---|---|---|
| Expanded Kitchen | High | $25,000 |
| Additional Bedroom | Medium | $20,000 |
| Home Office Space | Low | $15,000 |
Prioritizing Home Improvements
Although many homeowners envision extensive renovations, prioritizing home improvements based on potential value and necessity can lead to more strategic investments.
Implementing effective home improvement strategies requires a keen understanding of project prioritization. Start by evaluating which upgrades will yield the highest return on investment—such as kitchen remodels or bathroom upgrades.
Additionally, consider your family’s current needs and future plans. By analyzing market trends and property values, you can allocate your budget wisely, ensuring that each project enhances both your living experience and your home’s overall worth.
Focus on essential improvements to maximize your investment and satisfaction.
Enhancing Resale Potential
When contemplating home improvements, it’s essential to focus not just on current needs but also on how those changes will affect your home’s resale potential.
Effective resale strategies hinge on understanding market timing and buyer preferences. For instance, adding square footage or modern amenities can greatly boost your home’s appeal.
Identifying High-Value Additions
Identifying high-value additions can greatly impact your home’s overall worth, especially when you leverage data to guide your decisions.
Focus on integrating functional spaces that enhance livability, such as additional bedrooms or expanded kitchens. These improvements often yield better returns than luxury upgrades, which can be subjective and vary by market.
For instance, a finished basement can provide versatile space for recreation or storage, appealing to a broader range of buyers.
Comparing Costs and Returns
Understanding the potential returns on your investment is essential once you’ve identified high-value additions to your home. Conducting a cost benefit analysis allows you to compare project costs against expected returns, helping you set realistic return expectations.
For instance, if a kitchen remodel costs $30,000 but could increase your home’s value by $20,000, you need to weigh that against other options. By analyzing various addition scenarios, you can pinpoint which projects yield the best financial returns.
This data-driven approach empowers you to make informed decisions, ensuring that your investment aligns with your overall financial goals and home improvement strategy.
Supporting Decision-Making With Data
While the emotional appeal of home improvements can be strong, data-driven decision-making is essential for maximizing your investment’s potential.
By utilizing a home addition value calculator, you can make data-driven choices that align with your financial goals. This tool allows you to evaluate projected costs against potential returns, enabling you to make informed investments.
You’ll gain insights into which additions yield the highest value, helping you avoid costly mistakes. Ultimately, relying on data empowers you to confidently navigate the complexities of home renovations, ensuring that every dollar spent contributes meaningfully to your property’s overall worth.
Conclusion
Incorporating a home addition value calculator into your renovation planning empowers you with data-driven insights that can greatly impact your investment. By accurately estimating potential returns and aligning your projects with local market trends, you can make informed decisions that enhance your home’s value. Prioritizing high-value improvements not only maximizes your budget but also supports your long-term financial goals. Ultimately, leveraging this tool guarantees that your renovation efforts yield the best possible outcomes for both functionality and resale potential.
Step-by-Step Guide for Basement Waterproofing in Minot to Protect Your Home
If you’re a homeowner in Minot, waterproofing your basement is essential for maintaining the integrity of your property. Moisture issues can lead to serious damage, including mold growth and structural concerns. Start by evaluating your basement’s current condition and identifying any signs of trouble. Understanding the specific waterproofing methods suitable for your situation is critical. Let’s explore how to effectively prepare your basement and apply the right solutions.
Key Takeaways
- Inspect your basement for water damage, mold, and drainage issues to identify potential waterproofing needs.
- Choose appropriate waterproofing methods based on your basement’s specific moisture challenges and construction type.
- Prepare the space by clearing clutter, sealing cracks, and ensuring proper drainage around the foundation.
- Install chosen waterproofing solutions, such as sealants or sump pumps, to effectively combat moisture.
- Maintain your waterproofed basement by conducting regular inspections and monitoring humidity levels to prevent future issues.
Understanding the Importance of Basement Waterproofing
When you consider the long-term health of your home, understanding the importance of basement waterproofing becomes vital.
The benefits of waterproofing extend beyond preventing water damage; it enhances air quality, prevents mold growth, and increases your property’s value.
Many homeowners fall prey to common misconceptions, believing that waterproofing is unnecessary if they don’t see visible leaks.
However, even minor moisture can lead to significant structural issues over time.
Assessing Your Basement’s Current Condition
To effectively assess your basement’s current condition, start by inspecting for any signs of water damage, such as stains or warped surfaces.
Next, check for mold growth, which can indicate excess moisture and pose health risks.
Finally, evaluate your drainage systems to guarantee they’re functioning properly and directing water away from your foundation.
Inspect for Water Damage
Many homeowners overlook the signs of water damage in their basements, but a thorough inspection is essential for maintaining a dry and healthy space.
Start by examining walls, floors, and corners for discoloration, peeling paint, or dampness. These water damage signs indicate potential problems.
Pay attention to water stains or mold growth, as these often signal leaks or humidity issues.
Also, check for cracks in the foundation, which are common water damage causes.
Don’t forget to inspect around windows and doors for any gaps where moisture can seep in.
Addressing these issues early can save you from costly repairs later.
Check for Mold Growth
How can you guarantee your basement remains a safe and healthy environment? Start by checking for mold growth, as it can severely impact indoor air quality.
Inspect corners, walls, and any damp areas for discoloration or musty odors. Use mold prevention techniques, like ensuring proper ventilation and controlling humidity levels, to mitigate potential issues.
If you spot mold, address it immediately with appropriate cleaning solutions or seek professional help. Regularly monitor your basement for signs of moisture and act swiftly to maintain a mold-free environment.
Protect your home and health by staying proactive in mold prevention.
Evaluate Drainage Systems
What methods are you using to evaluate your basement’s drainage systems?
Start by inspecting the gutters and downspouts for blockages and guarantee they direct water away from your foundation.
Next, assess the grading around your home; it should slope away to facilitate proper water flow.
Examine any existing sump pumps to confirm they’re operational and properly installed.
Additionally, check for any signs of standing water or leaks, as these indicate drainage issues.
Finally, consider using a drainage system inspection camera to identify hidden problems in underground pipes.
Addressing these elements helps you guarantee effective water management in your basement.
Choosing the Right Waterproofing Methods
While selecting the right waterproofing methods for your basement, it’s essential to take into account factors like the specific moisture challenges your space faces and the type of construction.
Evaluate advanced waterproofing technology options, such as liquid membranes or exterior drainage systems, to effectively counteract water intrusion.
Explore innovative waterproofing technologies like liquid membranes and exterior drainage systems to combat water intrusion effectively.
Consider using interior solutions like sealants or sump pumps, particularly if you’re dealing with minor leaks.
Additionally, guarantee proper basement insulation to maintain temperature control and prevent condensation.
Tailor your approach based on the unique characteristics of your basement to guarantee a long-lasting, effective waterproofing solution that protects your home.
Preparing Your Basement for Waterproofing
Before you begin the waterproofing process, preparing your basement is an essential step that can greatly influence the effectiveness of your chosen methods.
Focus on these key areas for basement organization and moisture control:
- Clear out all clutter and unnecessary items.
- Inspect for any signs of leaks or water damage.
- Confirm proper drainage by checking gutters and downspouts.
- Seal cracks in walls and floors to prevent moisture entry.
- Create a moisture barrier using plastic sheeting if needed.
Taking these steps will set a solid foundation for successful waterproofing, guaranteeing your home stays dry and protected in the long run.
Applying Waterproofing Solutions
Before you apply any waterproofing solutions, make certain your surface is properly prepared.
This involves cleaning, patching, and drying the walls and floor to create an ideal bond.
Once that’s done, you’ll need to select the right waterproofing products tailored to your specific basement conditions.
Surface Preparation Techniques
To achieve effective waterproofing in your basement, proper surface preparation is essential, as it directly impacts the adhesion and performance of the applied solutions.
Start with thorough surface cleaning to remove dirt, dust, and mold. Next, focus on crack sealing to prevent water intrusion.
Here are key steps to follow:
- Inspect for cracks and damage
- Clean surfaces with a pressure washer or scrub brush
- Fill and seal any cracks with appropriate sealant
- Allow surfaces to dry completely before applying solutions
- Guarantee a smooth, even surface for peak adhesion
These steps will set the foundation for successful waterproofing.
Selecting Waterproofing Products
When it comes to selecting waterproofing products, understanding the specific needs of your basement is essential for achieving lasting results. You’ll find various product types tailored for different conditions, such as sealants, membranes, and coatings. Evaluating application techniques like brush-on, spray, or roll-on methods can notably impact performance.
| Product Type | Application Technique | Key Benefits |
|---|---|---|
| Sealants | Brush-on | Fills cracks, easy to use |
| Membranes | Roll-on | Provides a barrier, durable |
| Coatings | Spray | Quick application, flexible |
| Drainage Systems | Installation | Redirects water, prevents flooding |
Maintaining Your Waterproofed Basement
Although you’ve successfully waterproofed your basement, ongoing maintenance is essential to confirm it remains dry and protected from future water intrusion.
Ongoing maintenance is vital to keep your waterproofed basement dry and safe from future water issues.
Regular post waterproofing maintenance guarantees effective basement humidity control and early detection of potential issues.
Here are key tasks to keep in mind:
- Inspect and clean gutters and downspouts
- Check for cracks in walls or floors and seal them
- Monitor humidity levels with a hygrometer
- Test sump pump functionality regularly
- Ensure proper landscaping to divert water away
Conclusion
By following this step-by-step guide, you can effectively waterproof your basement in Minot and protect your home from moisture damage. Regular assessments and maintenance will guarantee your efforts remain effective over time. Remember, it’s not just about applying waterproofing solutions; it’s also about proper drainage and humidity control. Stay proactive in monitoring your basement’s condition, and you’ll create a dry, safe environment that enhances your home’s longevity and value.
Costs of Basement Waterproofing in Kitchener?
When considering basement waterproofing in Kitchener, it’s essential to understand the varying costs involved. Your expenses can range from $2,000 to $10,000, depending on factors like water damage severity and the waterproofing methods you choose. Each method has its own price tag, with exterior excavation typically being more expensive. Knowing what influences these costs can help you make informed decisions, but there’s much more to explore regarding the best practices and options available.
Key Takeaways
- Basement waterproofing costs in Kitchener typically range from $2,000 to $10,000, depending on the extent of water damage and chosen methods.
- Exterior excavation methods are generally more expensive than interior sealants, affecting overall pricing.
- Additional costs may include permit fees, quality of materials, and professional labor charges.
- DIY waterproofing can reduce upfront costs but may lead to future expenses from potential mistakes.
- Consulting local professionals can provide tailored estimates and insights on specific needs in Kitchener.
Understanding Basement Waterproofing
When you think about basement waterproofing, it’s essential to understand that this process involves preventing water from entering your basement, which can lead to structural damage and mold growth.
Managing basement moisture is vital; excessive dampness can compromise your home’s integrity. By implementing effective waterproofing techniques, you can experience significant waterproofing benefits, such as increased property value, enhanced air quality, and a healthier living environment.
Methods like exterior drainage systems, interior sealants, and sump pumps can effectively reduce water intrusion. Addressing these issues proactively not only safeguards your home but also contributes to long-term peace of mind.
Factors Influencing Waterproofing Costs
Several key factors influence the costs of basement waterproofing, each contributing to the overall expense you might incur. These elements include the extent of water damage, the type of materials used, and the installation timing, which can affect labor costs. Additionally, a cost comparison between DIY and professional services can considerably impact your budget.
| Factor | Impact on Cost |
|---|---|
| Extent of Damage | Higher repair costs |
| Material Quality | Varies widely |
| Labor Type | DIY vs. Professional |
| Installation Timing | Seasonal price changes |
Types of Waterproofing Methods
When it comes to waterproofing your basement, you’ll encounter various methods tailored to different needs.
Interior waterproofing solutions focus on sealing and managing moisture within the space, while exterior waterproofing techniques address water intrusion from outside.
Additionally, drainage system options play a critical role in directing water away from your foundation, ensuring long-term protection.
Interior Waterproofing Solutions
Interior waterproofing solutions are essential for preventing moisture intrusion and damage in basements. By effectively managing interior humidity, you can greatly reduce the risk of water damage. Here are some common methods:
| Method | Description | Pros |
|---|---|---|
| Interior Sealants | Coatings applied to walls and floors | Simple application |
| Sump Pumps | Pumps that remove water accumulation | Effective for high water |
| Drainage Systems | Internal drains directing water away | Reduces flooding risk |
| Dehumidifiers | Devices that lower humidity levels | Improves air quality |
| Vapor Barriers | Sheets that block moisture ingress | Cost-effective solution |
Exterior Waterproofing Techniques
Exterior waterproofing techniques are essential for protecting your basement from water intrusion and structural damage.
By implementing these methods, you can effectively manage moisture levels and enhance your home’s longevity:
- Exterior drainage systems to redirect water away from your foundation.
- Landscape grading that slopes away from your home, preventing water accumulation.
- Waterproof membranes applied to your foundation walls, providing a protective barrier.
These solutions not only safeguard your basement but also improve your property’s overall health.
Drainage System Options
While various waterproofing methods exist, selecting the right drainage system is crucial for effective basement protection.
You’ll find several drainage system types, including interior and exterior systems. Interior systems involve sump pumps and perforated drains, collecting and redirecting water from within.
Exterior systems typically consist of French drains and weeping tiles, installed around your foundation to divert water away.
Proper drainage system installation guarantees efficient water management, preventing moisture buildup and potential structural damage.
Assess your specific needs and consult with professionals to determine which option best suits your basement, guaranteeing long-lasting protection against water intrusion.
Average Cost Estimates for Kitchener
When considering basement waterproofing in Kitchener, it’s essential to understand the factors influencing costs, such as the extent of water damage and the chosen waterproofing method.
Typically, you can expect price ranges that vary based on these elements, with some projects costing as little as $2,000 and others exceeding $10,000.
Knowing these estimates helps you budget effectively and make informed decisions.
Factors Influencing Costs
Understanding the costs of basement waterproofing in Kitchener involves considering several key factors that can greatly impact your overall expenditure.
- Extent of water damage: The more severe the damage, the higher the costs for repairs and waterproofing.
- Basement humidity levels: High humidity may necessitate additional dehumidification systems, increasing your budget.
- Type of waterproofing method: Interior vs. exterior systems can vary considerably in price and effectiveness.
Typical Price Ranges
Basement waterproofing costs in Kitchener typically range from $2,000 to $10,000, depending on various factors such as the severity of water damage and the chosen waterproofing method.
For instance, exterior excavation methods are often pricier than interior sealants. You should also consider that basement moisture levels can indicate underlying issues, which may drive costs up.
Beware of waterproofing myths; not all products guarantee complete protection or longevity.
It’s crucial to consult professionals who can provide accurate estimates tailored to your specific situation, ensuring you invest wisely in protecting your home from potential water damage.
Cost Breakdown by Method
While various methods exist for waterproofing, each comes with its own cost implications that can greatly affect your decision-making process.
Understanding the cost comparison between these methods is essential for evaluating their effectiveness.
- Interior Sealants: Typically less expensive, but may require frequent application.
- Exterior Excavation: Higher upfront costs, but offers long-term protection and durability.
- Drainage Systems: Moderate costs with effective moisture control, ensuring method effectiveness.
Additional Costs to Consider
When planning your basement waterproofing project, you’ll need to factor in additional costs that can greatly impact your budget.
Permit fees and regulations may be required by your local municipality, while the quality of materials you choose can affect both durability and price.
Additionally, hiring professional labor can vary in cost depending on the expertise and availability of contractors in your area.
Permit Fees and Regulations
Maneuvering the complexities of permit fees and regulations is essential before commencing any basement waterproofing project, as local laws often dictate necessary approvals.
You’ll need to familiarize yourself with permit requirements and zoning regulations specific to Kitchener.
- Application fees can vary considerably based on project scope.
- Inspection costs may arise, ensuring compliance with building codes.
- Timeline delays can occur if permits aren’t processed promptly.
Material Quality Differences
After securing necessary permits, the next essential factor in basement waterproofing involves understanding the differences in material quality, which can greatly impact overall costs.
Higher-quality materials often offer better material durability, resisting moisture and preventing future issues. However, this enhanced durability comes with price variations that can markedly affect your budget.
For instance, investing in premium waterproofing membranes or advanced drainage systems may seem costly upfront but can save you money on repairs down the line.
Weighing the long-term benefits against initial expenses is vital for making an informed decision that balances quality and affordability in your project.
Professional Labor Costs
While choosing high-quality materials is essential, you can’t overlook the impact of professional labor costs on your basement waterproofing project. Labor rates can vary considerably based on the contractor’s experience, which influences the overall price.
A skilled contractor not only guarantees proper installation but also reduces future issues.
- Expertise in waterproofing techniques
- Efficient project timelines
- Reliable warranty coverage
Investing in experienced labor may seem costly upfront, but it often leads to long-term savings and peace of mind.
Make certain to balance material costs with professional labor to achieve the best results for your basement waterproofing needs.
DIY vs. Professional Waterproofing
When considering basement waterproofing, you’ll face a choice between tackling the project yourself or hiring a professional.
DIY advantages include lower costs and the ability to learn valuable skills. However, consider the time investment; waterproofing properly can take significant effort and may not yield the best results without experience.
On the other hand, professional expertise guarantees that the job is done right, often providing warranties and peace of mind.
Cost comparisons between DIY and professional services reflect potential savings against the risk of future issues.
Ultimately, weigh your skills, time, and budget before making a decision.
Long-Term Savings From Waterproofing
Investing in basement waterproofing can lead to significant long-term savings that often outweigh the initial costs.
Investing in basement waterproofing offers lasting savings that often surpass the initial expenses.
By preventing moisture issues, you’ll enhance your home’s energy efficiency and ultimately increase your property’s value.
Consider these benefits:
- Lower energy bills due to improved insulation and reduced humidity.
- Increased lifespan of your foundation and structural components.
- Higher resale value, attracting potential buyers looking for a well-maintained property.
These long-term advantages not only protect your investment but also provide peace of mind, knowing that your home is secure against water damage and its associated costs.
Choosing the Right Contractor
Selecting the right contractor for basement waterproofing is essential to ensuring the job is done effectively and lasts for years.
Start by evaluating contractor qualifications, including licenses, insurance, and experience in waterproofing projects. A well-qualified contractor will provide a detailed plan and timeline for your project.
Don’t forget to check customer reviews; they offer valuable insights into the contractor’s reliability and quality of work. Look for consistent positive feedback and be cautious of red flags.
Financing Options for Basement Waterproofing
How can you manage the costs of basement waterproofing without breaking the bank?
Exploring financing options and payment plans can ease the financial burden. Here are some solutions to contemplate:
- Home equity loans: Tap into your property’s value for necessary funds.
- Personal loans: Secure a loan with a fixed interest rate for predictable payments.
- Contractor financing: Some companies offer tailored payment plans, allowing you to pay over time.
Conclusion
In summary, investing in basement waterproofing in Kitchener is essential for protecting your property from water damage. By understanding the various factors influencing costs and comparing different methods, you can make informed decisions. Whether you opt for DIY solutions or hire professionals, guarantee you choose a reliable contractor to achieve long-lasting results. Don’t forget to explore financing options to manage your budget effectively, ultimately safeguarding your home and enhancing its value.

Best Local Contractors for Basement Waterproofing in Cape Cod
When it comes to basement waterproofing in Cape Cod, finding the right contractor is essential for protecting your home. You’ll want to take into account their experience, customer feedback, and whether they’re licensed and insured. Tailored solutions for local humidity and rainfall issues can make a big difference. So, what should you look for in a contractor to guarantee your basement stays dry and safe? Let’s explore the key factors that can help you make the best choice.
Key Takeaways
- Research local contractors with verified licensing and insurance to ensure protection against potential issues during basement waterproofing projects.
- Look for contractors with extensive experience specifically in basement waterproofing to address unique challenges in Cape Cod’s humid climate.
- Request detailed estimates that include materials, labor, and potential additional costs for unforeseen issues like mold removal.
- Consult with multiple contractors to compare services offered, such as interior and exterior waterproofing solutions tailored to your home’s needs.
- Check online reviews and testimonials to gauge customer satisfaction and the effectiveness of previous waterproofing projects completed by local contractors.
Understanding Basement Waterproofing Needs in Cape Cod
When it comes to basement waterproofing in Cape Cod, how do you know what your specific needs are? Start by considering the regional climate, which often brings humidity and heavy rainfall.
Examining moisture control is essential; you’ll want to identify potential sources of water intrusion. Check for cracks in your foundation, poor drainage systems, or inadequate ventilation.
Understanding these factors helps you determine whether you need interior solutions like sump pumps or exterior methods such as drainage systems.
Key Factors to Consider When Choosing a Contractor
When you’re choosing a contractor for basement waterproofing, there are a few key factors to keep in mind.
Check their licensing and insurance status to guarantee you’re protected, and look into their experience and expertise to gauge their ability.
Don’t forget to ask about warranty and service options, as these can save you from future headaches.
Licensing and Insurance Status
While maneuvering through the process of choosing a contractor for basement waterproofing, it’s crucial to reflect on their licensing and insurance status.
Verify the contractor qualifications to confirm they meet local regulations and industry standards. A valid license indicates professionalism and accountability.
Additionally, check their insurance requirements; a reputable contractor should carry liability and workers’ compensation insurance. This protects you from potential liabilities during the project.
Don’t hesitate to ask for proof of both licensing and insurance before making your decision.
Taking these steps guarantees you’re hiring a qualified contractor who prioritizes your safety and peace of mind.
Experience and Expertise Levels
Choosing the right contractor for basement waterproofing hinges greatly on their experience and expertise levels. You want someone with solid contractor qualifications and significant project experience. This guarantees they can handle any challenges your basement might present.
| Experience Level | Qualifications | Project Types |
|---|---|---|
| 1-3 Years | Basic Training | Residential Repairs |
| 4-6 Years | Certification | Commercial Projects |
| 7+ Years | Advanced Skills | Complex Installations |
| 10+ Years | Expert Status | Custom Solutions |
| All Levels | Insurance | Extensive Services |
Make an informed choice for lasting results!
Warranty and Service Options
A solid warranty and reliable service options are crucial elements to take into account as you evaluate potential contractors for your basement waterproofing project.
Look for contractors offering extensive warranty options that cover both materials and labor, ensuring you’re protected if issues arise. It’s also essential to inquire about service guarantees; a contractor who stands by their work shows confidence in their skills.
Always read the fine print to understand what’s included and excluded. By prioritizing these factors, you’ll make a more informed decision and enjoy peace of mind knowing your basement is protected for years to come.
Top Local Contractors for Basement Waterproofing
Finding the right contractor for basement waterproofing can make all the difference in protecting your home from moisture damage.
You’ll want to seek local contractor recommendations from friends or online reviews to guarantee you’re choosing a reliable expert.
Look for contractors who are up-to-date with waterproofing technology advancements, as this can greatly improve the effectiveness of their solutions.
Many of the top local contractors offer tailored services that address your specific needs, so don’t hesitate to ask questions and discuss your concerns.
Services Offered by Waterproofing Contractors
When it comes to basement waterproofing, contractors offer a range of essential services to keep your space dry.
You’ll find interior waterproofing solutions that effectively manage moisture inside your home, as well as exterior drainage systems designed to prevent water from entering your basement in the first place.
Understanding these options can help you choose the right approach for your needs.
Interior Waterproofing Solutions
While basement waterproofing might seem challenging, many local contractors offer effective interior solutions tailored to keep your home dry and protected.
One popular method is installing interior drainage systems, which collect and redirect water away from your basement. These systems work in tandem with moisture barriers, preventing dampness from seeping through walls and floors.
Contractors can also apply specialized coatings to enhance your basement’s defenses against moisture.
With these interior waterproofing solutions, you’ll not only safeguard your home but also improve its overall comfort and value.
Trust local experts to customize these strategies for your specific needs.
Exterior Drainage Systems
Interior waterproofing solutions lay a solid foundation for keeping your basement dry, but to tackle water issues at their source, exterior drainage systems are key.
These systems play a crucial role in effective water management by redirecting surface water away from your home. A well-thought-out drainage design includes elements like French drains, downspout extensions, and grading adjustments to guarantee peak performance.
By investing in exterior drainage, you’re not only protecting your basement but also enhancing your property’s overall value.
Consult local waterproofing contractors to create a tailored plan that meets your specific needs and keeps your basement dry for years to come.
Customer Reviews and Testimonials
Customer reviews and testimonials provide invaluable insights into the reliability and effectiveness of local contractors for basement waterproofing.
When you read about others’ experiences, you’ll gauge customer satisfaction and understand the potential project outcomes. Look for patterns in feedback regarding responsiveness, quality of work, and overall professionalism.
Positive reviews often highlight timely completions and exceptional service, while negative ones can reveal red flags to avoid.
Cost Estimates and Budgeting for Waterproofing
Understanding cost estimates and budgeting for basement waterproofing is essential, as it helps you plan effectively and avoid unexpected expenses.
Effective planning and budgeting for basement waterproofing can prevent unexpected expenses and ensure a successful project.
A detailed cost breakdown can give you clarity on what to expect. When budgeting, consider these key factors:
- Initial Inspection Fees: Evaluating your basement’s condition.
- Materials Costs: Waterproofing products and supplies needed.
- Labor Expenses: Hiring experienced contractors.
- Potential Additional Costs: Unforeseen issues like mold removal.
Maintaining Your Waterproofed Basement
Once you’ve invested time and resources into waterproofing your basement, maintaining that protective barrier is key to guaranteeing long-term effectiveness. Here are some essential basement maintenance tips to keep your space dry and protected:
| Action Item | Frequency | Notes |
|---|---|---|
| Inspect for cracks | Monthly | Fill cracks promptly |
| Check drainage systems | Biannually | Guarantee proper flow |
| Review waterproofing products | Annually | Replace as needed |
The Importance of Regular Inspections and Upkeep
Regular inspections and upkeep are essential for guaranteeing your basement remains a dry, functional space.
By prioritizing preventive maintenance, you can catch issues early and save money in the long run. Here’s why you should stay on top of your inspection frequency:
- Detect leaks before they worsen.
- Identify signs of mold or mildew.
- Assess the effectiveness of your waterproofing system.
- Guarantee proper drainage and ventilation.
Taking these proactive steps not only protects your investment but also enhances the overall comfort of your home.
Don’t wait for problems to arise—make inspections a regular part of your home maintenance routine!
Conclusion
Choosing the right contractor for basement waterproofing in Cape Cod is essential for protecting your home. By focusing on experience, customer feedback, and tailored solutions, you’ll guarantee your basement stays dry and comfortable. Don’t forget to discuss warranties and maintenance options to safeguard your investment. Regular inspections will help you maintain your waterproofed space and prolong its effectiveness. With the right contractor, you can enhance your home’s safety, comfort, and value for years to come.