
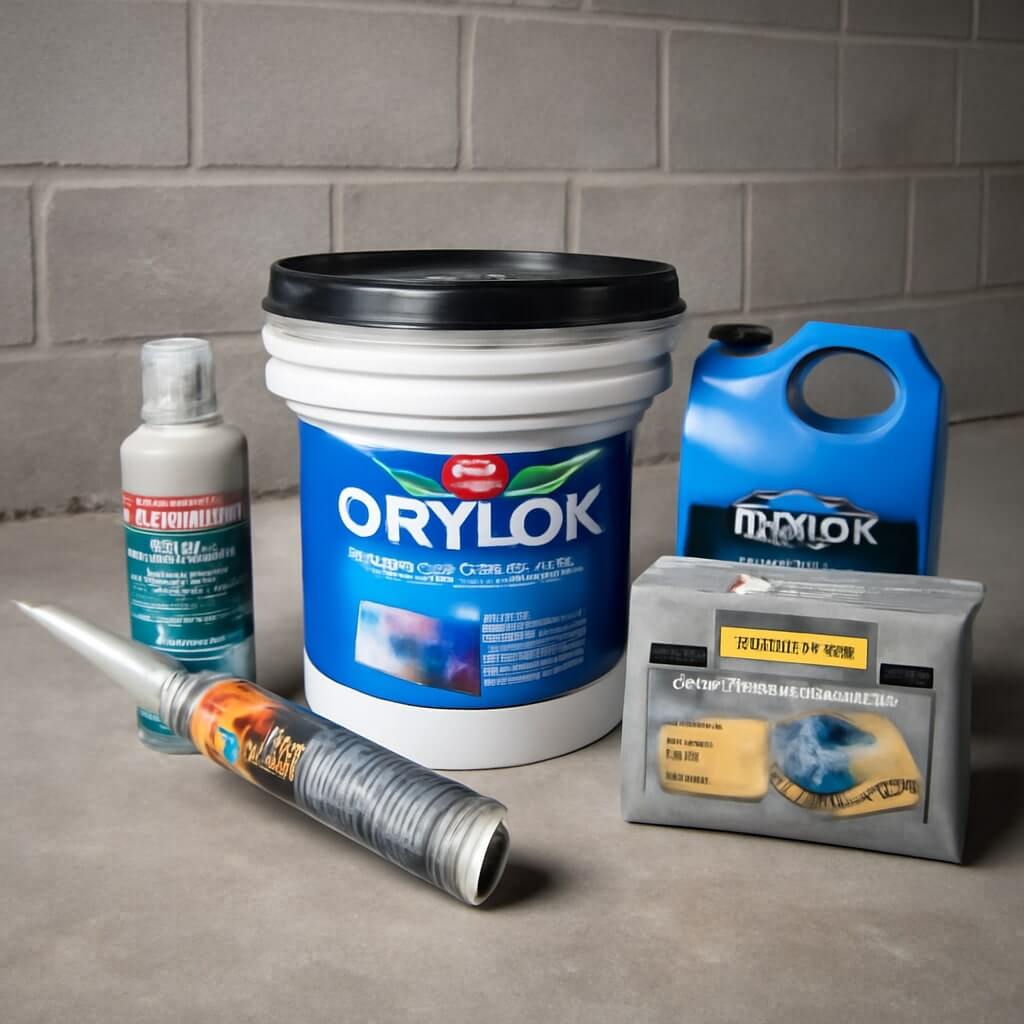
The 10 Best Waterproof Concrete Sealers for Basement Floors
When it comes to protecting your basement from moisture damage, choosing the right waterproof concrete sealer is essential. Each option on the market offers specific advantages, such as strong adhesion, quick drying times, and resistance to mold. Understanding these features can help you make an informed decision. But with so many products available, how do you determine which sealer will provide the best long-lasting protection for your space? Let’s explore the top contenders.
Key Takeaways
- Liquid Rubber Waterproof Sealant provides seamless coverage and resists UV damage, ensuring long-lasting protection against moisture infiltration in basements.
- Drylok Extreme Masonry Waterproofer offers quick-drying application and forms a durable barrier, effectively preventing mold and mildew growth in damp areas.
- Rust-Oleum EpoxyShield is a two-part epoxy system that cures quickly, providing a strong finish that resists water and chemical damage.
- Behr Premium Concrete & Masonry Waterproofer boasts superior water resistance and is easy to apply, making it ideal for maintaining a dry basement.
- Siloxa-Tek 8500 Concrete Sealer penetrates deeply for long-lasting durability and excellent water repellency, ensuring a safe and dry environment.
Liquid Rubber Waterproof Sealant
Liquid Rubber Waterproof Sealant is a highly effective solution for protecting basement floors from moisture infiltration. You’ll find that its liquid rubber applications offer seamless coverage, ensuring every crack and crevice is sealed.
This product bonds well to various surfaces, providing versatility in your waterproofing projects. One of the key liquid rubber benefits is its durability; it resists UV damage and extreme temperatures, making it ideal for long-term use.
Additionally, it’s eco-friendly and non-toxic, ensuring safety for your indoor environment. By applying this sealant, you’ll create a robust barrier against water, helping maintain a dry and healthy basement.
Drylok Extreme Masonry Waterproofer
When it comes to waterproofing basement floors, Drylok Extreme Masonry Waterproofer stands out as a top-tier option. This high-performance product boasts exceptional resistance against water intrusion, making it ideal for damp environments.
Many Drylok reviews highlight its ease of use during the Drylok application process, which can be done with a brush, roller, or sprayer. It dries quickly and forms a durable barrier that protects against mold and mildew.
For best results, verify surfaces are clean and dry before application. With its robust formula and proven effectiveness, Drylok Extreme is a reliable choice for safeguarding your basement.
Rust-Oleum EpoxyShield Basement Floor Coating
Rust-Oleum EpoxyShield Basement Floor Coating delivers a robust solution for homeowners seeking to protect their basement floors from moisture and stains.
This coating features a two-part epoxy system that creates a strong, durable finish, resisting water and chemical damage. You’ll appreciate its easy application, as it adheres well to concrete surfaces and cures quickly, ensuring minimal downtime.
One of the key Rust Oleum benefits is its resistance to chipping and peeling, maintaining a pristine look over time.
Additionally, EpoxyShield offers excellent traction, reducing slip hazards, making it a smart choice for enhancing both safety and aesthetics in your basement.
Behr Premium Concrete & Masonry Waterproofer
If you’re looking for a reliable way to keep your basement dry, Behr Premium Concrete & Masonry Waterproofer stands out as an exceptional choice.
This advanced formula offers several Behr advantages, including superior water resistance and mold prevention.
For ideal results, the Behr application process is straightforward: clean the surface thoroughly, apply a primer if necessary, and then use a roller or sprayer to coat the area evenly.
It dries quickly and provides long-lasting protection against moisture infiltration.
With its durability and effectiveness, Behr Premium Waterproofer is an excellent investment for maintaining a dry, safe basement environment.
RadonSeal Concrete Sealer
RadonSeal Concrete Sealer creates an effective moisture barrier that protects your basement from water intrusion and dampness.
Its easy application process allows you to achieve professional results without the need for specialized tools or skills.
Effective Moisture Barrier
When it comes to protecting your basement from water intrusion, an effective moisture barrier is essential, and RadonSeal Concrete Sealer delivers just that.
This sealer penetrates deeply into the concrete, creating a robust moisture control system that markedly reduces basement humidity levels. By forming a durable, waterproof barrier, it prevents water from seeping through the concrete, mitigating issues like mold growth and structural damage.
Additionally, its resistance to alkalis and salts guarantees long-lasting performance. With RadonSeal, you’re investing in a solution that not only safeguards your basement but also enhances the overall air quality and livability of your home.
Easy Application Process
Applying RadonSeal Concrete Sealer is a straightforward process that anyone can accomplish with the right preparation. Start by ensuring proper surface preparation; clean and dry the concrete thoroughly. You’ll need specific application tools, such as a roller or brush, for even distribution. Here’s a quick guide:
| Step | Details |
|---|---|
| Surface Preparation | Clean, dry, and repair cracks |
| Application Method | Use a roller for large areas |
| Drying Time | Allow 24-48 hours before use |
Valspar Basement & Masonry Waterproofer
Valspar Basement & Masonry Waterproofer offers robust protection against moisture intrusion, making it an essential choice for your basement.
You’ll appreciate its easy application process, which includes specific techniques to guarantee maximum adhesion and durability.
In this section, we’ll explore the product features and provide practical tips for achieving the best results.
Product Features Overview
One of the standout features of the Valspar Basement & Masonry Waterproofer is its exceptional ability to create a durable, water-resistant barrier on various surfaces.
This product excels in basement protection, effectively preventing moisture infiltration and damage. It’s formulated with advanced polymer technology, ensuring strong adhesion and flexibility, which allows it to withstand temperature fluctuations and surface movement.
Additionally, it’s mold and mildew resistant, promoting a healthier indoor environment. Easy to apply, this waterproof sealer dries clear, maintaining the aesthetic of your surfaces.
You’ll appreciate its long-lasting performance and the peace of mind it offers against water-related issues.
Application Tips and Techniques
To achieve ideal results with the Valspar Basement & Masonry Waterproofer, proper surface preparation is essential. Start by cleaning the surface to remove dirt, grease, and mildew. Make certain the area is dry before application to enhance adhesion.
Follow these application techniques for best results:
- Apply in temperatures between 50°F and 90°F.
- Use a roller or sprayer for even coverage.
- Apply two coats, allowing the first to dry completely.
- Focus on seams and cracks for thorough sealing.
- Always wear protective gear and make certain proper ventilation during application.
Following these steps will maximize the effectiveness of your waterproofing project.
Xtreme Guard Concrete Sealer
Xtreme Guard Concrete Sealer stands out among the top choices for protecting basement floors against moisture intrusion. Its formulation offers exceptional durability and resistance to water, making it ideal for high-humidity environments.
One of the key Xtreme Guard benefits is its ability to penetrate deeply, creating a long-lasting barrier that prevents mold and mildew growth.
During the Xtreme Guard application, verify the surface is clean and dry for peak adhesion. You can easily apply it with a roller or sprayer, allowing for a smooth and even coat.
This sealer not only protects but enhances the appearance of your basement floor.
Aqua Mix Sealer and Coating
Aqua Mix Sealer and Coating is a top-tier choice for homeowners seeking reliable moisture protection for their basement floors.
This versatile product offers excellent aqua mix applications, guaranteeing your concrete remains sealed against water intrusion. With a focus on durability and longevity, it boasts various aqua mix benefits that enhance your basement environment.
- Protects against mold and mildew
- Easy to apply with a roller or sprayer
- Dries clear, preserving the original look
- Suitable for both interior and exterior surfaces
- Non-toxic, safe for indoor air quality
Investing in Aqua Mix guarantees a secure and dry basement for years to come.
INSL-X WaterBlock Waterproofing Paint
INSL-X WaterBlock Waterproofing Paint stands out as an effective solution for protecting basement floors from moisture damage. This high-performance paint offers several INSL-X benefits, including superior adhesion and resistance to mold and mildew.
Its unique formula creates a durable barrier that prevents water infiltration while allowing moisture vapor to escape, reducing the risk of damage.
For ideal results, proper INSL-X application is essential; verify the surface is clean, dry, and free of contaminants. Apply with a roller or brush, and allow adequate drying time between coats.
With INSL-X, you can achieve a long-lasting, waterproof finish that safeguards your basement.
Siloxa-Tek 8500 Concrete Sealer
When it comes to waterproofing basement floors, Siloxa-Tek 8500 Concrete Sealer is a top-tier option that offers exceptional protection against water damage.
Its advanced formula penetrates deeply, ensuring long-lasting durability. You’ll appreciate its ease of application, making it suitable for both DIY enthusiasts and professionals alike.
- Provides excellent water repellency
- Resists mold and mildew growth
- Enhances surface durability and lifespan
- Non-toxic and environmentally friendly
- Compatible with various concrete surfaces
With Siloxa Tek benefits like these, you’ll safeguard your basement effectively while enjoying the straightforward siloxa tek application process.
Protect your investment and keep your space dry!
Conclusion
In conclusion, selecting the right waterproof concrete sealer is essential for safeguarding your basement against moisture damage. Each product listed, from Liquid Rubber to Siloxa-Tek 8500, offers distinct advantages tailored to different needs, such as superior adhesion, quick drying, and mold resistance. When you invest in one of these high-performance sealers, you’re ensuring long-lasting protection and a safer environment for your home. Don’t compromise on quality—choose a sealer that meets your specific requirements for best results.
Benefits of Early Basement Waterproofing in New Construction
When you’re building a new home, considering early basement waterproofing can be a strategic decision. It not only protects your foundation from potential water damage but also minimizes the risk of mold growth. This proactive measure not only enhances indoor air quality but can also save you from costly repairs down the line. Curious about how these benefits can impact your investment and living environment? Let’s explore the key advantages in detail.
Key Takeaways
- Early basement waterproofing prevents moisture-related structural damage, enhancing the foundation’s stability and durability.
- Implementing effective water management systems directs rainwater away, reducing the risk of leaks and dampness.
- Proactive moisture control minimizes mold growth, improving indoor air quality and reducing health risks.
- Investing in waterproofing during construction saves on future repair costs, ensuring long-term financial benefits.
- Homes with waterproofed basements increase property value and appeal to potential buyers, enhancing market competitiveness.
Protecting Your Foundation From Water Damage
When you invest in early basement waterproofing, you’re taking an essential step to protect your foundation from water damage.
This proactive approach enhances foundation stability by preventing moisture from seeping in and compromising structural integrity. Effective water management systems direct rainwater away, reducing pressure against your foundation walls.
By addressing potential leaks and dampness now, you’re not just safeguarding your home; you’re ensuring long-term durability. Ignoring these issues can lead to costly repairs down the line.
Reducing the Risk of Mold Growth
Controlling moisture in your basement is essential for preventing mold growth.
By implementing effective waterproofing strategies, you not only safeguard your home but also enhance the indoor air quality.
This proactive approach can markedly reduce health risks associated with mold exposure.
Moisture Control Strategies
To effectively reduce the risk of mold growth in your basement, implementing moisture control strategies is crucial.
Start by installing moisture barriers, which prevent water vapor from seeping through walls and floors. These barriers act as a first line of defense against humidity.
Next, verify you have efficient drainage systems in place. Proper drainage directs water away from your foundation, minimizing potential leaks and dampness. Regularly inspect and maintain these systems to keep them functional.
Improved Indoor Air Quality
Implementing moisture control strategies not only protects your basement from water damage but also plays a notable role in enhancing indoor air quality.
By maintaining ideal humidity levels, you greatly reduce the risk of mold growth, which can lead to health issues.
Installing effective ventilation systems guarantees fresh air circulation, preventing stale, damp conditions.
This proactive approach helps you create a healthier living environment, where you’re less likely to experience respiratory problems caused by mold spores.
Early basement waterproofing, combined with strategic humidity management, sets the foundation for a comfortable home, contributing to overall well-being and peace of mind.
Enhancing Indoor Air Quality
When you consider the impact of moisture on your home, it’s clear that early basement waterproofing can greatly enhance indoor air quality.
By effectively managing humidity levels, you’ll reduce the risk of mold and mildew growth, which can negatively affect your health.
Effectively managing humidity levels minimizes mold and mildew growth, safeguarding your health and enhancing your living space.
Additionally, proper waterproofing allows for better air filtration throughout your home, ensuring that contaminants and allergens are minimized.
This strategic approach to moisture control not only creates a healthier living environment but also contributes to a more comfortable home.
Investing in early basement waterproofing is a proactive step towards achieving ideal indoor air quality for you and your family.
Preventing Costly Repairs in the Future
By investing in early basement waterproofing, you can save yourself from the headache and financial burden of costly repairs down the line.
Performing a thorough cost analysis during construction reveals that proactive waterproofing measures greatly reduce the risk of water damage.
By addressing potential leaks now, you’re not just avoiding immediate issues; you’re also ensuring long-term savings on repairs, mold remediation, and structural damage.
Think about it—every dollar spent on early waterproofing helps protect your investment and minimizes unexpected expenses in the future.
In the end, this strategic approach secures your home and your financial peace of mind.
Increasing Property Value
Early basement waterproofing doesn’t just prevent future repairs; it also greatly boosts your property value.
When you invest in this essential feature, you’re likely to see a positive impact during property appraisals. Potential buyers often prioritize homes with waterproofed basements, knowing they won’t face water damage issues later.
This added assurance can make your property more attractive in a competitive market, aligning with current market demand for durable and low-maintenance homes.
Ensuring a Healthier Living Environment
When you invest in early basement waterproofing, you’re not just protecting your property; you’re also enhancing your indoor air quality.
By preventing mold and mildew growth, you create a healthier atmosphere for your family.
Additionally, maintaining your home’s structural integrity means fewer headaches down the line, allowing you to focus on what truly matters.
Improved Indoor Air Quality
While many homeowners may overlook the importance of basement waterproofing, addressing moisture issues can greatly enhance your indoor air quality. By keeping your basement dry, you improve air filtration and support your ventilation systems, leading to fresher, healthier air throughout your home. Here’s a quick overview of the benefits:
| Benefit | Description |
|---|---|
| Reduced Humidity | Lowers moisture levels indoors |
| Enhanced Air Quality | Improves overall air freshness |
| Better Ventilation | Supports efficient airflow |
Investing in early waterproofing not only protects your home but also creates a healthier living environment for you and your family.
Mold and Mildew Prevention
Moisture in your basement creates the perfect environment for mold and mildew to thrive, posing significant health risks to your family.
To combat this, implement effective mold prevention techniques like proper drainage systems and vapor barriers during construction. These strategies keep moisture at bay and guarantee a drier basement.
Additionally, consider mildew resistance strategies, such as using mold-resistant paint and guaranteeing adequate ventilation.
By addressing these issues early on, you create a healthier living environment that safeguards your family’s well-being.
Taking proactive measures not only minimizes mold and mildew but also enhances your home’s overall comfort and safety.
Enhanced Structural Integrity
A well-maintained basement foundation is essential for your home’s overall structural integrity, as it supports the entire structure above it.
Early basement waterproofing enhances foundation stability, preventing water damage that can weaken walls and floors. Without proper waterproofing, moisture can compromise your home’s structural resilience, leading to costly repairs down the line.
By investing in waterproofing during construction, you create a durable barrier against water intrusion, ensuring a solid base for your home.
This proactive approach not only safeguards your investment but also promotes a healthier living environment, free from the dangers of mold and structural decay.
Simplifying the Construction Process
When you prioritize early basement waterproofing, you streamline the construction process considerably.
This proactive approach allows for streamlined scheduling, as you can avoid delays caused by water-related issues later on. By addressing waterproofing from the start, you enhance planning efficiency and minimize disruptions during construction.
It also enables efficient resource allocation, ensuring labor and materials are used effectively throughout the project. You’ll find that with fewer complications arising from moisture, your team can focus on other critical tasks, maintaining momentum and upholding timelines.
Ultimately, early waterproofing not only simplifies the process but also contributes to a smoother, more organized construction experience.
Conclusion
Incorporating early basement waterproofing in new construction isn’t just a smart choice; it’s an investment in your home’s future. By safeguarding your foundation, reducing mold risks, and enhancing indoor air quality, you’re creating a healthier living environment. Plus, you’ll save on costly repairs down the line while boosting your property’s value. Don’t overlook this vital step—proactive waterproofing simplifies your construction process and guarantees your home remains a safe, durable haven for years to come.
5 Effective Products for Interior Basement Waterproofing
If you’re dealing with a damp basement, finding the right waterproofing solutions is vital. There are several effective products that can help protect your space from water damage. From waterproofing paints to sump pumps, each option serves a unique purpose in keeping moisture at bay. Understanding how these products work together can make a significant difference in maintaining a dry environment. Let’s explore these essential tools and how they can benefit your home.
Key Takeaways
- Waterproofing Paints and Coatings create a protective barrier against water infiltration for masonry and concrete surfaces.
- Interior Drainage Systems channel water away from the basement, directing it to a sump pump for effective water management.
- Sump Pumps efficiently remove excess water, making them essential for safeguarding against basement flooding.
- Dehumidifiers lower humidity levels, preventing mold growth and protecting belongings stored in the basement.
- Crack Sealants effectively repair foundation cracks, preventing water intrusion and potential damage.
Waterproofing Paints and Coatings
When it comes to protecting your basement from moisture, waterproofing paints and coatings are your first line of defense.
These products utilize advanced waterproofing techniques to create a barrier against water infiltration. You’ll find various paint applications designed specifically for masonry and concrete surfaces, ensuring a proper seal.
Before applying, clean the area and repair any cracks to maximize effectiveness. Choose a high-quality product that suits your needs, whether it’s a paint that dries clear or one with a bold color.
With the right waterproofing paint, you can keep your basement dry and prevent costly water damage down the line.
Interior Drainage Systems
While waterproofing paints and coatings provide a solid first line of defense against moisture, they may not be enough for more severe water issues.
An interior drainage system effectively channels water away from your basement, preventing flooding and damage. These systems typically include a drain tile or perimeter drain that collects water, directing it to a sump pump or other drainage solution.
Regular system maintenance is essential; check for clogs and guarantee proper flow. By investing in a reliable interior drainage system, you can safeguard your basement, keeping it dry and functional even during heavy rain or melting snow.
Sump Pumps
Sump pumps are essential for any effective interior basement waterproofing system, especially in areas prone to heavy rainfall or flooding.
Proper sump pump installation guarantees that excess water is efficiently removed, protecting your basement from damage.
Properly installed sump pumps effectively eliminate excess water, safeguarding your basement from potential damage.
To keep your system running smoothly, focus on regular sump pump maintenance, including:
- Checking the power source
- Testing the pump periodically
- Cleaning the sump pit
- Inspecting the discharge line
Dehumidifiers
Dehumidifiers play an essential role in maintaining a dry and healthy basement environment. By efficiently reducing humidity levels, they help prevent mold growth and damage to your belongings.
When choosing a dehumidifier, look for energy efficiency ratings to save on electricity bills. To maximize performance, place the unit in a central location and keep vents unobstructed.
Regular maintenance tips include cleaning the filter monthly and emptying the water tank frequently or connecting it to a drain. By following these steps, you’ll guarantee your dehumidifier operates effectively, keeping your basement dry and comfortable year-round.
Crack Sealants
Crack sealants are a vital component in waterproofing your basement, especially when it comes to preventing water intrusion through foundation cracks.
When choosing a sealant, consider the various types available for effective crack repair:
- Acrylic Sealants: Flexible and easy to apply, great for minor cracks.
- Polyurethane Sealants: Durable and ideal for larger cracks, providing strong adhesion.
- Epoxy Sealants: Best for structural repairs, offering excellent strength and moisture resistance.
- Hydraulic Cement: Expands as it cures, perfect for stopping active leaks.
Selecting the right sealant type can greatly enhance your basement’s waterproofing and protect your home from water damage.
Conclusion
Ultimately, investing in effective interior basement waterproofing products can transform your space into a dry, safe haven. By using waterproofing paints, installing interior drainage systems, and incorporating sump pumps, you can effectively manage water infiltration. Don’t forget the importance of dehumidifiers and crack sealants to maintain a healthy environment. By taking these steps, you’ll not only protect your basement from water damage but also enhance your home’s overall value and comfort.
Key Factors to Select Basement Waterproofing in NJ
When it comes to selecting basement waterproofing solutions in New Jersey, you’ve got a few key factors to evaluate. Your basement’s unique challenges, local climate, and soil conditions play a significant role in the effectiveness of your chosen method. Plus, recognizing signs of water damage early can save you money down the line. Understanding your options will help you make an informed decision, but there’s more to explore about maintaining that protection over time.
Key Takeaways
- Assess your specific basement’s moisture issues, including water table levels and humidity, to choose the most effective waterproofing method.
- Consider both interior and exterior waterproofing options to determine which best addresses your home’s unique needs.
- Evaluate the long-term effectiveness of solutions like French drains and sump pumps to ensure lasting protection against water intrusion.
- Budget for all costs, including inspection fees, materials, and labor, to avoid unexpected expenses during the waterproofing process.
- Research and compare different waterproofing systems to find the best alignment of cost, efficiency, and longevity for your basement.
Understanding Your Basement’s Unique Challenges
When it comes to understanding your basement’s unique challenges, recognizing the specific factors at play in New Jersey can make all the difference.
The state’s varying water table levels can greatly impact basement humidity, leading to potential moisture issues. If your home is near a high water table, you might experience higher humidity levels, making your basement a breeding ground for mold and mildew.
Regularly monitoring humidity and addressing any signs of water intrusion is essential. By staying informed about these factors, you can take proactive steps to maintain a dry and healthy basement, ensuring a safer living environment for you and your family.
Evaluating Different Waterproofing Methods
When it comes to keeping your basement dry, you’ll want to explore various waterproofing methods.
From interior solutions that tackle moisture at the source to exterior techniques that prevent water from entering, understanding your options is essential.
Plus, comparing drainage systems can help you choose the best fit for your home’s unique needs.
Interior Waterproofing Solutions
Although you may not always see the signs of moisture damage, addressing potential issues with interior waterproofing solutions is essential for maintaining a dry and healthy basement. Here are some effective interior sealing methods and moisture barriers to contemplate:
| Method | Description |
|---|---|
| Interior Sealants | Create a protective layer against moisture. |
| French Drains | Direct water away from the foundation. |
| Sump Pumps | Remove accumulated water effectively. |
Exterior Waterproofing Techniques
To keep your basement dry and protected from water intrusion, exploring exterior waterproofing techniques is essential.
One effective method is ensuring proper foundation drainage. Installing drainage systems like French drains can help channel water away from your home, preventing buildup around your foundation.
Additionally, surface grading plays an important role; it involves sloping the ground away from your foundation to direct water runoff. This simple adjustment can greatly reduce the risk of moisture seeping into your basement.
Drainage Systems Comparison
Proper foundation drainage is just one piece of the puzzle when it comes to keeping your basement dry. You’ll find various drainage types, such as interior and exterior systems, each with its own merits.
Interior drainage systems, like sump pumps, are often easier to install and maintain, but may lack the long-term efficiency of exterior systems that redirect water away from your foundation.
Compare the system efficiency of each option based on your specific needs, climate, and soil type. Understanding these differences will help you make an informed decision that protects your basement from water damage effectively.
Assessing Local Climate and Soil Conditions
Understanding the local climate and soil conditions is essential for effective basement waterproofing in New Jersey.
You need to evaluate how these factors influence your basement’s vulnerability to water intrusion.
Consider the following:
- Climate impact: Heavy rainfall and humidity can exacerbate water issues.
- Soil permeability: Highly permeable soils allow more water to seep through.
- Frost line depth: Understand freeze-thaw cycles that can affect foundation stability.
- Drainage patterns: Identify how your property’s topography directs water flow.
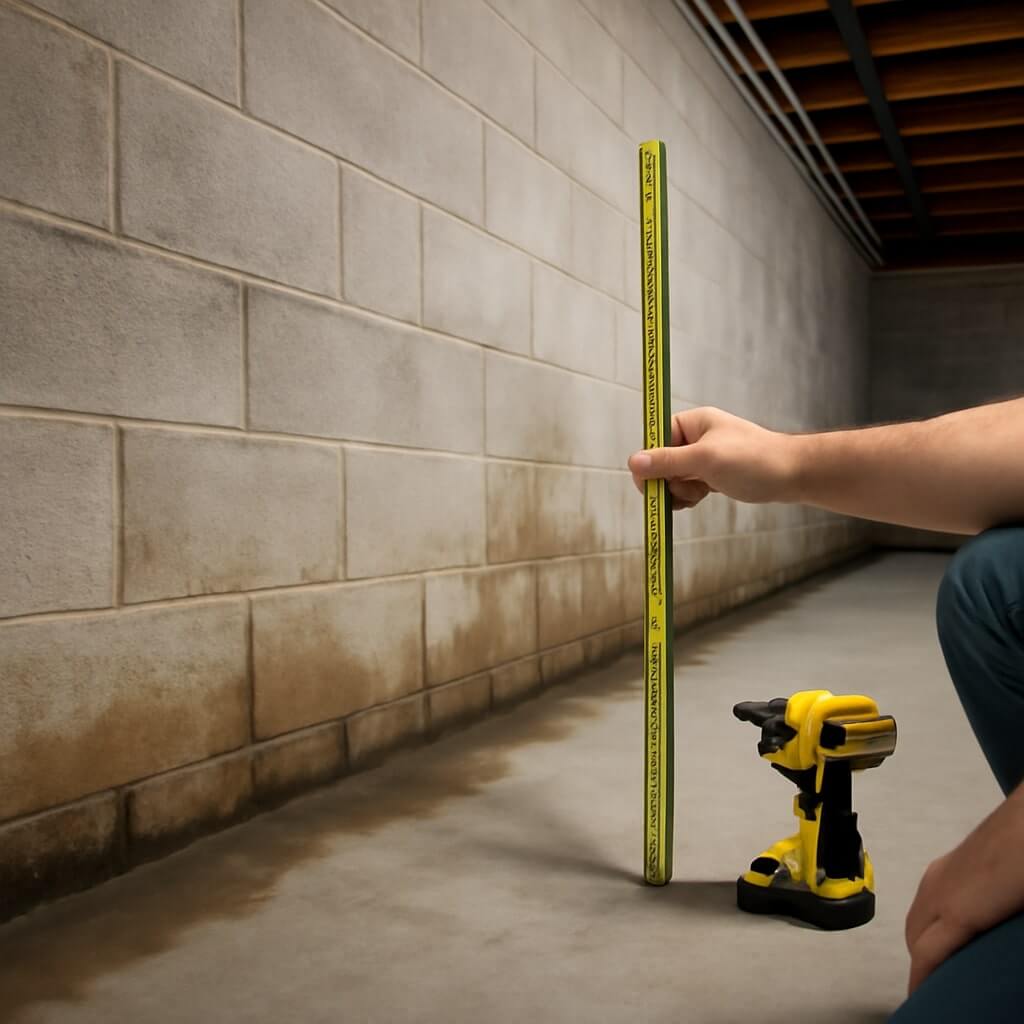
Identifying Signs of Water Damage
After evaluating the local climate and soil conditions, it’s important to recognize the signs of water damage in your basement.
Look out for water stains on walls or floors, as they indicate moisture intrusion. Dark spots or peeling paint can also signal problems.
Pay attention to any musty odors, which often suggest mold growth. If you notice condensation on surfaces or visible mold, it’s a clear sign that water is present.
Addressing these issues promptly can prevent further damage and protect your home’s structure. Stay vigilant and act quickly to safeguard your basement from water-related issues.
Budgeting for Waterproofing Solutions
When you’re planning your basement waterproofing project, it’s crucial to assess the total costs involved.
You’ll want to compare different methods to find the best fit for your budget and needs.
Don’t forget to factor in long-term maintenance expenses, as they can greatly affect your overall investment.
Assessing Total Project Costs
Budgeting for basement waterproofing in New Jersey can seem intimidating, but breaking down the costs into manageable parts makes it easier.
To effectively assess your total project costs, consider these key components:
- Initial inspection fees
- Materials and supplies
- Labor costs
- Potential permits
Creating a detailed cost breakdown helps you understand where your money’s going and allows you to adjust your project timeline accordingly.
By planning carefully, you can avoid unexpected expenses and guarantee a successful waterproofing project.
Comparing Different Methods
Choosing the right waterproofing method for your basement can greatly impact your budget and the effectiveness of the solution. You’ll find several options, including interior and exterior drainage systems, which may involve foundation repair costs.
A sump pump is often a key component in these systems, helping to manage water accumulation. While interior methods can be less expensive upfront, they might require more frequent maintenance.
On the other hand, exterior solutions may have higher initial costs but can offer long-lasting protection. Assess your specific needs and budget to find the most suitable waterproofing method for your home.
Long-term Maintenance Expenses
While you may have invested in a waterproofing solution for your basement, it’s essential to contemplate the long-term maintenance expenses that come with it.
A thorough cost analysis will help you budget effectively. Here are some key maintenance tips to keep in mind:
- Regularly inspect the waterproofing system
- Clean gutters and downspouts to prevent water buildup
- Monitor humidity levels to avoid mold growth
- Schedule professional check-ups every few years
Researching Professional Installation Options
How do you know which professional installation option is right for your basement waterproofing needs in New Jersey? Start by researching contractors with solid professional certifications, ensuring they’re qualified and knowledgeable.
Look for companies that offer installation warranties; this shows they stand behind their work and are committed to quality.
Read reviews and ask for references to gauge customer satisfaction. Don’t hesitate to ask potential installers about their experience with similar projects.
Maintaining Your Waterproofing System
To keep your basement waterproofing system effective over time, regular maintenance is vital.
By performing seasonal maintenance and regular inspections, you can prevent costly damage.
Here are some key steps to follow:
- Check gutters and downspouts for clogs
- Inspect the foundation for cracks or signs of water
- Make certain sump pumps are functioning properly
- Clear drainage systems of debris
Conclusion
Choosing the right basement waterproofing solution in New Jersey is essential for protecting your home. By understanding your unique challenges, evaluating different methods, and considering local conditions, you can make an informed decision. Don’t forget to budget for both installation and maintenance, ensuring your investment lasts. Researching professional options will help you achieve the best results. With the right approach, you can keep your basement dry and free from mold, enhancing your property’s value and comfort.
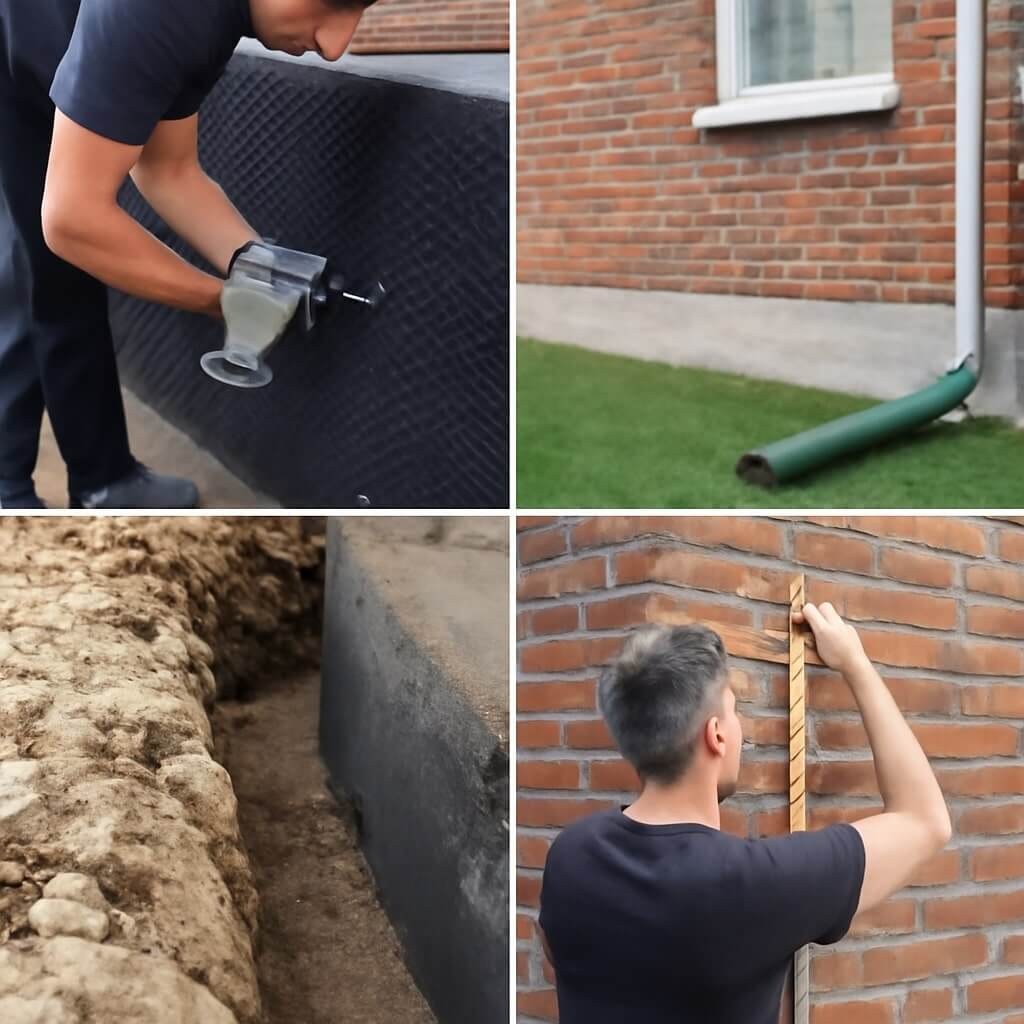
Steps for Successful Exterior Waterproofing of Your Basement?
When it comes to exterior waterproofing your basement, understanding the necessary steps is vital for long-term effectiveness. You’ll need to assess your home’s drainage systems and prepare the exterior properly before excavation. This process includes installing a reliable waterproof membrane and a drainage system to manage groundwater effectively. Each step requires precision and attention to detail to prevent future moisture issues. So, what are the essential techniques to guarantee your efforts aren’t in vain?
Key Takeaways
- Clear debris and vegetation within three feet of the foundation to ensure proper drainage and access for waterproofing work.
- Adjust the grading around the foundation to create a slope that directs water away from the home.
- Excavate around the foundation to a depth of 8-12 inches for the installation of drainage systems and waterproof barriers.
- Install a perforated drainage pipe at the base of the foundation to collect and redirect water effectively.
- Apply high-quality waterproofing membranes and sealants to foundation walls to prevent water intrusion.
Assessing Your Basement’s Waterproofing Needs
How can you determine if your basement requires waterproofing? Start by identifying leaks, which can manifest as water stains, mold, or peeling paint.
Inspect walls and floors for damp spots, particularly after heavy rains. Next, analyze potential moisture sources, like plumbing leaks or poor drainage outside.
Pay close attention to window wells and cracks in the foundation, as these can allow water intrusion. If you notice persistent humidity or musty odors, it’s essential to act.
Understanding Water Drainage Systems
While understanding water drainage systems may seem complex, grasping their fundamentals is essential for effective basement waterproofing. You need to recognize the different drainage system types and how they interact with water flow patterns around your home.
Grasping the fundamentals of water drainage systems is crucial for effective basement waterproofing and safeguarding your home.
Here are three key components to take into account:
- Surface Drains: These collect and redirect rainwater away from your foundation.
- French Drains: These systems channel groundwater into a perforated pipe, preventing flooding.
- Sump Pumps: These actively remove water that accumulates in your basement, ensuring it stays dry.
Understanding these elements will help you design a robust waterproofing strategy.
Preparing the Exterior of Your Home
Before you begin the waterproofing process, you must prepare the exterior of your home to create an effective barrier against moisture.
Start with landscape preparation; clear any debris, vegetation, or obstructive features within a three-foot radius of your foundation.
Next, conduct a soil analysis to determine drainage patterns and soil composition. This helps identify areas prone to water retention or erosion.
Adjust the grade around your foundation to guarantee water flows away from your home.
Proper grading and landscape management are essential in minimizing moisture infiltration, setting the stage for successful waterproofing and protecting your basement from potential water damage.
Excavating Around the Foundation
Excavating around your foundation is a significant step in the waterproofing process, as it allows for the installation of effective drainage systems and waterproof barriers.
To guarantee foundation stability and prevent soil erosion, follow these key steps:
- Dig to the appropriate depth: Aim for at least 8-12 inches below the footing to facilitate proper drainage.
- Create a slope for water diversion: Make sure the soil slopes away from your foundation to direct water away.
- Identify utilities and potential obstructions: Locate any buried lines or structures to avoid damage during excavation.
These actions are essential for maintaining a dry basement and long-lasting structural integrity.
Installing a Waterproof Membrane
One essential component of effective exterior waterproofing is installing a waterproof membrane around your foundation.
Start by selecting high-quality waterproof membranes, like polyethylene or rubberized asphalt. Verify the surface is clean and dry before application.
Choose durable waterproof membranes, such as polyethylene or rubberized asphalt, and ensure the surface is clean and dry before applying.
Use the correct installation techniques, such as overlapping seams and sealing edges to create a continuous barrier. Apply adhesive uniformly for proper attachment, and consider using a trowel for added pressure.
Pay attention to any penetrations, sealing them thoroughly to prevent moisture ingress.
Finally, inspect the membrane for any defects before backfilling to guarantee maximum protection against water infiltration.
Applying a Drainage System
To effectively manage water around your basement, applying a drainage system is crucial for preventing moisture buildup. A well-designed drainage system directs water flow away from your foundation, minimizing the risk of leaks and damage.
Here’s how to implement it:
- Install a Perimeter Drain: Position it around the foundation’s base to capture groundwater before it can penetrate.
- Use Drainage Pipes: Confirm they’re sloped for effective water flow, directing excess water to a designated outlet.
- Incorporate a Sump Pump: This helps remove water that accumulates in the drainage system, further protecting your basement from flooding.
Backfilling and Compacting Soil
Backfilling and compacting soil around your basement is vital for maintaining structural integrity and preventing water infiltration.
You’ll need to follow specific techniques for compacting the soil to guarantee stability and proper drainage.
Consideration of drainage during the backfilling process is essential to avoid future moisture issues.
Importance of Proper Backfilling
Proper backfilling is essential for guaranteeing the stability and longevity of your basement’s waterproofing system.
Using suitable backfill materials and effective backfill techniques minimizes water infiltration and soil settlement. Here are three key considerations:
- Material Selection: Use clean, granular materials like crushed stone or gravel, which promote drainage and reduce pressure on the waterproofing membrane.
- Layering: Backfill in layers, compacting each layer thoroughly to prevent voids that can lead to settling.
- Moisture Control: Keep the backfill slightly damp during compaction to achieve ideal density and prevent erosion.
Implementing these steps guarantees a robust foundation for your waterproofing efforts.
Techniques for Soil Compaction
When you’re preparing to compact soil during backfilling, understanding the right techniques is crucial for achieving ideal results.
Start by evaluating the soil density; it should be at suitable moisture content to guarantee effective compaction. Use a mechanical compactor or vibratory plate for uniform compaction.
Apply compaction techniques in layers, ideally 6 to 8 inches at a time, to avoid overloading the soil. After each layer, check for uniform density with a density gauge.
Properly compacted soil prevents settlement and enhances the stability of your foundation, reducing the risk of water intrusion and providing long-lasting results.
Drainage Considerations During Backfilling
Effective drainage is essential during the backfilling process to prevent water accumulation around your foundation.
Consider the following drainage patterns and soil types as you backfill:
- Sloped Backfill: Make sure the soil slopes away from your foundation, promoting proper drainage.
- Granular Soil: Use granular soil types for backfill, as they encourage drainage and reduce water retention.
- Drainage Pipes: Install perforated drainage pipes at the base of your foundation to collect and redirect water effectively.
Ensuring Proper Grading and Landscaping
To protect your basement from water intrusion, guarantee the ground slopes away from your foundation.
This grading directs rainwater away, preventing pooling around the base of your home.
Additionally, maintain clear drainage paths to facilitate proper runoff and avoid potential water damage.
Slope Away Foundations
While proper grading and landscaping may seem like minor details, they play an essential role in guaranteeing that water drains away from your foundation effectively.
A well-designed slope away from your foundation minimizes water accumulation, especially in areas with high water tables.
Consider these key aspects:
- Grade the soil: Guarantee a slope of at least 6 inches over the first 10 feet away from your foundation.
- Use landscaping features: Incorporate swales or berms to redirect water flow.
- Select appropriate plants: Choose drought-resistant plants that won’t disrupt your foundation design while controlling erosion.
These strategies help maintain your basement’s integrity.
Maintain Drainage Paths
Confirming that drainage paths remain unobstructed is essential for preventing water from pooling around your foundation.
To achieve effective water diversion, regularly inspect and maintain your landscaping. Verify that soil slopes away from the foundation, promoting the natural flow of water.
Utilize appropriate drainage solutions, such as French drains or swales, to guide water away from your home. Keep gutters and downspouts clear, directing runoff well away from your property.
Regular Maintenance and Monitoring
Regular maintenance and monitoring of your basement’s exterior waterproofing system are essential to preventing water intrusion and structural damage.
Implementing routine inspections and moisture monitoring guarantees the integrity of your waterproofing efforts.
- Conduct routine inspections every six months to identify any cracks or damage in the waterproofing membrane.
- Monitor moisture levels using hygrometers, especially during heavy rainfall or snowmelt.
- Clear drainage paths of debris regularly to maintain proper water flow away from your foundation.
Conclusion
Successfully waterproofing your basement requires careful attention to detail at each step. By evaluating your needs, preparing the exterior, and ensuring proper installation of drainage systems and waterproof membranes, you can effectively protect your home from moisture intrusion. Don’t overlook the significance of backfilling and grading, as they play an essential role in directing water away from your foundation. Finally, regular maintenance and monitoring will help you catch potential issues early, ensuring long-lasting protection for your basement.

5 Essential Tips to Select the Right Basement Waterproofing
When it comes to selecting the right basement waterproofing solution, there are key factors you need to take into account. Start by evaluating your basement’s current condition and identifying any moisture sources. From there, you can explore various waterproofing methods tailored to your needs. Whether you choose to tackle the project yourself or hire professionals can greatly impact the outcome. Understanding long-term maintenance and costs is also essential. Let’s break down these important tips to guarantee your basement stays dry.
Key Takeaways
- Assess your basement’s current condition thoroughly to identify visible damage and moisture levels before selecting a waterproofing method.
- Identify the source of moisture to target specific issues like cracks, leaks, or poor drainage for effective waterproofing solutions.
- Explore various waterproofing methods, including interior drainage systems, exterior sealing, sump pumps, and French drains to find the best fit for your needs.
- Consider your skill level when deciding between DIY solutions and hiring professionals, as complex issues often require expert intervention.
- Evaluate long-term maintenance costs and budgeting needs for your chosen waterproofing method to ensure ongoing effectiveness and financial stability.
Assess Your Basement’s Current Condition
Before you tackle any waterproofing solutions, it’s essential to assess your basement’s current condition.
Start with a thorough basement inspection to identify any visible signs of damage, such as cracks, mold, or dampness.
Begin by inspecting your basement for visible damage like cracks, mold, or dampness to assess its condition.
Next, conduct a moisture assessment to determine humidity levels and potential water sources.
Use a moisture meter to check walls and floors, and pay attention to any musty odors, which often indicate hidden moisture issues.
Document your findings to create a clear picture of your basement’s health.
Identify the Source of Moisture
Once you’ve assessed your basement’s condition, the next step is to identify the source of moisture.
Look for common moisture sources like cracks in walls, leaky pipes, or poor drainage systems. Check for signs of water damage, such as mold, mildew, or peeling paint.
Pay attention to the ground around your home—ensure that it’s sloped away from the foundation. Additionally, inspect windows and doors for gaps that could let in water.
Explore Different Waterproofing Methods
As you explore different waterproofing methods, it’s essential to choose the right approach for your basement’s specific needs. Two popular options are interior drainage and exterior sealing. Interior drainage systems channel water away from the foundation, while exterior sealing prevents water intrusion from the outside.
| Method | Description |
|---|---|
| Interior Drainage | Collects and diverts water from inside |
| Exterior Sealing | Applies a waterproof barrier outside walls |
| Sump Pumps | Pumps out water collected in a basin |
| French Drains | Directs surface water away from the home |
| Waterproof Coating | Adds a protective layer to basement walls |
Evaluate each to find the best fit for you.
Consider Professional Help vs. DIY Solutions
Choosing the right waterproofing method is just the beginning; deciding whether to tackle the project yourself or hire a professional can greatly impact the outcome.
DIY techniques can save you money, but they often require time, skills, and tools you mightn’t have. If you’re confident in your abilities, you can manage simple tasks, but complicated issues often need professional contractors.
They bring expertise and experience, ensuring the job’s done right the first time. Weigh the complexity of your basement’s issues against your skill level and resources to determine the best approach for your waterproofing project.
Evaluate Long-Term Maintenance and Costs
While you may be enthusiastic to waterproof your basement, it’s essential to contemplate the long-term maintenance and costs associated with your chosen method.
Start by evaluating your long-term budgeting needs; some solutions require more upfront investment but less frequent maintenance, while others may be cheaper initially but demand regular upkeep.
Determine the maintenance frequency for your selected system—will you need to check it monthly or annually?
Factor these costs into your overall budget to avoid surprises down the line. Understanding the financial commitment upfront will help you maintain a dry basement without unexpected expenses in the future.
Conclusion
In conclusion, selecting the right basement waterproofing solution involves a clear understanding of your basement’s condition and moisture sources. By exploring various methods and weighing the pros and cons of DIY versus professional help, you can make an informed choice. Don’t forget to take into account long-term maintenance and costs to guarantee your solution remains effective. With careful planning and the right approach, you can keep your basement dry and protected for years to come.
Critical Factors Affecting Basement Waterproofing Prices
When considering basement waterproofing, several critical factors can greatly impact your costs. The size and condition of your basement play a key role, as do the selected waterproofing methods. Additionally, local labor rates and compliance with regulations can further influence your budget. Understanding these aspects will help you make informed decisions. However, there are more nuances involved that could affect your overall expenses.
Key Takeaways
- The size and layout of the basement significantly influence material and labor costs for waterproofing solutions.
- Existing moisture issues and structural integrity assessments incur inspection fees that can add to overall project expenses.
- The chosen waterproofing method, whether interior or exterior, affects installation complexity and costs.
- Labor costs vary by region and project complexity, impacting the overall pricing of waterproofing services.
- Compliance with local regulations and building codes is essential to avoid potential delays and penalties in the waterproofing project.
Size of the Basement
When considering basement waterproofing, the size of your basement plays an essential role in determining overall costs. A larger basement layout often requires more materials and labor, directly impacting the price.
Additionally, the ceiling height can influence the complexity of waterproofing installations. A higher ceiling might necessitate specialized equipment or techniques, driving up expenses.
You’ll also need to factor in the square footage when evaluating the necessary waterproofing solutions.
Basement Condition
Although the condition of your basement markedly influences waterproofing costs, it’s vital to assess factors like existing moisture issues, structural integrity, and any signs of water damage.
Understanding these elements will help you make informed decisions:
- Moisture Levels: Check for excessive humidity or standing water.
- Cracks and Damage: Inspect walls and floors for visible cracks that may affect stability.
- Drainage Systems: Evaluate the effectiveness of existing drainage options.
- Soil Saturation: Assess surrounding soil moisture content, as it can affect basement conditions.
Addressing these factors will guarantee your basement’s readiness for waterproofing solutions.
Type of Waterproofing Method
When considering basement waterproofing, you’ll need to evaluate both interior and exterior solutions, as each has distinct advantages and costs.
Interior methods often involve drainage systems that can greatly impact overall pricing, while exterior options might require more extensive excavation.
Understanding these differences will help you make an informed decision tailored to your specific situation.
Interior vs. Exterior Solutions
While both interior and exterior waterproofing solutions aim to protect your basement from water damage, they each employ distinct methods and tackle different problems.
Understanding their differences is essential for effective waterproofing:
- Interior solutions typically involve sealants, drainage systems, or sump pumps to manage water after it enters.
- Exterior solutions focus on preventing water intrusion through excavation, waterproof membranes, and proper grading.
- Interior methods are often less invasive and quicker to install.
- Exterior options usually offer long-term protection but can be more expensive and labor-intensive.
Choosing the right solution depends on your specific water issues and budget.
Drainage Systems Impact Costs
Understanding how drainage systems impact waterproofing costs is essential for making informed decisions about your basement’s protection. The effectiveness of your drainage design directly influences system efficiency and overall project expenses.
A well-planned drainage system minimizes water intrusion, reducing the need for extensive waterproofing measures. Factors such as the type of drains, installation complexity, and materials used greatly affect costs.
For instance, interior drainage systems may be more affordable upfront but could require additional maintenance. Evaluating these aspects helps you choose a solution that balances initial costs with long-term reliability, ensuring your basement remains dry and protected over time.
Local Market Conditions
Understanding local market conditions is essential for estimating basement waterproofing prices accurately.
Regional demand trends can considerably influence pricing, as areas with higher moisture levels may see increased service requests.
Additionally, competition among contractors can affect your costs, with more options potentially leading to better pricing and service quality.
Regional Demand Trends
As local market conditions fluctuate, the demand for basement waterproofing services varies considerably across regions.
Factors influencing this demand include:
- Regional climate: Areas with high rainfall or snowmelt experience increased need for waterproofing.
- Soil composition: Certain soils retain water, heightening moisture issues.
- Market saturation: In regions with numerous providers, prices may stabilize or decrease.
- Local regulations: Stricter building codes can drive demand for waterproofing enhancements.
Understanding these factors helps you navigate pricing effectively and guarantees that your waterproofing solutions align with regional needs and conditions.
Competition Among Contractors
While the landscape of basement waterproofing is shaped by regional demand, competition among contractors greatly influences pricing and service quality.
In a crowded market, you’ll find that contractor reputation plays an essential role; established companies often command higher prices due to trustworthiness and proven results.
However, competitive pressures can push prices down, encouraging contractors to enhance their pricing transparency.
When you compare quotes, look for detailed breakdowns of services offered, as this will help you assess not only costs but also the quality of workmanship.
Ultimately, the interplay between competition and reputation can greatly affect your waterproofing investment.
Labor Costs
When planning a basement waterproofing project, labor costs can greatly influence your overall budget.
Understanding the impact of the labor market and contractor experience is essential. Here are four key factors to take into account:
Understanding labor market dynamics and contractor expertise is crucial for your project’s success.
- Region – Labor costs can vary considerably based on your location.
- Experience Level – More experienced contractors typically charge higher rates due to their expertise.
- Project Complexity – Complex projects may require specialized skills, increasing labor costs.
- Timeframe – Urgent projects may incur higher rates as contractors prioritize your job.
Additional Features and Upgrades
After evaluating labor costs, it’s important to take into account any additional features and upgrades that can enhance your basement waterproofing project.
These additional features may include sump pump installation, drainage systems, or wall sealing products that provide extra protection.
Upgrade options, like enhanced waterproofing membranes or dehumidifiers, can greatly improve moisture control and air quality.
Investing in these features not only boosts the longevity of your waterproofing solution but also increases your home’s value.
As a result, consider how these additional features align with your budget and goals, ensuring a thorough approach to your basement’s waterproofing needs.
Accessibility of the Basement
To guarantee effective basement waterproofing, evaluating the accessibility of your basement is essential. The ease of access impacts labor costs and overall project duration.
Evaluating basement accessibility is crucial for effective waterproofing, influencing both labor costs and project timelines.
Consider these factors:
- Access Points: Examine entryways and exits; tight spaces can complicate the process.
- Structural Obstacles: Identify any beams, ducts, or plumbing that may hinder movement.
- Equipment Size: Larger machinery may be necessary for hard-to-reach areas, increasing expenses.
- Terrain: Assess the surrounding landscape; steep slopes or uneven ground can complicate access.
Addressing these elements will help you understand potential costs and streamline the waterproofing process effectively.
Permitting and Inspection Fees
Permitting and inspection fees can considerably impact your basement waterproofing budget. Before starting your project, you’ll need to navigate local permitting processes, which may vary by jurisdiction.
These processes often include submitting plans and paying fees to obtain necessary permits. Additionally, you’ll face inspection requirements that guarantee compliance with building codes and safety standards.
Each inspection typically incurs its own fee, which can add to your overall costs. It’s vital to factor in these expenses early on to avoid surprises later.
Understanding local regulations will help you plan effectively and guarantee your waterproofing project proceeds smoothly and legally.
Conclusion
In conclusion, understanding the critical factors affecting basement waterproofing prices can help you make informed decisions. The size and condition of your basement, the chosen waterproofing method, and local market conditions all play significant roles in determining costs. By considering labor expenses, potential upgrades, and accessibility issues, you can better estimate your project’s total investment. Don’t forget to factor in permitting and inspection fees to guarantee you’re fully prepared for the waterproofing process ahead.
What Does a Sump Pump Do That Makes It Essential for Your Basement Waterproofing?
A sump pump plays an essential role in basement waterproofing by actively removing excess water, which helps prevent flooding and moisture buildup. When water levels rise, the pump automatically activates, directing water away from your foundation. This process not only protects your property from potential damage but also enhances its overall value. Understanding how sump pumps operate and their various types can further illuminate their importance in maintaining a dry basement environment.
Key Takeaways
- Sump pumps actively remove excess water from basements, preventing flooding and water damage.
- They integrate with drainage systems, directing water away from the home’s foundation.
- By maintaining a dry environment, they significantly reduce the risk of mold growth.
- Sump pumps can lower flood insurance premiums, showcasing proactive water damage prevention.
- Their installation enhances property value, making homes more marketable and attractive to buyers.
Understanding the Basics of Sump Pumps
When you’re dealing with basement waterproofing, understanding sump pumps is essential.
Sump pumps are submersible devices designed to remove excess water from your basement, preventing flooding and moisture issues. The basic operation involves a float switch that activates the pump when water levels rise, directing water away from your home.
Familiarizing yourself with sump pump basics helps you choose the right model for your waterproofing solutions. Consider factors like pump capacity, power source, and maintenance requirements.
The Role of a Sump Pump in Flood Prevention
A sump pump plays an essential role in flood prevention for your basement. It actively removes excess water, preventing it from pooling and causing damage.
By integrating with your drainage systems, the pump efficiently directs water away from your foundation. This not only helps maintain a dry environment but also reduces the risk of mold and structural issues, which can impact your home’s value.
Integrating with drainage systems, a sump pump directs water away from your foundation, preserving your home’s value and preventing mold.
Additionally, having a reliable sump pump can lower your flood insurance premiums, as insurers recognize proactive measures against water damage.
Investing in a sump pump is a vital step in safeguarding your basement from flooding.
How Sump Pumps Operate
Sump pumps typically operate using a straightforward mechanism that efficiently removes water from your basement.
Understanding sump pump mechanics is essential for effective water removal. Here’s how they function:
- Float Switch Activation: When water levels rise, a float switch activates the pump.
- Water Discharge: The pump forces water through a discharge pipe, directing it away from your home.
- Automatic Operation: Many sump pumps feature automatic settings, ensuring they only run when necessary, conserving energy and prolonging lifespan.
Types of Sump Pumps and Their Functions
When choosing a sump pump, you’ll encounter various types, each designed for specific functions.
Pedestal sump pumps are ideal for applications with limited space, while submersible sump pumps are submerged in water for more efficient operation.
Additionally, battery backup systems guarantee your pump continues to function during power outages, providing extra protection against flooding.
Pedestal Sump Pumps
Pedestal sump pumps are a popular choice for homeowners looking to manage groundwater and prevent flooding in basements. Their pedestal design elevates the pump above the sump pit, making maintenance easier and allowing for improved airflow to the motor.
The installation process is straightforward, often requiring minimal tools and time.
Key features include:
- Height Advantage: Keeps the motor above potential water levels.
- Accessibility: Easier to service and replace components.
- Cost-Effective: Generally lower in price compared to submersible options.
Choosing a pedestal sump pump can provide effective basement waterproofing while simplifying maintenance tasks.
Submersible Sump Pumps
For homeowners facing persistent moisture issues, submersible sump pumps offer an efficient solution by operating underwater within the sump pit. These pumps come with several advantages, including reduced noise and improved efficiency. When considering submersible pump installation, it is crucial to evaluate their capabilities against your specific needs.
| Feature | Description |
|---|---|
| Design | Operates submerged in water |
| Noise Level | Quieter than pedestal pumps |
| Efficiency | Higher energy efficiency |
| Maintenance | Requires less frequent upkeep |
| Lifespan | Typically lasts longer |
Battery Backup Systems
A reliable battery backup system is essential for guaranteeing that your sump pump continues to operate during power outages or pump failures.
These systems provide peace of mind, especially in storm-prone areas. Here’s what to take into account:
- Battery life: Choose systems with long-lasting batteries to guarantee functionality during extended outages.
- Automatic activation: Look for backup systems that automatically engage when the primary pump fails or loses power.
- Maintenance: Regularly check battery health and connections to maintain peak performance.
Investing in a quality battery backup system can safeguard your basement against flooding, even when you’re not home.
Benefits of Installing a Sump Pump
Installing a sump pump offers critical advantages for your basement.
It prevents flooding, considerably reducing the risk of water damage and mold growth.
Additionally, a sump pump can enhance your property’s value by maintaining a dry and healthy environment.
Prevents Basement Flooding
Since basement flooding can cause significant damage to your property and lead to costly repairs, having a sump pump is essential for preventing such issues.
A sump pump actively removes excess water, ensuring your basement remains dry and protected. This flood prevention system works efficiently to minimize water damage by:
- Detecting rising water levels and activating promptly
- Discharging water away from your foundation
- Providing peace of mind during heavy rainfall or snowmelt
Reduces Mold Growth
When you install a sump pump, you greatly reduce the risk of mold growth in your basement.
By actively removing excess water, a sump pump creates a drier environment that inhibits mold spores from thriving. This mold prevention not only protects your belongings but also enhances indoor air quality.
Mold can release harmful spores into the air, which may lead to health issues. With a sump pump in place, you’re taking a proactive step in maintaining a safe, healthy living space.
Regular operation guarantees moisture levels stay low, further minimizing the potential for mold and its associated problems.
Enhances Property Value
A sump pump not only prevents mold growth but also greatly enhances your property’s value.
When considering home resale or property appraisal, a sump pump can make a significant difference. Buyers prefer homes with reliable waterproofing systems, as they reduce the risk of water damage.
Installing a sump pump can lead to:
- Increased marketability for your home
- Higher potential resale prices
- Positive appraisal outcomes due to reduced risk factors
Investing in a sump pump not only protects your basement but also positions your property as a more attractive option for potential buyers, ultimately boosting its value in the real estate market.
Maintenance Tips for Sump Pumps
Although sump pumps are designed to work reliably, regular maintenance is essential to guarantee peak performance and longevity.
Start with sump pump cleaning; remove debris and sediment from the basin and check the inlet screen for clogs.
Next, perform sump pump testing at least once a year. Pour water into the basin to confirm the pump activates and discharges water effectively.
Additionally, inspect the discharge pipe for blockages, and verify the float switch operates freely.
Finally, consider a backup power source, especially in areas prone to power outages.
Following these steps will keep your sump pump functioning at its best.
When to Consider Sump Pump Installation
Have you noticed recurring water issues in your basement or crawl space? It might be time to contemplate sump pump installation. This solution is vital if you experience:
- Frequent flooding or pooling water
- High humidity levels leading to mold growth
- Water stains or damage on walls and flooring
Understanding sump pump costs and installation timelines is important for budgeting. Typically, installation can take just a few hours, depending on your space’s complexity.
Addressing these concerns promptly can safeguard your home, making it a wise investment in basement waterproofing. Don’t wait until the problem escalates—act now for a dry and safe environment.
Conclusion
In summary, a sump pump is essential for effective basement waterproofing. By actively managing excess water, it safeguards your home against flooding and moisture-related issues. Installing a sump pump not only enhances your property’s value but also minimizes the risk of costly water damage. Regular maintenance guarantees peak performance, allowing you to enjoy a dry, safe basement. If you’re experiencing moisture problems or live in a flood-prone area, it’s time to contemplate adding a sump pump to your home.
10 Essential Steps to Calculate Average Cost of Basement Waterproofing
Calculating the average cost of basement waterproofing involves several critical steps that you can’t overlook. First, you’ll need to assess your basement’s current condition to understand the moisture issues at play. After that, you’ll identify the waterproofing system that best fits your needs. But that’s just the beginning. Understanding local labor costs and material expenses can greatly impact your budget. Let’s explore these essential steps and how they can lead to effective waterproofing solutions.
Key Takeaways
- Conduct a moisture assessment to determine the severity of water issues in the basement.
- Research local labor costs for waterproofing and related services to estimate expenses.
- Gather quotes for necessary materials and factor them into the overall budget.
- Account for potential hidden damages and additional costs like permits and inspections.
- Obtain multiple contractor quotes to ensure competitive pricing and service quality.
Assess Your Basement’s Current Condition
Before diving into basement waterproofing, it’s essential to assess your basement’s current condition.
Start with a thorough moisture assessment to identify any damp areas or signs of water intrusion. Check for visible mold, mildew, or water stains, as these indicate potential problems.
Conduct a detailed moisture assessment to spot dampness, mold, and water stains that signal potential issues.
Next, conduct a damage inspection; examine walls, floors, and foundations for cracks or structural issues. Document your findings to understand the extent of the damage and prioritize repairs.
This preliminary evaluation will guide you in selecting the right waterproofing solutions and ultimately help you avoid costly repairs in the future.
Identify the Type of Waterproofing System Needed
Once you’ve assessed your basement’s condition, you can identify the type of waterproofing system that suits your needs.
Consider various waterproofing methods to find the best fit for your situation. Your system selection should factor in the severity of moisture issues, existing drainage, and your budget.
- Interior Waterproofing: Ideal for minor leaks and moisture.
- Exterior Waterproofing: Best for severe water intrusion and long-term protection.
- Crawl Space Encapsulation: Effective for moisture control in crawl spaces.
Choosing the right system guarantees maximum protection and prevents future water damage, ultimately saving you time and money.
Research Local Labor Costs
How can you guarantee you’re getting a fair price for basement waterproofing? Start by researching local labor costs to understand the prevailing rates in your area. The local market can greatly influence what you should expect to pay. Here’s a quick overview of average labor rates:
| Service Type | Average Labor Rate |
|---|---|
| General Waterproofing | $50 – $75 per hour |
| Foundation Repair | $60 – $90 per hour |
| Drainage Installation | $55 – $80 per hour |
| Mold Remediation | $70 – $100 per hour |
Knowing these figures helps you make informed decisions and negotiate effectively with contractors.
Calculate Material Costs
To guarantee your basement waterproofing project stays within budget, it’s crucial to calculate material costs accurately.
Begin by identifying various material types you’ll need, such as:
- Waterproofing membranes
- Sealants and coatings
- Drainage materials
Next, gather quotes from suppliers to perform a cost comparison. Factor in the quantity required for each material type to avoid unexpected expenses.
Be sure to choose quality materials, as they can impact the long-term effectiveness of your waterproofing project.
Consider Additional Expenses
After calculating your material costs, it’s important to contemplate additional expenses that may arise during your basement waterproofing project.
Hidden damages often lurk behind walls or under flooring, potentially leading to unexpected repairs that can greatly increase your budget. It’s wise to set aside funds for these contingencies.
You should also consider costs related to permits, inspections, or specialized equipment needed for the job.
Don’t forget about labor costs, as hiring professionals can considerably impact your overall expenses.
Get Multiple Quotes From Contractors
Gathering multiple quotes from contractors is an essential step in ensuring you get the best value for your basement waterproofing project. By obtaining various estimates, you can make informed contractor comparisons and perform thorough quote evaluations to identify the most competitive pricing.
- Assess the scope of work included in each quote.
- Check contractor credentials and customer reviews for reliability.
- Analyze warranties and after-service support offered.
This process not only helps you understand the market rates but also enables you to choose a contractor who delivers quality work within your budget.
Don’t settle for the first quote; explore your options!
Evaluate DIY vs. Professional Installation
While you might consider tackling basement waterproofing as a DIY project to save money, it’s crucial to weigh the potential risks and benefits of professional installation.
DIY advantages include lower costs and a hands-on experience, allowing you to control the process. However, without professional expertise, you may overlook critical issues like structural damage or improper sealing, leading to costly future repairs.
Professionals bring specialized skills, advanced tools, and knowledge of local building codes, ensuring a thorough and effective job.
Assess your comfort level and the complexity of the project before deciding which route to take for the best long-term results.
Factor in Permits and Inspections
Before you start your basement waterproofing project, it’s essential to factor in permits and inspections, as they can greatly impact both the timeline and cost of your work.
Understanding permit requirements in your area can help you avoid fines and delays. Additionally, inspection costs can vary, so it’s wise to budget for these expenses.
- Check local regulations for necessary permits
- Research typical inspection costs in your region
- Factor in time needed for permit approval
Plan for Future Maintenance
Planning for future maintenance is essential to guarantee the longevity and effectiveness of your basement waterproofing system.
Establish a maintenance schedule to regularly inspect and clean your system, ensuring it functions efficiently. Check for signs of wear, leaks, or blockages that could lead to future repairs.
Document any issues you find and address them promptly to prevent more significant problems later. Regular maintenance not only extends the life of your waterproofing but also saves you money on costly repairs down the line.
Stay proactive in your approach to keep your basement dry and secure for years to come.
Create a Budget and Timeline
Regular maintenance sets the foundation for a successful waterproofing project, but to assure everything goes smoothly, you need to create a budget and timeline.
Employ effective budgeting strategies to allocate funds for materials, labor, and unexpected costs. Simultaneously, practice timeline management to guarantee each phase of the project is completed on schedule.
- Identify key project milestones
- Allocate funds for each stage
- Set deadlines for completion
Conclusion
By following these essential steps, you can accurately calculate the average cost of basement waterproofing. Assess your basement’s condition, choose the right systems, and research local labor and material costs. Don’t forget to factor in permits, potential hidden damages, and future maintenance needs. With a clear budget and timeline, you’re well-equipped to make informed decisions, whether you opt for DIY or hire a professional. Taking these steps guarantees long-term protection and peace of mind for your basement.
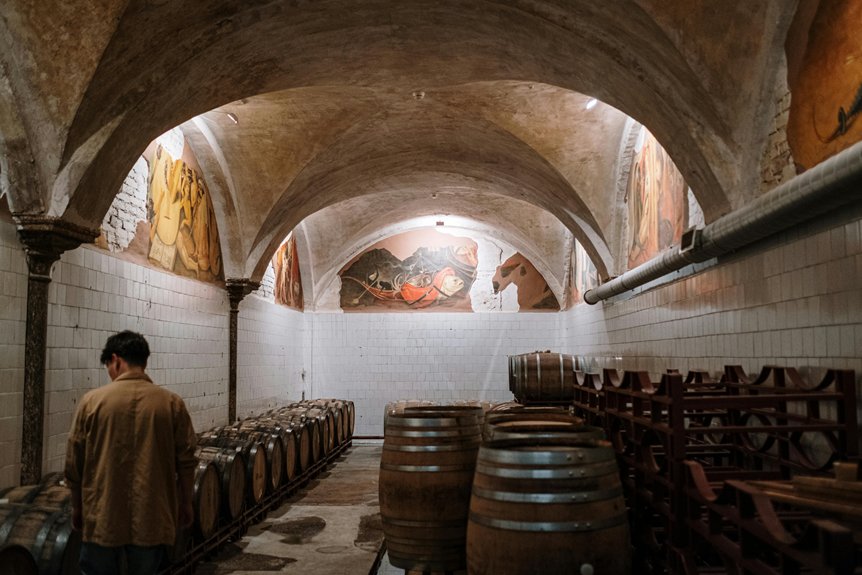
What Are the Benefits of Basement Waterproof Paint?
When it comes to safeguarding your home, basement waterproof paint is a practical solution you might want to contemplate. It not only prevents mold and mildew growth but also protects your foundation from potential water damage. With its application, you can enhance energy efficiency and even increase your home’s market value. Curious about how this simple step can lead to significant advantages? Let’s explore the key benefits in more detail.
Key Takeaways
- Prevents mold and mildew growth by adding a moisture-resistant layer, promoting a healthier living environment.
- Protects your foundation against water damage, ensuring structural integrity and saving on future repair costs.
- Enhances energy efficiency by improving insulation and reducing heat loss, leading to lower utility bills.
- Increases home value by creating a more inviting space and indicating lower risk of future issues to potential buyers.
- Offers easy application and maintenance, with a quick drying process and simple cleaning methods.
Prevents Mold and Mildew Growth
When you apply basement waterproof paint, you’re not just adding a protective layer; you’re actively preventing mold and mildew growth that can wreak havoc in your home.
This paint often contains mildew resistant materials, making it a smart choice for your basement.
Combining this with other mold prevention strategies, like proper ventilation and humidity control, creates a formidable defense against moisture-related issues.
Incorporating proper ventilation and humidity control alongside waterproof paint forms a powerful barrier against moisture challenges.
As you tackle the dampness in your basement, remember that the right paint can greatly reduce the chances of mold and mildew taking root.
Protect your space and enjoy a healthier living environment with these effective measures.
Protects Your Foundation
Using basement waterproof paint not only prevents water damage but also enhances the structural integrity of your home.
By creating a protective barrier, it keeps moisture at bay, ensuring your foundation remains strong and stable.
Investing in this simple solution can save you from costly repairs down the road.
Prevents Water Damage
Even if your basement seems dry, water can still seep in through cracks and porous materials, leading to considerable damage over time.
Using basement waterproof paint acts as a protective layer, preventing moisture from infiltrating your space. This paint works as a moisture barrier, safeguarding your foundation against water-related issues.
By implementing effective waterproofing methods, you can greatly reduce the risk of mold growth and structural deterioration.
Regular application of waterproof paint guarantees that your basement remains dry and functional, ultimately saving you money on repairs and preserving your home’s value.
Don’t wait for problems to arise; protect your basement today.
Enhances Structural Integrity
A strong foundation is essential for any home, and basement waterproof paint plays an important role in maintaining that integrity.
By applying this paint, you enhance your home’s structural support, creating a barrier against moisture. This moisture resistance prevents water from seeping into your foundation, which can lead to cracks and weakening over time.
When your basement remains dry, you reduce the risk of structural damage that can be costly to repair. Ultimately, investing in waterproof paint means you’re safeguarding your home’s foundation, ensuring it stands strong for years to come.
Protect your investment and enjoy peace of mind!
Enhances Energy Efficiency
When you apply basement waterproof paint, you not only protect your home from moisture but also enhance its energy efficiency. This paint acts as an additional barrier, improving insulation and reducing energy loss. As a result, you’ll notice significant energy savings on your utility bills.
| Benefit | Impact | Result |
|---|---|---|
| Insulation Improvement | Less heat loss | Lower heating costs |
| Moisture Barrier | Prevents dampness | Enhanced comfort |
| Energy Savings | Reduced energy consumption | Cost-effective living |
With these advantages, you’re investing in a more efficient and comfortable home.
Increases Home Value
Applying basement waterproof paint not only safeguards your home from moisture but also greatly boosts its market value.
When you’re considering property investment, enhancing your home’s appeal can markedly influence its home appraisal. A dry, well-maintained basement is a major selling point for potential buyers, as it indicates a lower risk of future issues.
By investing in waterproof paint, you create a more inviting space that can be transformed into a usable area, further increasing the property’s worth.
Ultimately, this small investment can yield substantial returns, making your home more attractive and valuable in a competitive real estate market.
Easy Application and Maintenance
Basement waterproof paint isn’t only effective but also remarkably easy to apply and maintain. You’ll appreciate the quick application process, which often requires just a brush or roller and minimal prep work.
Most products dry swiftly, allowing you to finish the job in no time. Once applied, maintenance is a breeze; a simple wash with soap and water keeps the surface looking fresh.
You won’t need to worry about frequent touch-ups or complicated procedures. This combination of quick application and simple maintenance makes waterproof paint an ideal choice for protecting your basement without a hassle.
Improves Indoor Air Quality
While many people focus on aesthetics and protection when choosing basement waterproof paint, an often-overlooked benefit is its significant impact on indoor air quality. By effectively sealing your basement, it reduces indoor humidity levels, which can lead to mold and mildew growth. This not only improves air purification but also contributes to a healthier living environment.
| Benefit | Explanation |
|---|---|
| Reduces Indoor Humidity | Lowers moisture levels, preventing mold. |
| Enhances Air Purification | Improves overall air quality in your home. |
| Prevents Allergens | Keeps dust mites and allergens at bay. |
| Increases Comfort | Creates a more pleasant living space. |
| Long-term Health | Supports respiratory health for your family. |
Conclusion
To sum up, using basement waterproof paint is a smart choice for homeowners looking to protect their property. Not only does it prevent mold and mildew growth, but it also safeguards your foundation and enhances energy efficiency. Plus, the easy application and minimal maintenance mean you can enjoy these benefits without a hassle. Ultimately, investing in waterproof paint not only improves your indoor air quality but can also boost your home’s market value, making it a win-win situation.