
If you’re dealing with water issues in your basement, a DIY French drain could be the solution you need. This effective drainage system helps manage excess water and prevents costly flooding. With the right tools and a solid plan, you can tackle the project yourself. Let’s explore the importance of a French drain and how to create one that protects your home and enhances your landscape. Are you ready to get started?
Key Takeaways
- Assess your property’s water flow and drainage patterns to determine the best location for a French drain.
- Gather essential tools and materials, including perforated pipes, gravel, and waterproofing fabric for effective installation.
- Excavate a trench with a slope away from the foundation, ensuring proper depth and width for the drain system.
- Install the perforated pipe in the trench with the holes facing down, surrounded by gravel for optimal drainage.
- Regularly maintain the French drain by checking for clogs and ensuring that water flows freely to prevent future water issues.
Understanding the Importance of a French Drain
A French drain is an essential solution for managing excess water in your yard, preventing flooding and structural damage to your home.
You’ll appreciate the many French drain benefits, such as improved drainage, reduced erosion, and better soil health.
However, don’t fall for common misconceptions; installing a French drain isn’t just for basements or extreme flooding situations. Even moderate water issues can warrant this effective system.
By understanding its importance, you can protect your property and enhance your landscape.
Tools and Materials Needed for Your DIY Project
Before you start your French drain project, it’s vital to gather the right tools and materials.
You’ll need essential items to guarantee everything goes smoothly and effectively.
Let’s break down what you’ll need to get the job done right.
Essential Tools Required
Starting your DIY French drain project requires gathering the right tools and materials to guarantee success.
First, you’ll need essential drainage tools like a shovel, trenching spade, and level to dig and shape your drain properly. A perforated pipe and gravel are critical for effective water flow.
Don’t forget a wheelbarrow for transporting materials and a tape measure for precise measurements. Safety gear, including gloves and knee pads, will help protect you during the process.
Finally, waterproofing materials, such as landscape fabric, are crucial for preventing soil from clogging your drain.
With these tools at hand, you’re ready to get started!
Materials for Drainage System
When planning your DIY French drain, selecting the right materials is just as essential as having the right tools.
Start with drainage materials like gravel or crushed stone, which help filter water and promote flow. For pipe options, consider perforated PVC or corrugated pipes; both allow water to seep in while directing it away effectively.
Don’t forget a geotextile fabric to prevent soil from clogging your drain. If you’re using a catch basin, make certain it’s compatible with your chosen pipe.
Planning Your French Drain Layout
Before you start digging, it’s essential to assess the water flow direction around your property.
Identify the areas where water tends to pool or cause problems, as this will help you determine the best layout for your French drain.
With a clear plan in place, you’ll effectively redirect water and protect your home from flooding.
Assessing Water Flow Direction
How can you effectively assess the water flow direction on your property? Start by observing natural water flow patterns during rainstorms. Conduct drainage assessments by noting where water collects or pools. You can also use a level to measure slopes in your yard, ensuring water flows away from your foundation.
- Inspect downspouts and gutters for proper drainage.
- Examine soil types; clay retains water, while sandy soils drain quickly.
- Look for signs of erosion or sediment buildup.
- Consider using a garden hose to simulate water flow and identify problem areas.
These steps will guide your French drain layout effectively.
Identifying Drainage Problem Areas
To effectively plan your French drain layout, start by pinpointing the areas where water accumulates and causes issues.
Look for spots in your basement where you notice dampness or pooling water, as well as any signs of spotting leaks. Pay attention to wall corners and around windows.
While you’re at it, assess humidity levels in various sections of your basement; high humidity can indicate poor drainage.
Identifying these problem areas helps you determine the ideal placement for your French drain, ensuring efficient water diversion and protecting your home from future moisture-related damage.
Excavation: Digging the Trench
As you gear up for your DIY French drain project, the first essential step involves excavating the trench where the drain will be installed.
You’ll need to determine the appropriate trench depth based on local regulations and your soil type.
- Use a shovel or trencher for efficiency.
- Make sure the trench slopes away from your foundation.
- Check for utility lines before digging to avoid hazards.
- Keep the soil you excavate nearby for backfilling later.
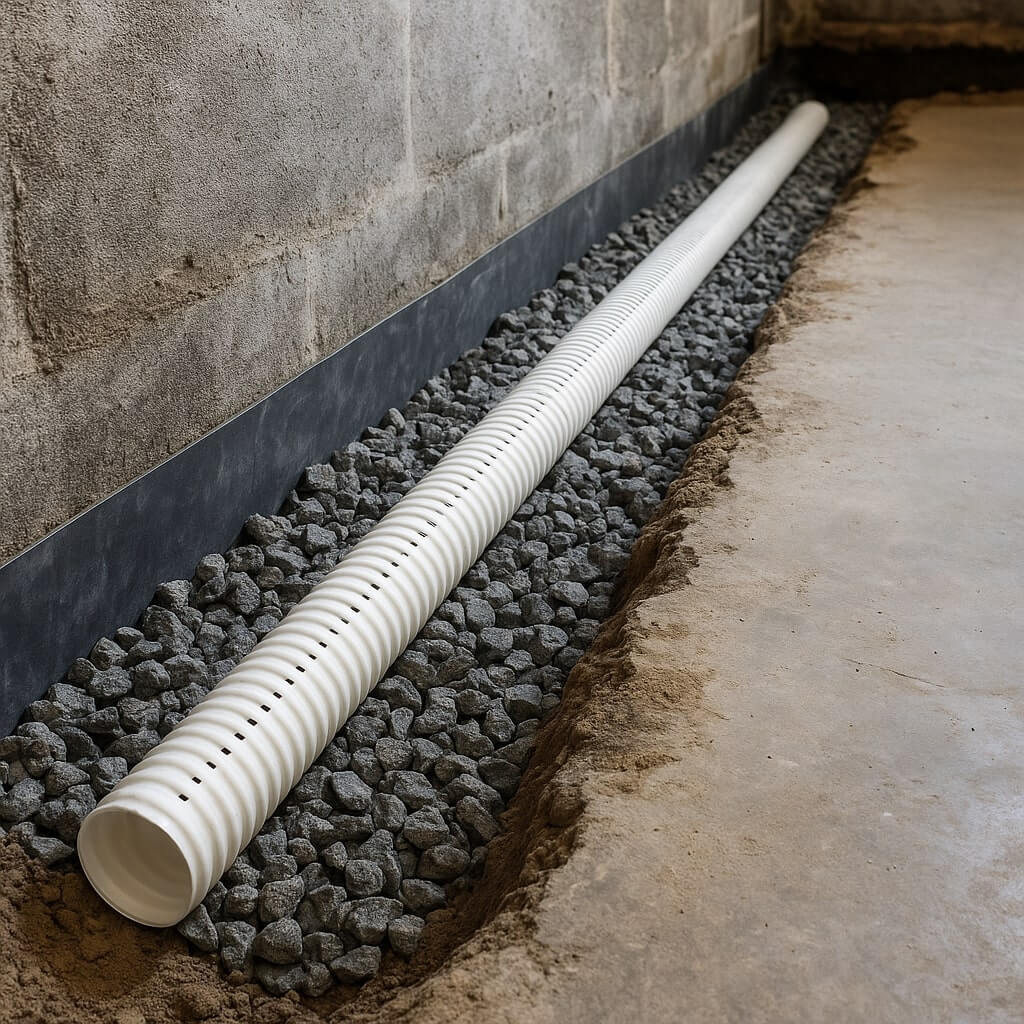
Installing the Drain Pipe and Gravel
Once you’ve excavated the trench, you can begin installing the drain pipe and gravel, guaranteeing proper drainage for your yard. Start by laying the drain pipe in the trench, with the perforated side facing down. This allows water to enter the pipe effectively. Next, add gravel around the pipe for ideal drainage and support.
| Step | Action | Notes |
|---|---|---|
| 1. Drain Pipe | Place pipe in trench | Perforated side down |
| 2. Gravel Placement | Add gravel around pipe | Use 3/4″ gravel |
| 3. Leveling | Guarantee proper leveling | Check with a level |
| 4. Compacting | Lightly compact gravel | Avoid over-compaction |
| 5. Final Check | Guarantee proper drainage | Test with water |
Backfilling the Trench
After you’ve installed the drain pipe and gravel, backfilling the trench becomes the next essential step in ensuring your drainage system functions effectively.
Use proper backfilling techniques to maintain soil compaction and prevent future settling. Here’s how to do it right:
- Start with a layer of soil, avoiding large clumps.
- Compact the soil in layers, ensuring stability.
- Avoid over-compaction, which can hinder drainage.
- Finish with topsoil, ready for landscaping.
Connecting to a Drainage System
To guarantee your French drain works effectively, connecting it to a drainage system is essential.
Start by evaluating your drainage options, such as storm drains or municipal systems. Use high-quality pipe fittings to guarantee a secure connection, preventing leaks and blockages.
Evaluate your drainage options carefully and use quality fittings for a secure, leak-free connection.
When connecting the drain, make sure to maintain a consistent slope to promote proper water flow. If you’re unsure about the best drainage option for your property, consult a professional for advice.
Proper installation and connection can save you from costly repairs down the line, making your DIY project both effective and long-lasting.
Maintenance Tips for a Long-Lasting French Drain
While it might seem like a set-it-and-forget-it solution, regular maintenance is key to guaranteeing your French drain continues to function effectively.
To keep it in top shape, follow a routine inspections and create a maintenance schedule:
- Check for debris removal to prevent clogs.
- Guarantee water flow is unobstructed and consistent.
- Inspect for proper grading to direct water away from your foundation.
- Look for any signs of erosion or damage around the drain.
Conclusion
To sum up, a DIY French drain is an effective way to protect your basement from flooding and enhance your landscape. By following this guide, you can confidently plan, install, and maintain your drainage system. Regular upkeep will guarantee your French drain lasts for years to come. So grab your tools, start digging, and take proactive steps to safeguard your home from water damage. You’ve got this!